Add a Create Form
Use the create form type as the primary intake source for a module (that is, the data submitted on a create form is new to Tonkean). In most cases, the submission of a create form starts a module workflow, with the subsequent actions and triggers in the module parsing and using that form data as needed.
From the module builder screen, select the Forms button on the module builder toolbar. The Forms panel displays.

In the upper right of the Forms panel, select + New, then select Create Form. The Create Form screen displays, with the Settings tab selected by default.

The Create Form screen is divided into two parts: the configuration panel on the left and the preview panel on the right. As you build and customize your form in the left panel, view the preview panel to get a real-time look at how the form will display.
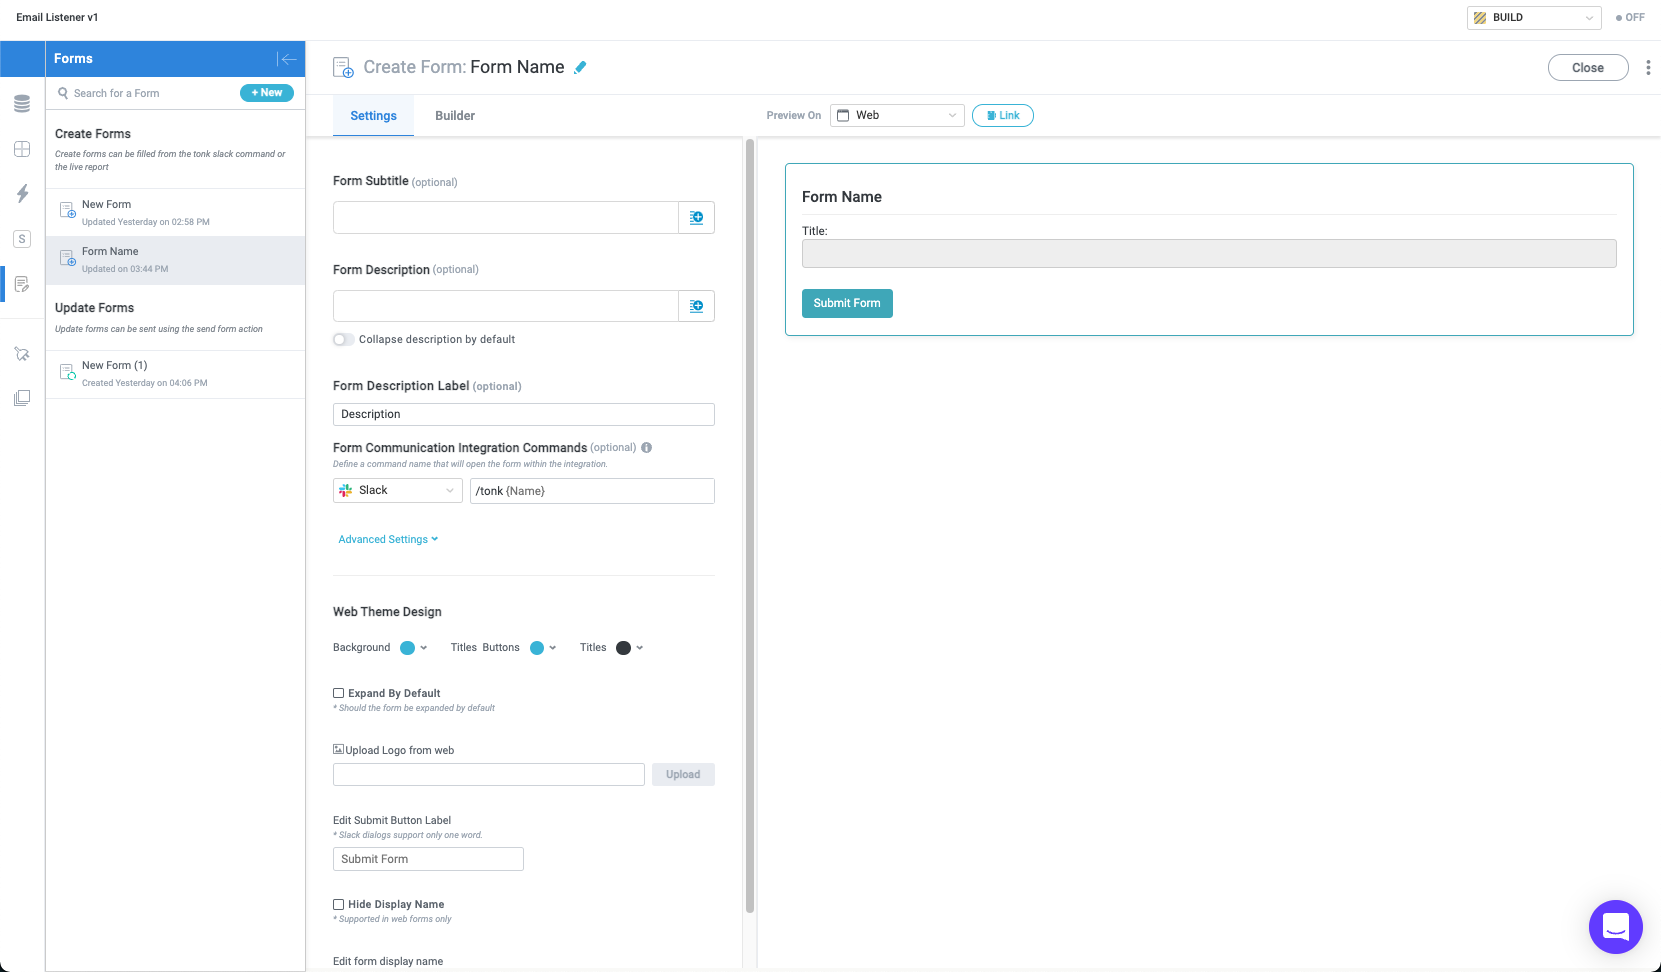
Select the title or pencil icon,
 , and enter a descriptive name for the form. The form name must be unique.
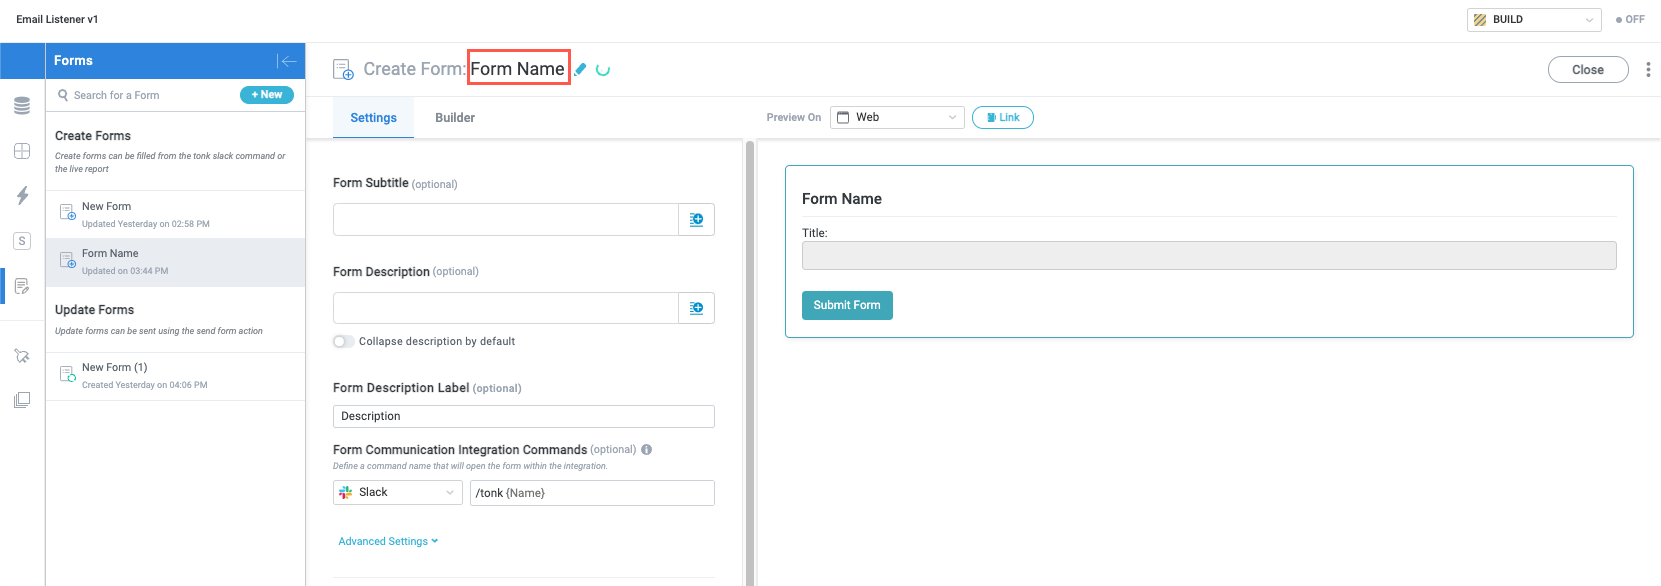
Enter a Form Subtitle and Form Description, if desired. In addition to entering text manually, you can select from existing fields by selecting the insert field button,
 .These fields can be helpful when building complex forms or where users are completing a long series of sequential forms.
Select the toggle below the Form Description field to collapse the description by default.
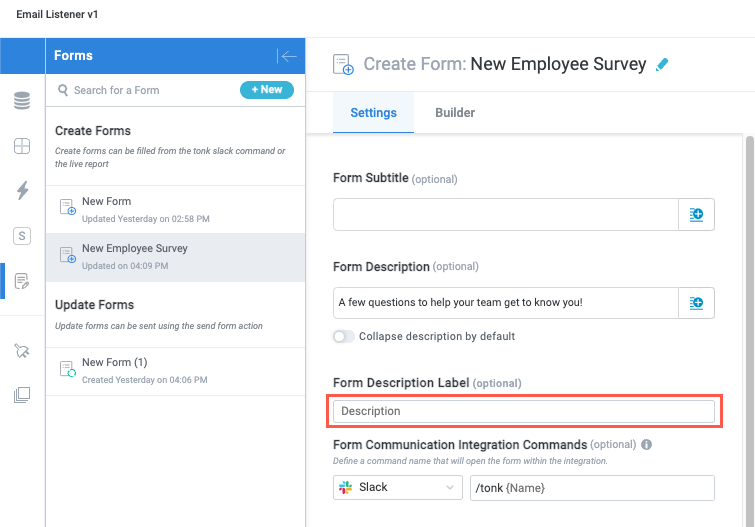
Enter a Form Description Label, if desired.
Depending on the connected communication tools, you have the option to define a command that opens the form in a messaging application (Slack or Microsoft Teams, for example). Define that command in the Form Communication Integration Commands field, if relevant.
Select the communication tool dropdown to select the application.
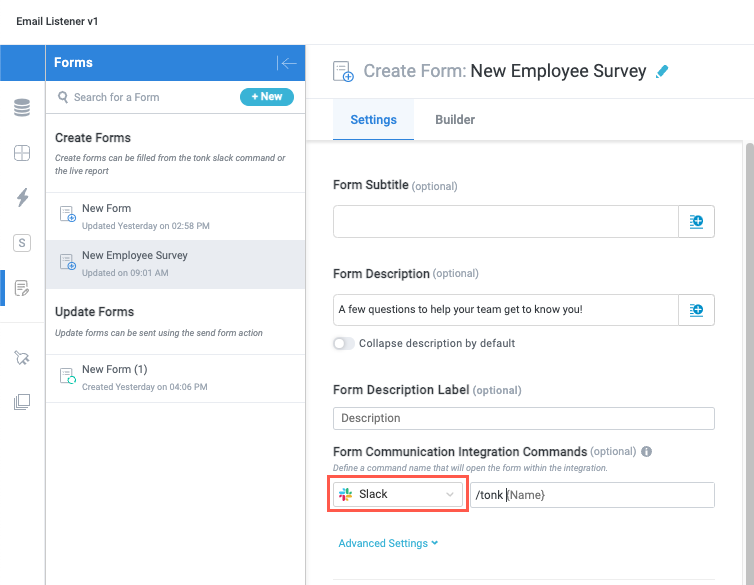
Enter a command. The command following
/tonkmust be unique and cannot contain any spaces (for example,/tonk hiring-updates).Test /tonk commands for modules that haven't been published to Production by entereing
/tonk {command} buildin Slack.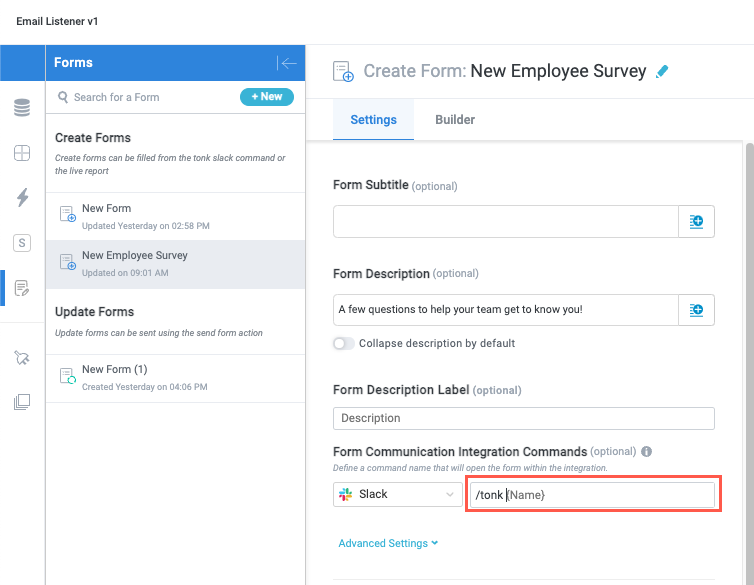
You can check what /tonk commands are available in your connected Slack instance by enter
/tonkwithout any additional parameters.
Configure the visual theme and design of the form as it appears in a web browser.

The create form is now configured and you can proceed to add the form questions.
Add Form Questions
The process for adding questions to a form varies slightly depending on whether it's a create or update form, and further within the three types of update form (Update Fields, Collect Inner Items, and Upload Files). However, the general workflow is shared by all forms. The steps below walk explain the most common process.
For detailed instructions and considerations for adding questions for the other types of update forms, see the relevant topics:
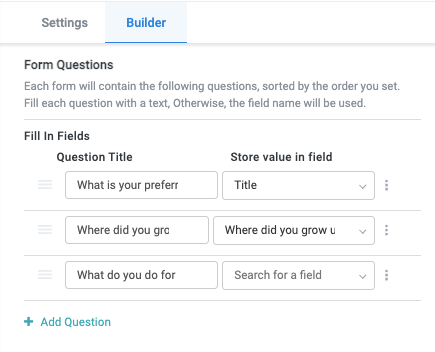
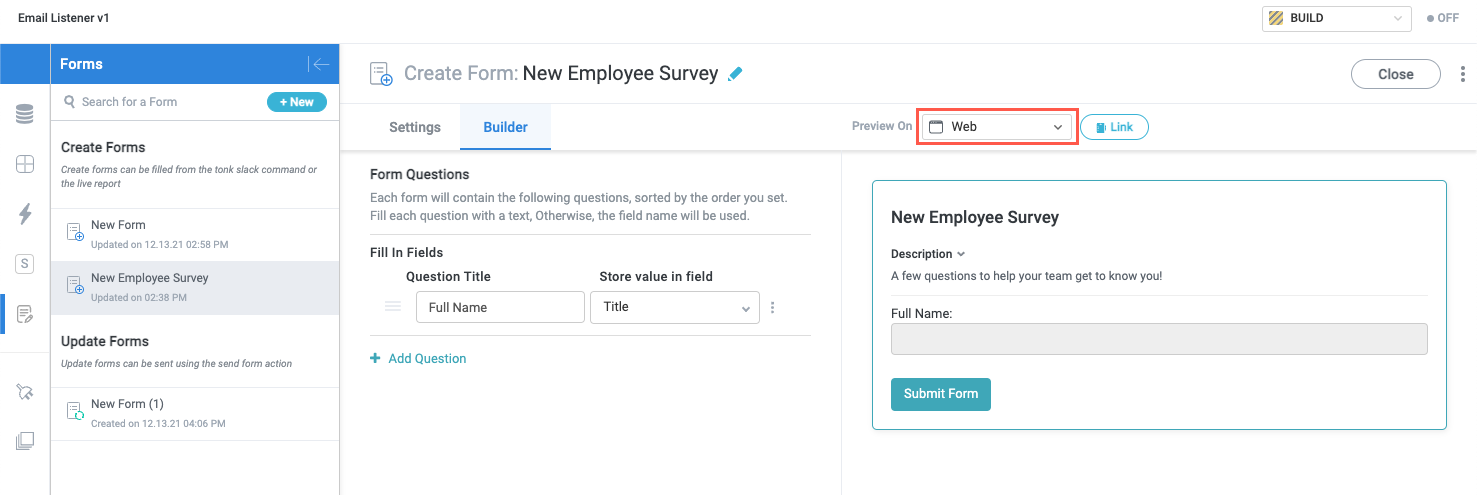
At the top of the Form screen, select the Builder tab. The Form Questions section displays.

Below the Forms Questions section are two columns:
Question Title - The question as it appears to the user completing the form.
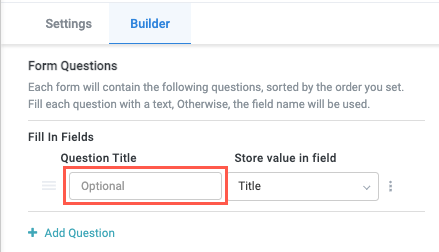
We recommend including a value for Question Title, though it's not required. If you don't include a value, Tonkean automatically generates a title in format
Created by {Name of user} using '{Form name}' ({Created At (Timezone of user)}), where the user is the person who completed the form.Store value in field - The field where the value entered by the user is stored. The default field value for the first question is "Title", which is a required field that acts as a unique identifier for the item.
We recommend requiring users to enter their name or unique email address for this field to ensure the item identifier is unique.
Enter a question in the Question Title field as it should display to the user completing the form.
Select the Store value in field dropdown and select from available fields to store the question value in.

Any of the default fields can be used to store form answers, but, depending on your use case, we generally recommend creating a new field to store the answer to each form question. To do this, select New Manual Field from the Store value in field dropdown. The Field Settings screen displays.

Create the appropriate field to store the expected value from the form question. See Manual Fields for detailed setup and configuration instructions.
Select the options icon,
 , to configure any additional options and validation, if desired. This is also where you can delete questions.
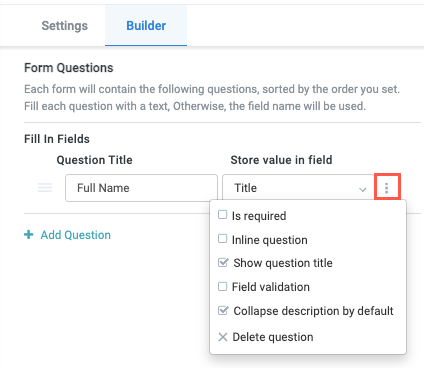
Below are the available field options:
Is required - Set the field as required; users must enter a value to submit the form.
Inline question - Align the question side-by-side in parallel with the question that follows, instead of the default format where each question displays on its own line.
You must select the inline question option for consecutive questions to display them side-by-side.
Show question title - Display the value entered in the Question Title field.
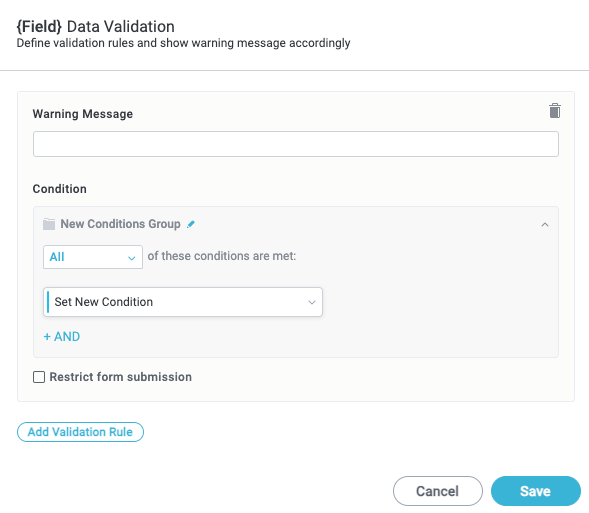
Field validation - Add field validation rules. Select this option to generate the {Field} Data Validation window:
Select Add Validation Rule. The {Field} Data Validation window displays.

Add a validation Warning Message, then add a new condition group. You can also select to Restrict form submission, which prevents the user from submitting the form unless the specified condition is met. When finished, select Save.
Collapse description by default - Collapse any existing field description by default, allowing users to expand the description. You can add field descriptions in the Additional Information section of the Field Settings screen.
Delete question - Delete the field.
Review your form in the preview panel as you work. Select the Preview On dropdown to preview the form on all formats where it might display:
When finished, select Close in the top right.