Create a Custom Action
To create a custom action, follow the steps below:
Custom actions are an advanced feature and we recommend you have some familiarity with REST APIs, including writing JSON and request structure, to get the most out of custom actions.
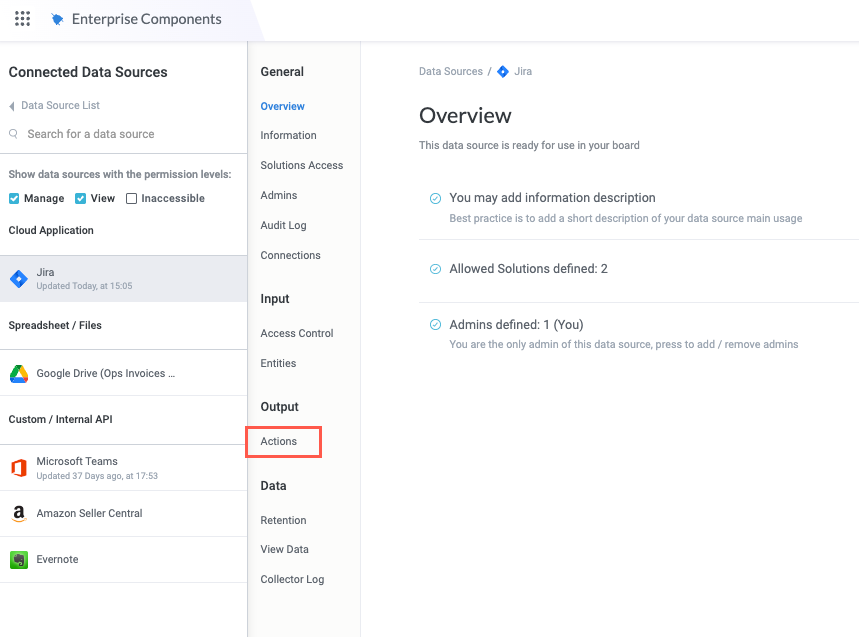
Select the main nav icon,
 , in the upper left and select Enterprise Components. The Enterprise Components screen displays.
Select the data source you want to create a custom action for. The data source configuration panel displays.

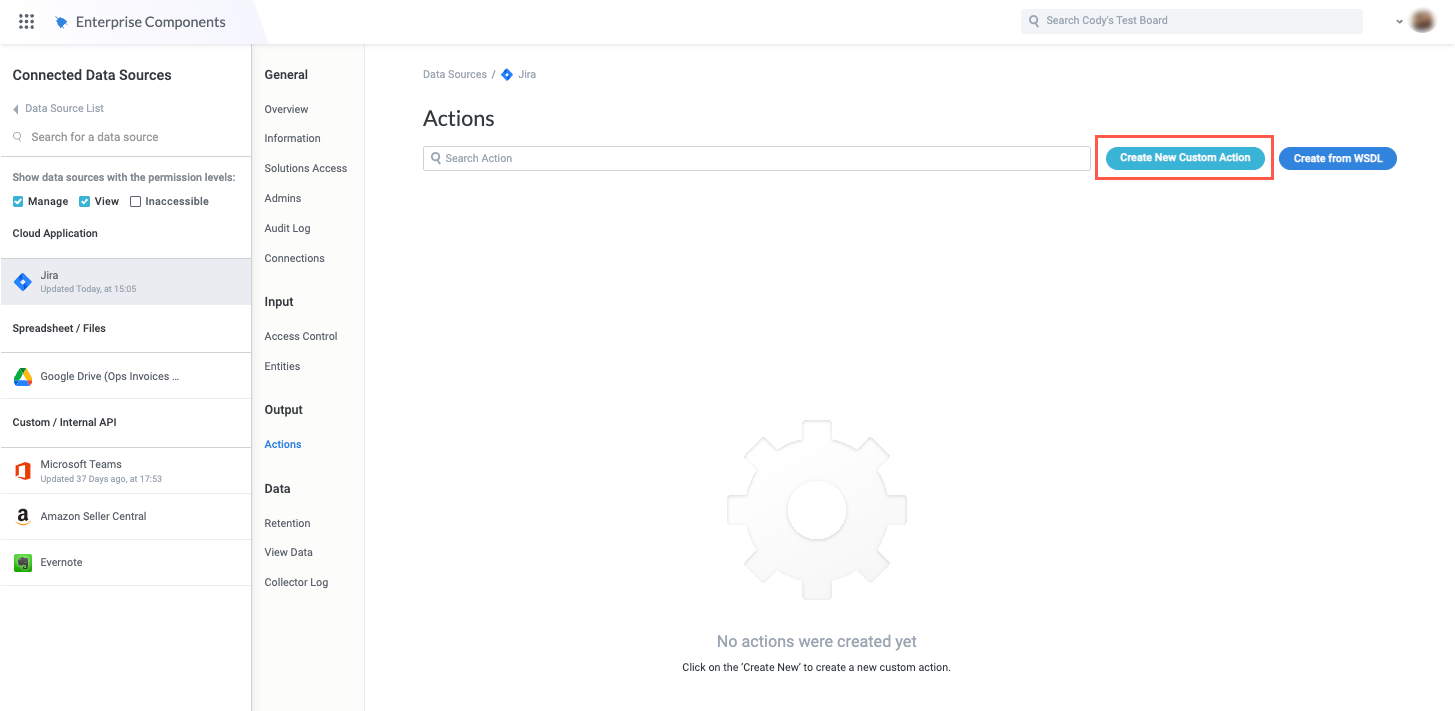
In the Output section of the data source configuration panel, select Actions. The Actions screen displays.
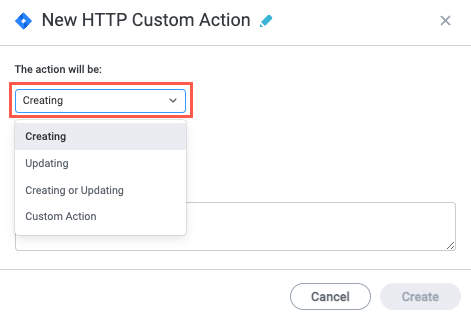
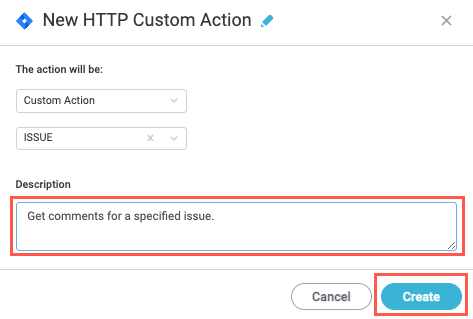
Select Create New Custom Action in the upper right. The New HTTP Custom Action window displays.
There are two dropdowns beneath the The action will be field, where you define the action type and the affected entity:
Select the first dropdown to define the type of action.
Your selection in this dropdown determines how Tonkean handles the results of the custom action in your module workflow. By selecting Creating or Updating, for example, you tell Tonkean that it can expect to handle a new entity or an update to an existing one, respectively, and plan to continue the module workflow accordingly. Alternatively, if you choose Custom Action, Tonkean does not expect a particular state and leaves it up to you to handle the result of the action.
There are four options in the first dropdown:
Creating - The custom action creates a new entity of the defined type.
Updating - The custom action updates an existing entity.
Creating or Updating - The custom action can create a new entity or update an existing entity.
Custom Action - The action does not fit into any other category. Use this option to create an open-ended action that does not presuppose any particular entity state following the use of the action.
Select the second dropdown to define the entity the action creates, updates, or otherwise acts upon. The options available in this dropdown are specific to the entity types in the data source.
Additionally, the entity you select determines which field is available from the data source as part of the request. Select the entity you want to create, update, or otherwise affect.

Enter a Description for the custom action, if desired, then select Create. The custom actions General screen displays.
On the General screen, enter a descriptive Display Name for the custom action.

The basic details of the custom action are complete. Now, it's time to configure the details of the request and response.
Configure the Request
To ensure the action behaves as expected, you must configure the API request, including defining the path and query parameters, header, and body, where necessary. To locate the information needed to configure the request, refer to the relevant developer or API documentation for the application you're adding a custom action to. For example, if you're adding a custom action to a Jira data source, refer to the Jira REST API reference.
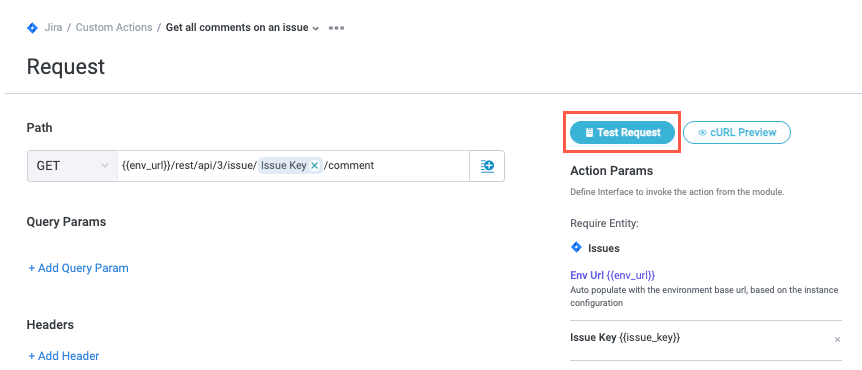
In the Settings panel, select Request. The Request screen displays.

In the Path field, select the method dropdown and choose the API method for the request.
The Request screen is responsive and changes to reflect your selections in each field. For example, if you select GET in the Path dropdown, the Body field no longer displays because a GET request doesn't require a body.

Referring to the relevant documentation for your application, locate the request path and enter it into the Path field.
Note that many request paths contain a variable for a path parameter (or "param"). In the image below,
{issueIdOrKey}is a path param variable. You must provide a value for these params in order to form the request properly and return the information you want.
Add a param for each variable you need to populate in the request. To add a param, locate the Action Params section and enter a param name in the provided field.
This name displays as a field in the data source and the related data source action, so write a name that's easily recognizable and human-readable. That is, write "Issue Key" instead of "JiraIssueKey".
When fished, select + Add Param. The param is added to the list above the field.

In the Path field, remove any variables you created params for and select the insert field button,
 to choose the relevant param to replace the variable.
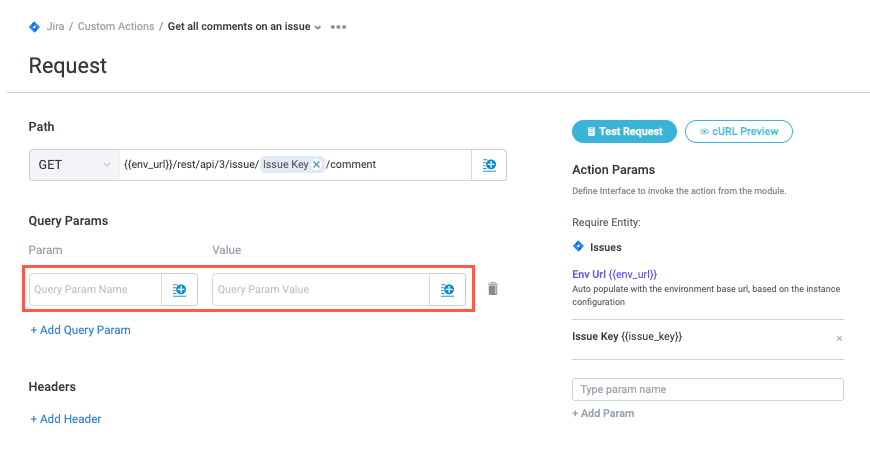
You may need or want to include query params to specify details in your request. To add a query param, select + Add Query Param. A pair of Param and Value fields displays.

Enter the param name and param value for each query param you include.
Where relevant, add the body of your request in the Body field. Select the insert field button,
, to include action params or data source fields. Refer to the documentation for your application to structure the body of your request properly.The Body field only displays if it's relevant to the method you select. For example, if you're making a GET request, the Body field does not display.

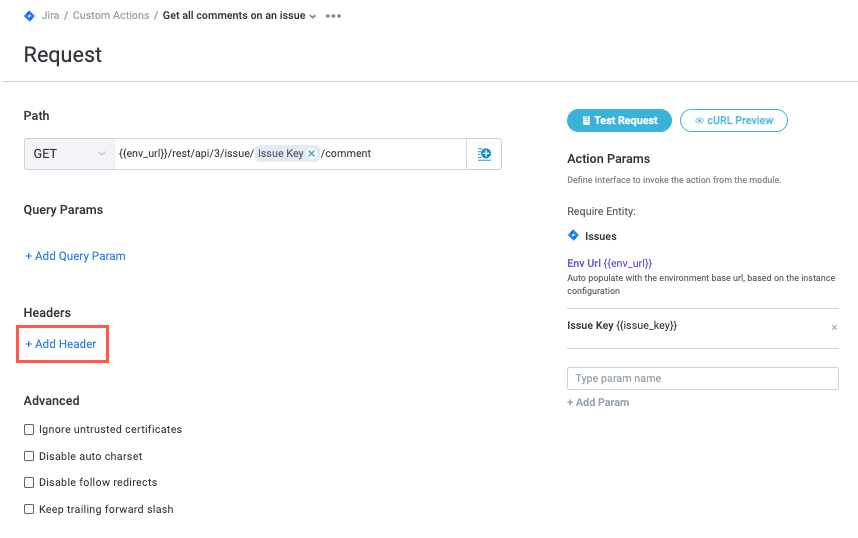
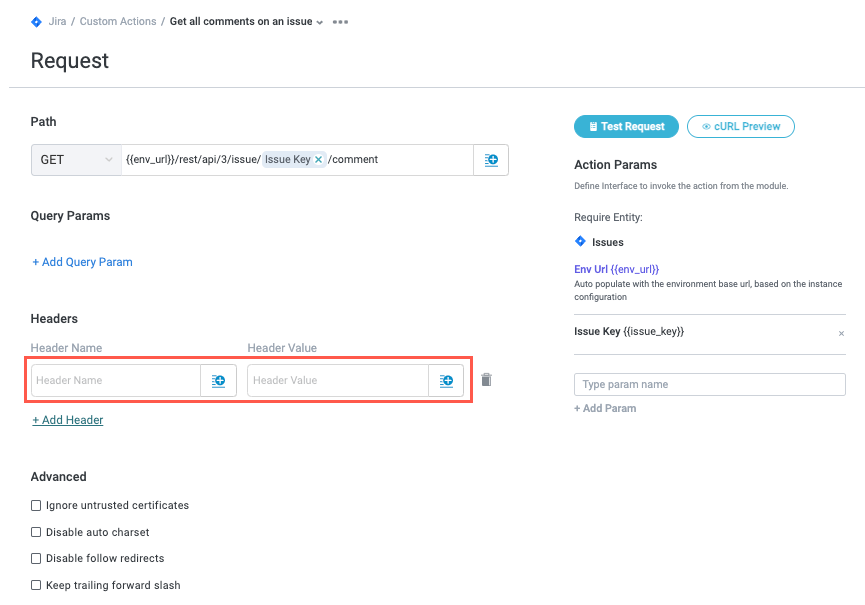
Where relevant, select + Add Header to add any header values to the request. A pair of Header Name and Header Value fields displays.
Enter the header name and header value for each header value you include.
Set Advanced Request Options
The Advanced section features several options for more complex use cases. Select the relevant checkbox to enable any of these options:
Ignore untrusted certificates - Ignore warnings generated by SSL or TLS certificates your browser has marked as untrusted.
Disable auto charset - Disable automatic assignment of the character set. Enable this option if you want to set the charset for your request by manually setting a value for
Content-Type(for example,Content-Type: text/html; charset=utf-8).Disable follow redirects - Disable automatic browser redirection.
Keep trailing forward slash - Maintain the trailing forward slash, "/" in the request path. Generally, the presence of a trailing slash indicates the resource is a directory as opposed to a file, which doesn't usually have a trailing slash.
Test the Request
After you have configured the request, you can test it to make sure it's working as expected.
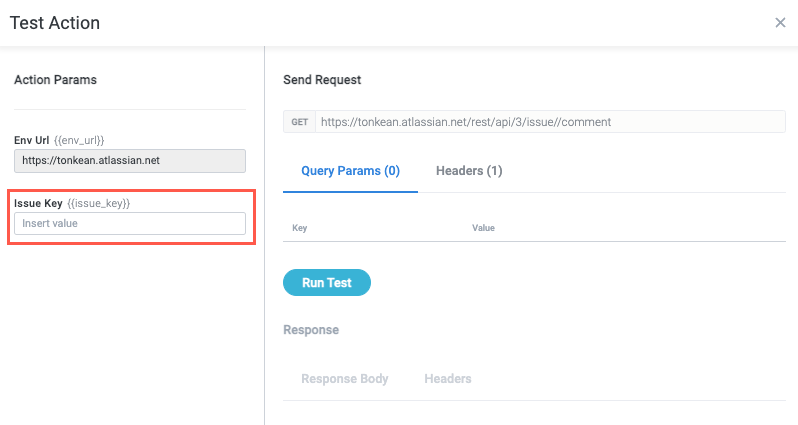
Select Test Request. The Test Action window displays.
In the Action Params section, enter valid values for each of the params you included in the request. In the image below, there is only one param that needs a value to run a test.
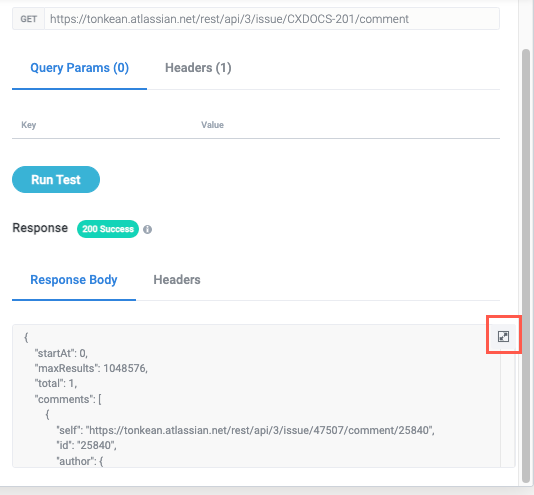
Select Run Test. The request runs with the param values you provided and the Response section populates, including a notification with the HTTP response code. The Response Body and Headers tabs in the Response section display the response from the endpoint.

Scroll down in the Response Body tab to ensure you received the response you expect. Select the expand icon in the upper right of the response body for a full-screen view of the response.
If you don't receive the expected response, or your test request fails, close the Test Action window and return to the Request screen to troubleshoot the problem.
The HTTP response code you receive in the test can be a helpful starting point for diagnosing potential problems, but we recommend first checking each of the fields in the Path, Query Params, Body, and Headers sections, where relevant. Additionally, check your request against the documentation for the application to ensure it's formed properly and contains the required values.
Once you've identified the cause of the error, return to the Test Action window and run the test again.
If the test is successful and you receive the response you expect, close the Test Action window and select Save Action Changes in the upper right of the Request screen.
Handle the Response
With the request complete and successfully tested, you can select the fields in the response you want to extract. These fields become matched entity fields when you incorporate the custom action into your module workflow.
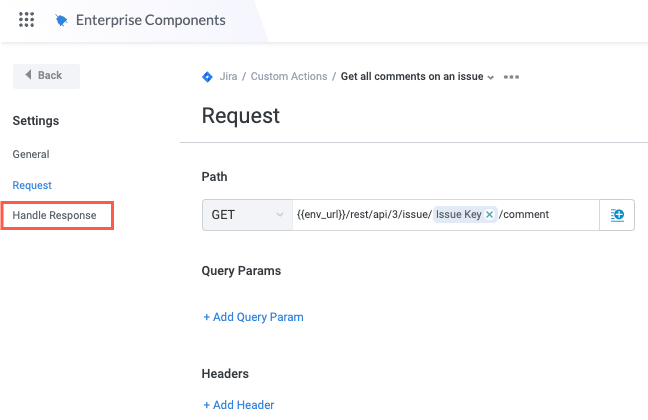
In the Settings panel, select Handle Response. The Handle Response screen displays, including the response you received in your previous test.
If you haven't tested your action yet, no data displays in the Response Body tab of the Handle Response screen. You must perform a successful test to gain access to the needed fields in the response.
In the Run Action section, select + Add Field. Name and Value fields display.

Enter a Name for the field you want to extract. Once extracted by the custom action, this field is added as a matched entity field in your module, so write a name that's easily recognizable and human-readable.
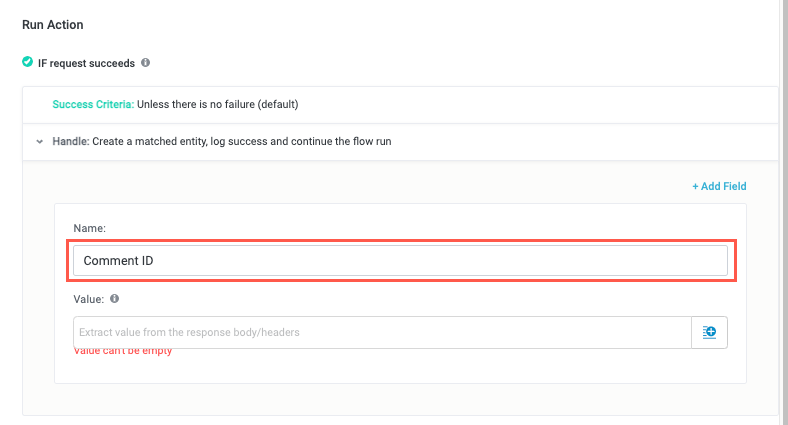
To extract the value for the field, you must select it from the response body. In the Response Body tab, locate the field value you want the action to extract.
In the image below, we want to extract the comment
idvalue. Notice how the value is highlighted when you place your cursor over it.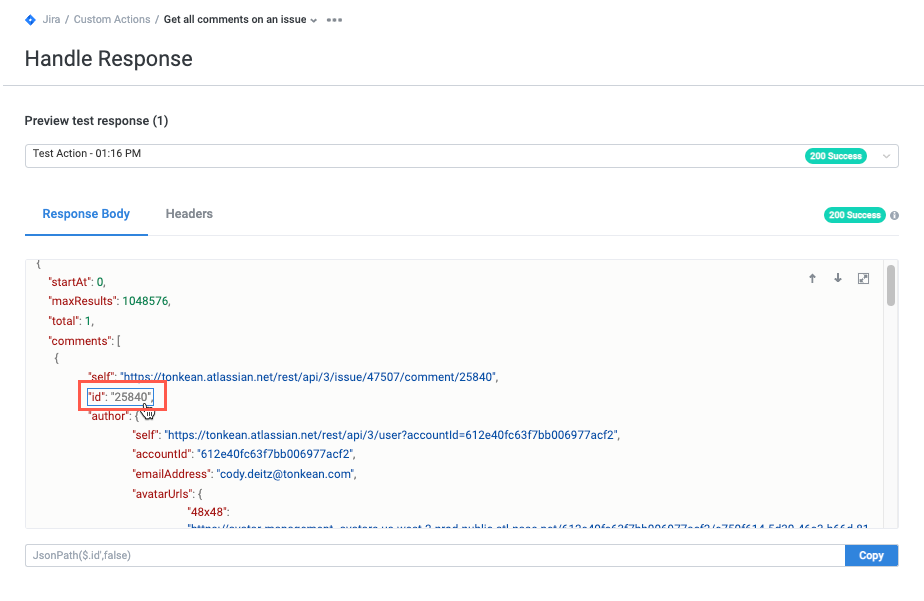
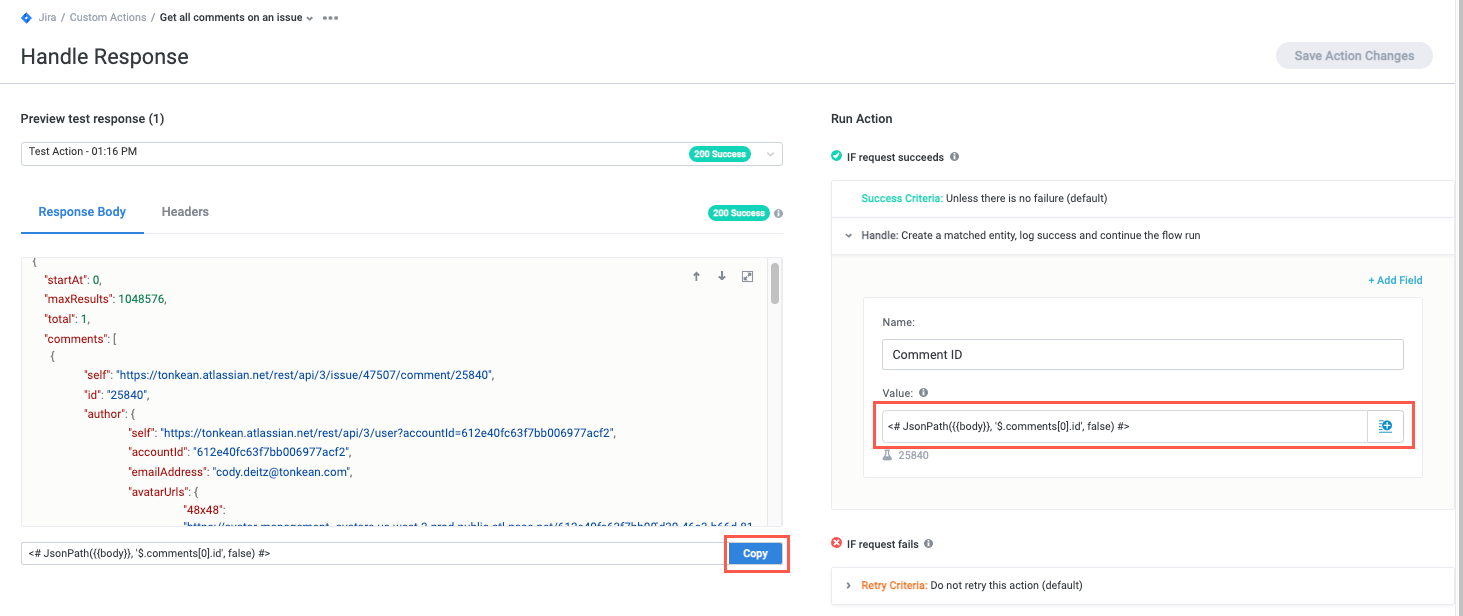
Select the value. The JSON path for that value displays in the field below the response body.

Select Copy to copy the JSON path, then paste the path into the Value field.
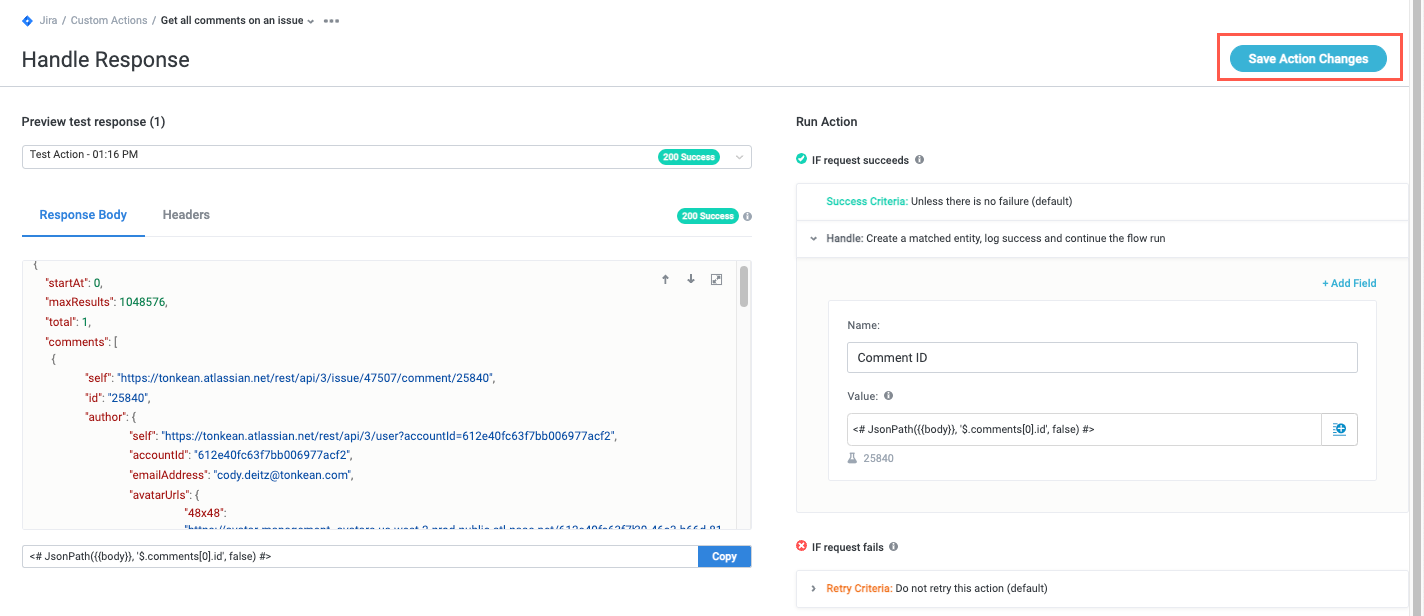
When finished, select Save Action Changes.
Your custom action is complete and ready to use in a module.
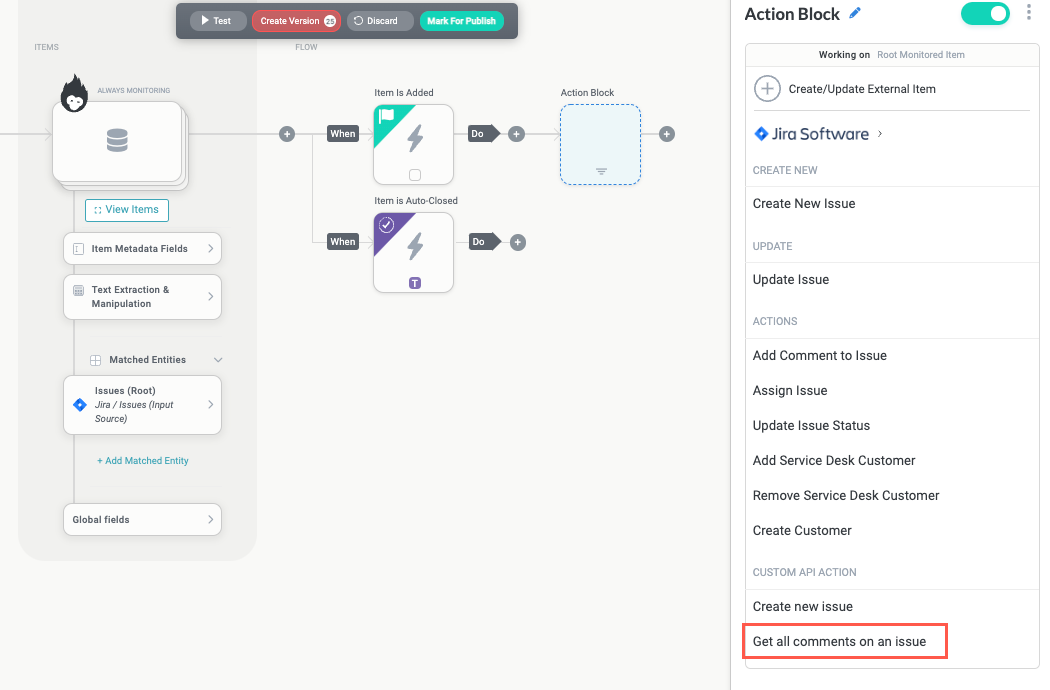
To leverage your custom action and the fields it extracts, add the relevant data source action block in your module and select the custom action from the Custom API Action section.