Field Changed
The Field Changed trigger activates when the value of a specified field changes, regardless of where it's changed (that is, whether it's from a new item running through the module or a field being updated in the module's business report).
If you have both a Field Changed and Item is Added trigger in the same module, both will activate when a new item is added to the module.
The conditions available in this trigger are detailed in Conditions.
Name the Trigger
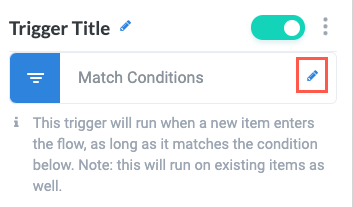
Select the trigger title or the blue pencil icon,  , and provide a descriptive title for the trigger.
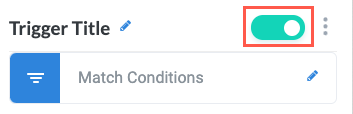
Turn Trigger Block On or Off
By default, trigger blocks are enabled and turned on. Select the toggle in the top right of the trigger panel to disable or turn it off.
When building a module, remember you can toggle triggers on and off rather than deleting them.
Change Trigger Type
To change the trigger type, select the blue pencil icon, , and select the new trigger type from the Change Type To dropdown.
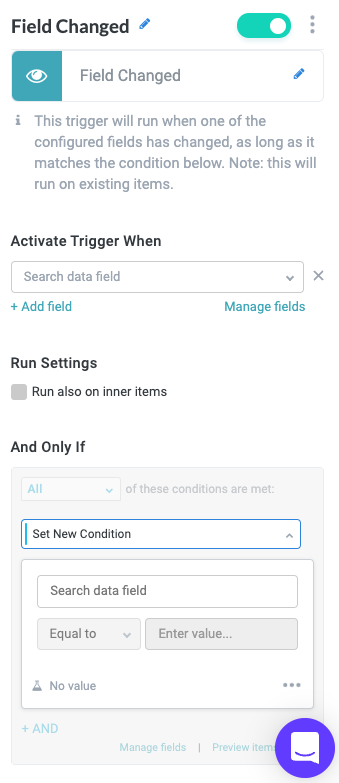
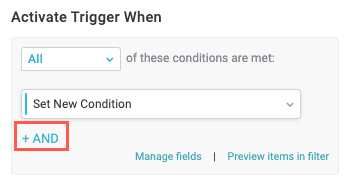
Activate Trigger When
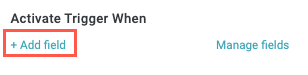
Select + Add field to select the field to monitor for changes. The Search data field dropdown displays.
Select the Search data field dropdown and select a field from the list of available fields. Select the close icon ,
 , beside the dropdown to clear the field selection.
Fields must already exist in your module to appear in this dropdown. For information about creating fields, see Create and Manage Fields.
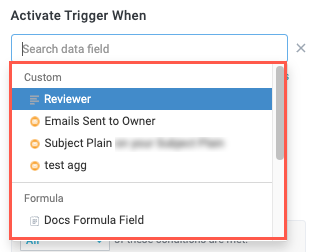
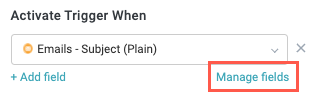
To open the Fields panel to create or edit fields, select Manage fields.
To add another field, select + Add field again and repeat the process.
If you include multiple fields in the condition, they act as an OR statement, meaning only one of the fields must change for the trigger to activate.
Run Settings
Select the checkbox to enable the trigger to activate if the form's inner items are submitted.

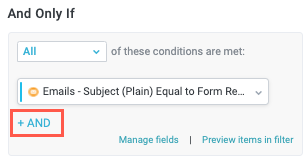
And Only If
In addition to activating the trigger when specified fields change, you can include additional conditions. This is useful if only certain kinds of changes should activate a trigger (for example, if the trigger is monitoring for changes in an opportunity stage field in Salesforce, but you only want the module to run when the opportunity amount is above a certain amount).
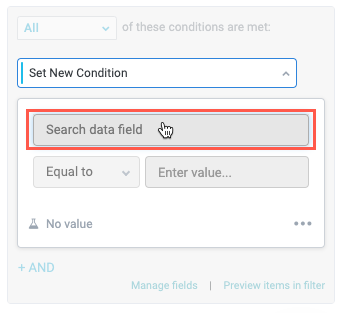
Select the dropdown to choose to run the trigger when All or At least one of the conditions are met. This option defaults to All.

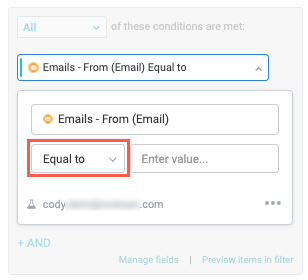
Select a primary field, a condition, and a qualifying value as the condition that activates the trigger:
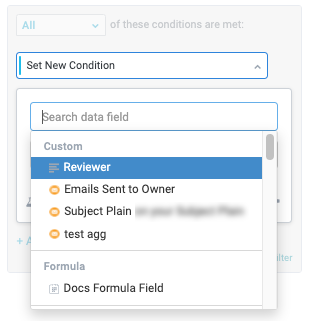
Select Search data field to select a field. The field dropdown displays.
Select a field from the dropdown. This is the primary field that the module is checking and can be a field from a data source, a Tonkean form, or any custom field you've created.
Select the condition field. This field defines how a value is matched or compared to the primary field.
For definitions for all available conditions, see Conditions.
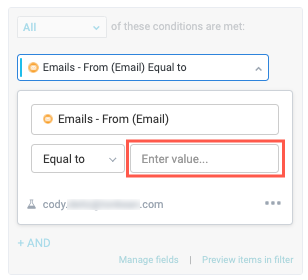
Enter a value. This is the qualifying value that is compared to the primary field, based on the selected condition. Depending on field type of the item, this value may be predefined or you may have the option to enter free text.
To add another And Only If condition, select + AND and repeat the process. This creates a compound match condition.
Add a Condition Group
In addition to defining individual conditions that activate a trigger, you can create a condition group that combines several related conditions. Condition groups allow you to organize complex conditions for the sake of visibility (for example, you might have three AND conditions that must be met and five OR conditions that can be met, which can be organized in two separate groups).
In the Activate Trigger When section, select + AND. The condition options dropdown displays.
Select New Condition Group. A new condition group section displays.

Select the default name, New Conditions Group, or the pencil icon,
, to rename the condition group.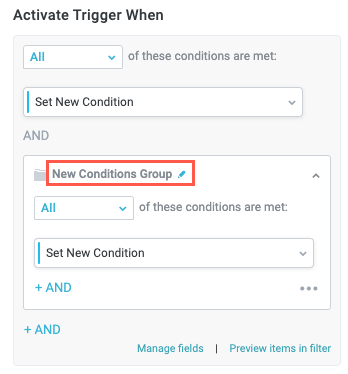
Select the dropdown to choose to run the trigger when All or At least one of the conditions are met. This option defaults to All.
Selecting All makes the condition inclusive, adding an + AND button to the bottom of the section, while selecting At least one makes the conditions exclusive, adding an + OR button.

Follow the process of adding a new condition as described in Set New Condition.