Create a Module
Each solution is made of modules. Modules house all the custom workflows, connect all of your data sources together, and give you the power to take actions based on the criteria you set up. Within each module, Tonkean provides you the ability to say "when" an event happens, the module takes specific actions.
Modules are typically built and organized as distinct, operational workflows or automations that orchestrate business processes between people, systems, and applications. This organization allows modules to remain simple to understand as they are iterated on and enhanced over time.
To create a module, follow the steps below:
Select the main nav icon,
 , in the upper left and select Solutions Studio.
Select the solution you want to create the module in.

In the desired solution, select + Add Module. A dropdown displays that provides two options:
Create New - Create a new, empty module.
Use Template - Create a new module using a module template from the Component Library as a starting point.
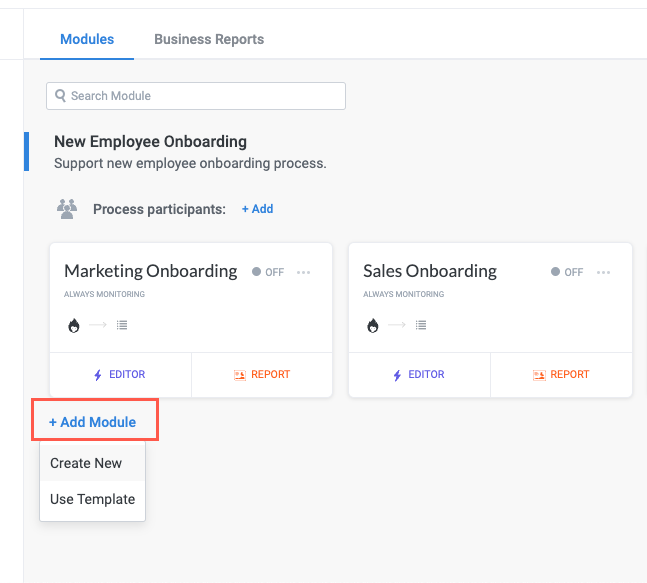
Select either Create New to create a custom module or Use Template to create a module based on a module template.
Create New Module
If you select Create New, the Create A New Ops Module window displays. Enter a descriptive name for your module and then select Create.
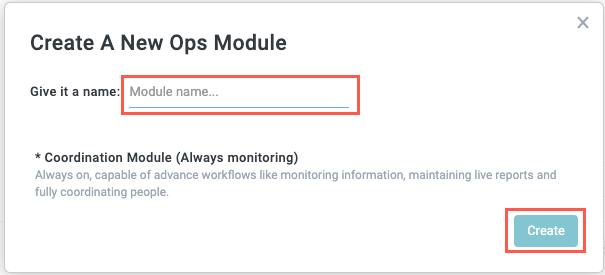
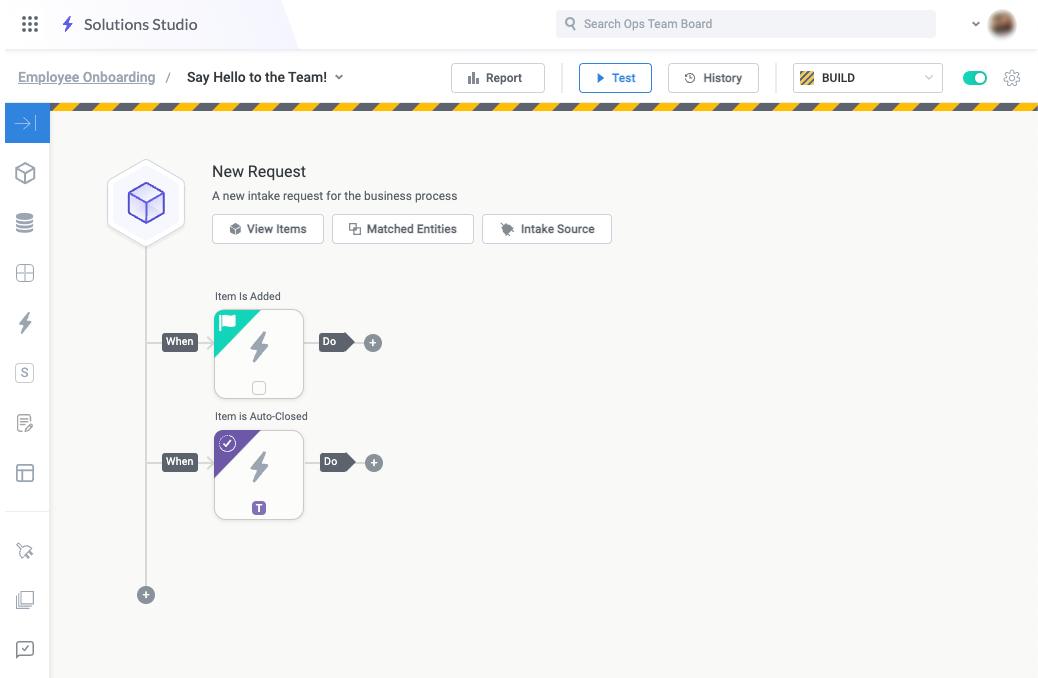
Your new module opens in the module builder.
Select an Intake Source
To automate a process, your module needs access to an intake source—whether that's an email request, a form, an object from external data source like Salesforce or Jira, or one of various other intake sources. Your intake source is the item at the center of your business process.
To select an intake source, follow the steps below:
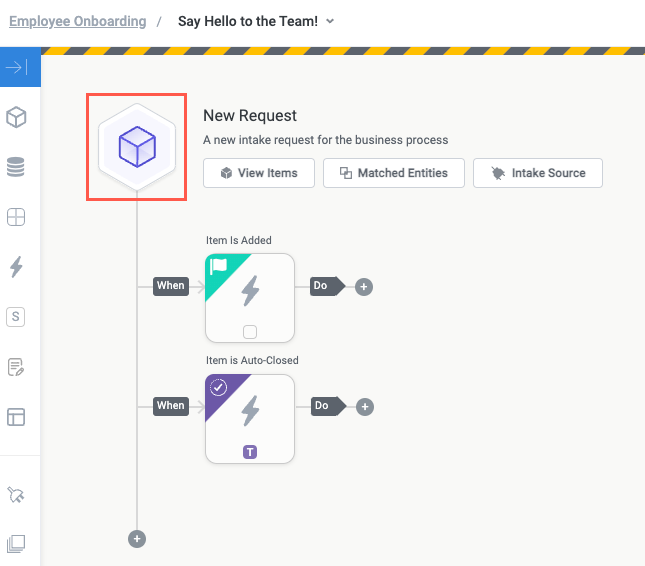
Select the Item tile in the top left corner of the module builder screen. In new modules, the item is labeled New Request by default. The Item Details panel displays.
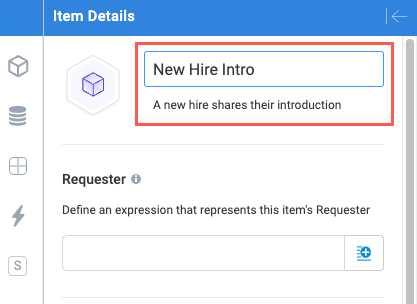
In the Item Details panel, enter a custom item name and description that fits your unique process.
Select the insert fields button,
 , and select an existing field that represents the item's requester or create a formula that dynamically represents the requester.
Select the module intake source. This is the origin of your module item—for example, the email inbox where users submit requests to initiative your business process.

An intake source-specific field displays where you select the specific enterprise component. For example, if you select Chat, you can choose to monitor a connected communication tool like Slack or Teams:
Your admin must connect data sources to your Tonkean instance before you can use data from these sources in any of your modules.
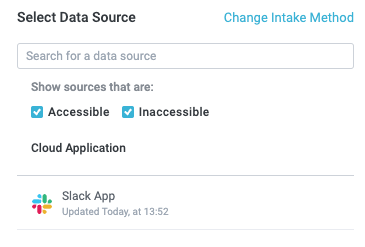
After selecting the data source, select the entity you want to monitor.

Configure a new condition group to filter your selected entity to only monitor a subset of that entity type.
For more information about condition groups, see ???.

When finished, select Save. Your intake source is configured and displays in the Item Details panel.

You can now proceed with Setting Up Triggers, Setting Up Actions, or bringing in more specific Fields from that intake source.
Use a Module Template
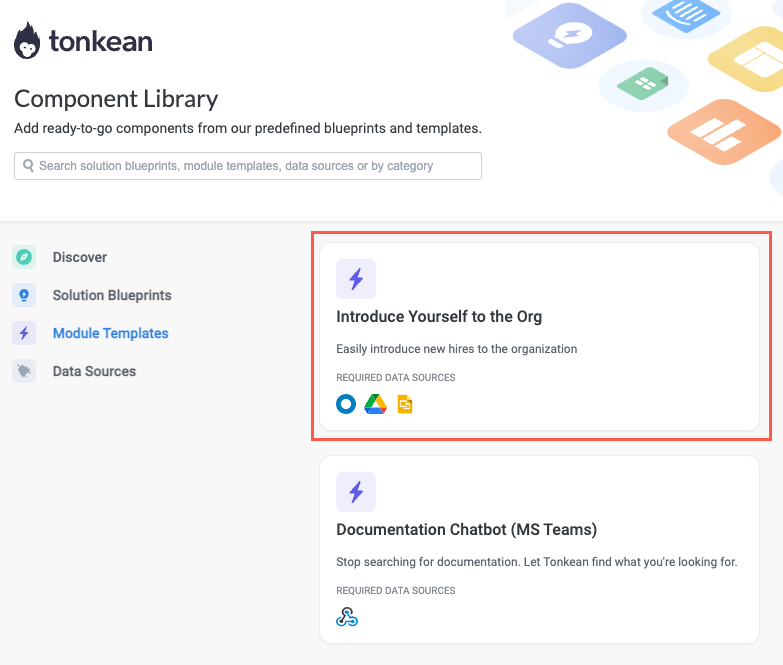
If you select Use Template, the Component Library screen displays.
The Component Library is a popular way to get started building in Tonkean. It contains ready-to-go components you can import into your board and begin customizing to suit your particular needs and business process.
In the side panel, select Module Templates. The Module Templates screen displays.

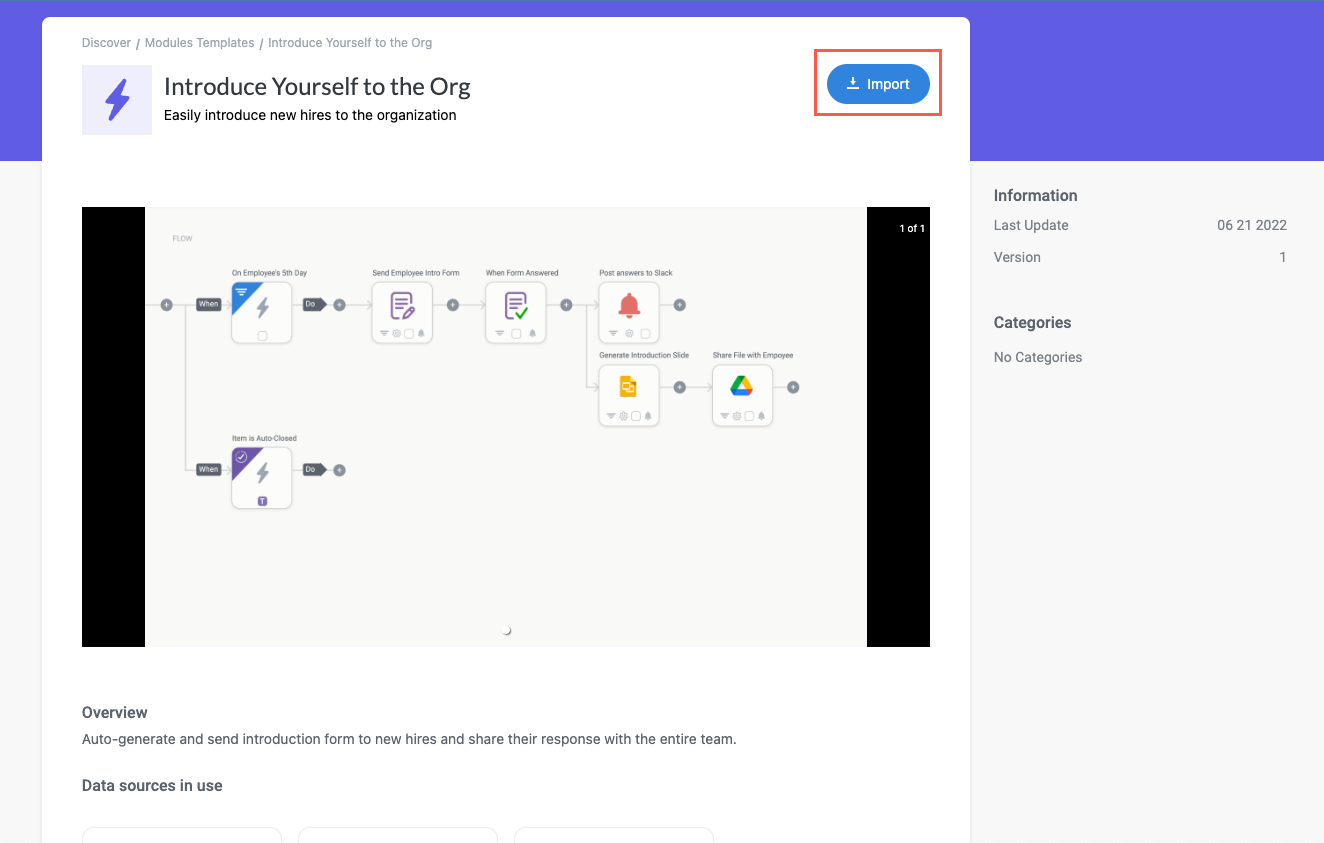
Select the template you want to import. The template detail screen displays.
Browse the template detail screen to confirm this is the template you want to import, then select Import. The Download Module window displays, featuring a list of boards you have access to.
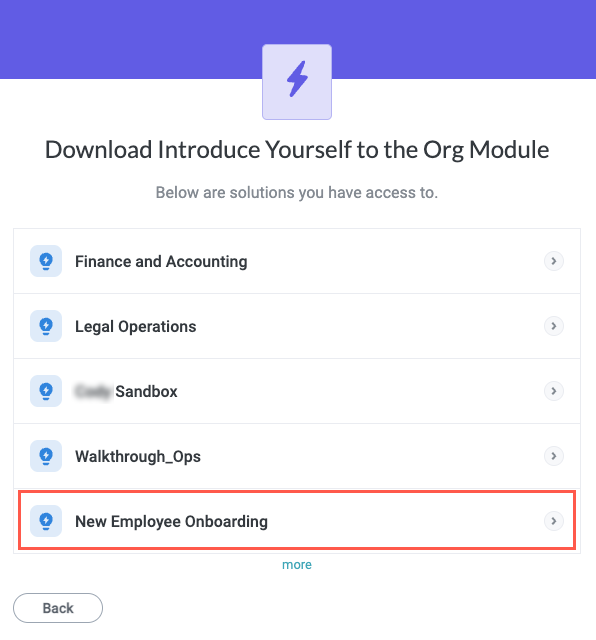
Select the board you want to import the template into. A list of solutions you have access to on the chosen board displays.
Use the search field to quickly locate a specific board.

Select the solution you want to import the template into. A list of sections you have access to in the chosen solution displays.
Select the section you want to add the template to. A list of data sources the module contains displays.

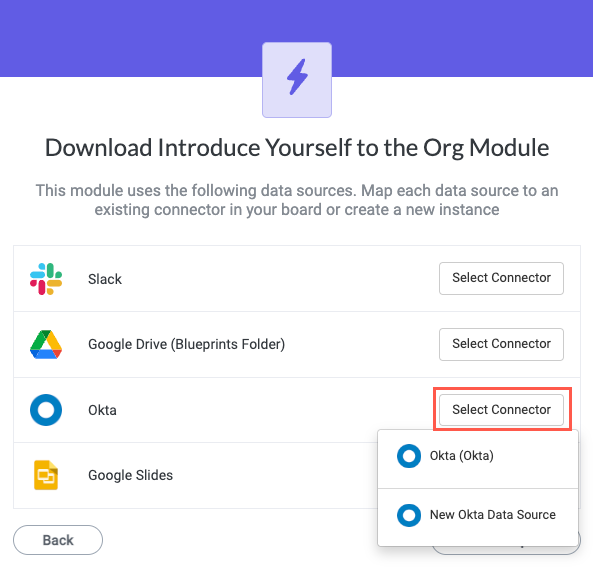
For each data source the module uses, there is a placeholder in the template. You must select an existing instance of that data source from your solution or create a new connection to make the relevant part of the module functional.
To select a connector for each data source in the module template, select Select Connector and choose from an existing instance of that data source in your solution, or choose to create a new connection.
If you choose to connect an existing data source, the data source automatically connects.
If you choose to create a new data source connection, the Set Up Data Source window displays. Enter the relevant information and select OK.

Repeat this process for each data source or select Finish setup later to configure these data sources after the module is added to your solution.
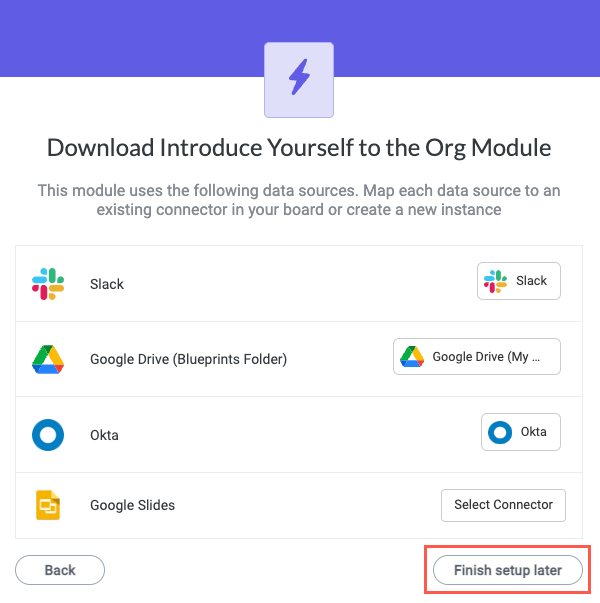
Ensure you've chosen the right board, solution, and section, then select Confirm. The module template is imported into your solution.

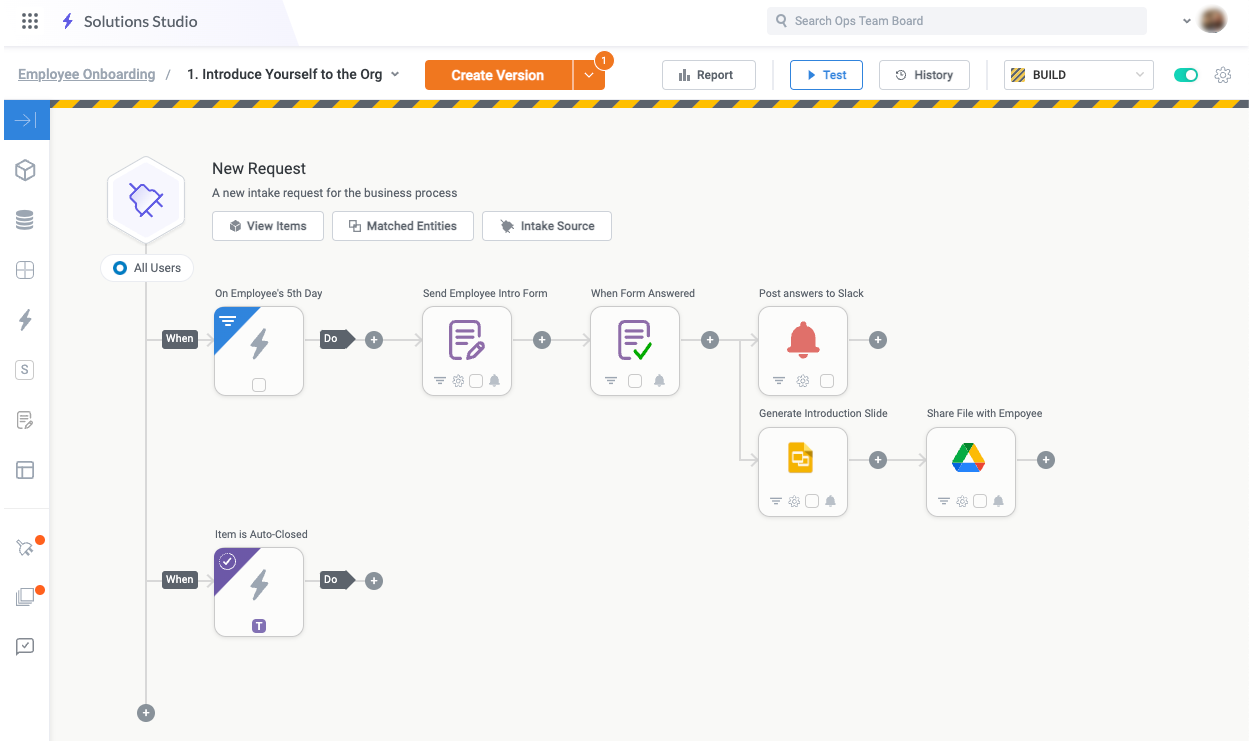
The module templates open in the module builder in your chosen solution. From this point, you can explore and customize the module workflow. Select an action or trigger block to see the configuration details.
The module features a complete workflow, but you must connect all relevant data sources and customize each action and trigger to reflect your unique data to build a functional module. The template is designed as a starting point and in most cases is not plug-and-play.