Configure a Text Extraction Training Set
Before you can use a new text extraction training set, you must configure three aspects of that training set: which fields to extract from the text input, how you expect the training set to perform (that is, training Tonkean to extract the right text), and one example of a correct extraction.
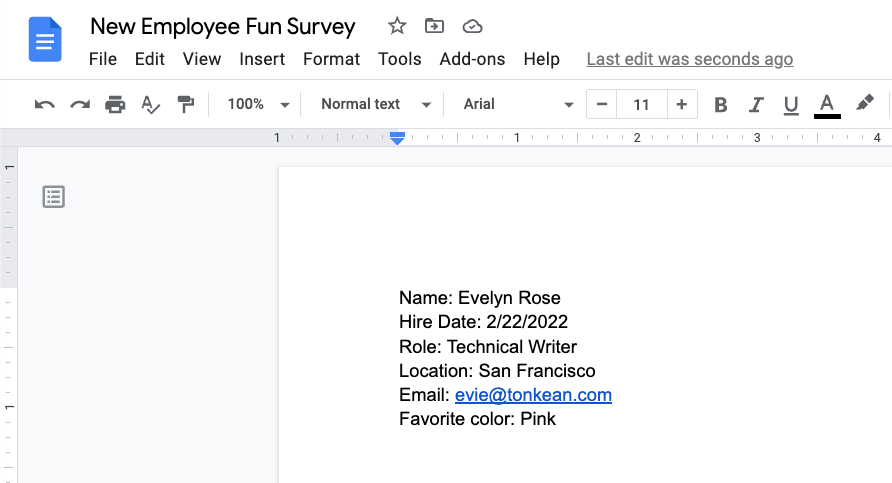
For the purpose of showing the configuration process, we're using the text from a sample Google Doc below, which is an informal new employee survey that includes some basic information about a new hire we're using in a module:
To configure each of these aspects, follow the steps in each relevant section below:
Set Extraction Fields
The foundation of an effective training set is specifying which fields you want the training set to extract. You define these fields on the Set Extraction Fields screen.
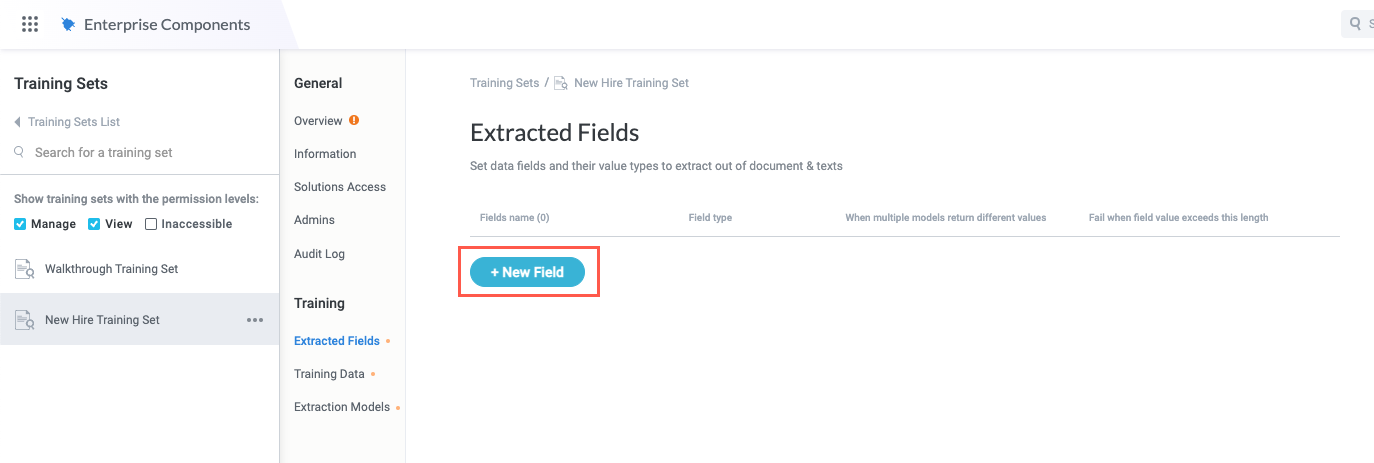
From the Training Sets configuration screen, select Extracted Fields in the configuration panel. The Extracted Fields screen displays.

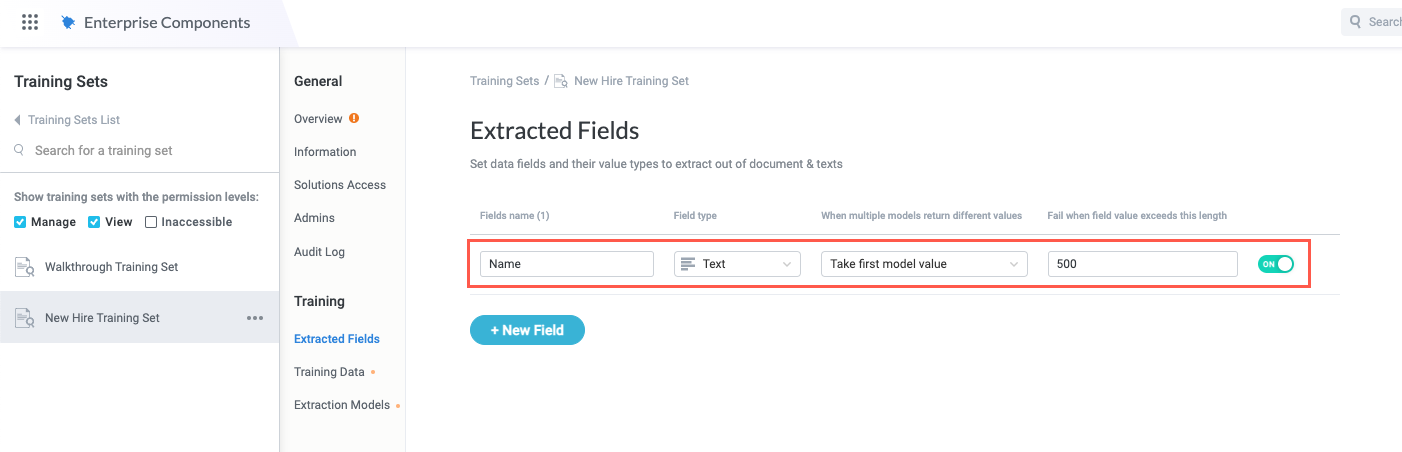
Select + New Field. The Add new field window displays.
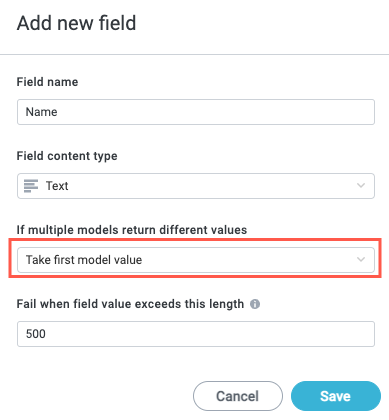
In Field name, enter the name of the first field you want to extract from the text input. In our example, the first field to extract is "Name".

Select the Field content type dropdown and select the type of content you expect to extract for this field.

Select the If multiple models return different values dropdown and choose whether the training set takes the first model value or fails:
Take first model extraction - The training set extracts the first matching text. We recommend this option for text inputs that are generally consistent and where the first match (when multiple matches exist) is likely to be the correct one.
Fail extraction - The training set fails. We recommend this option for text inputs that have a lot of variation and where the first match (when multiple matches exist) is not necessarily more likely to be correct.
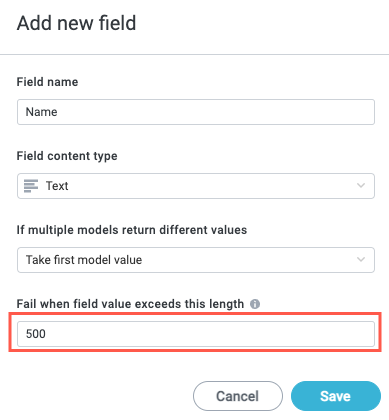
In Fail when field value exceeds this length, enter the number of characters after which point a match is ignored.
When finished, select Save. The newly-added field displays on the Extracted Fields screen.
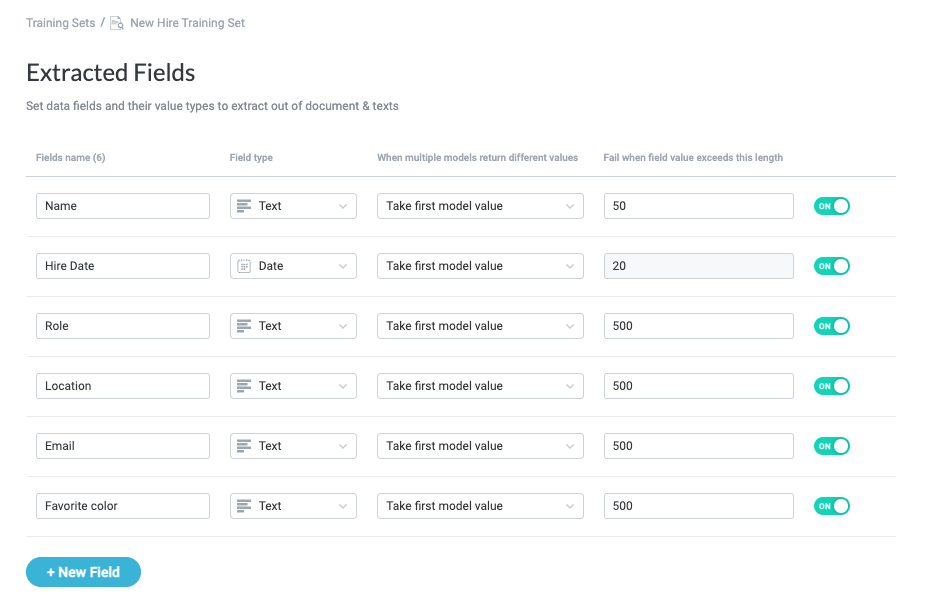
Repeat steps #1-7 for each field you want to extract from the text input. For our example, we have an additional five fields to add ("Hire Date", "Role", "Location", "Email", and "Favorite color").
All fields to extract are defined:
Add Training Data
Once the fields to extract are defined, you can add text input to begin training.
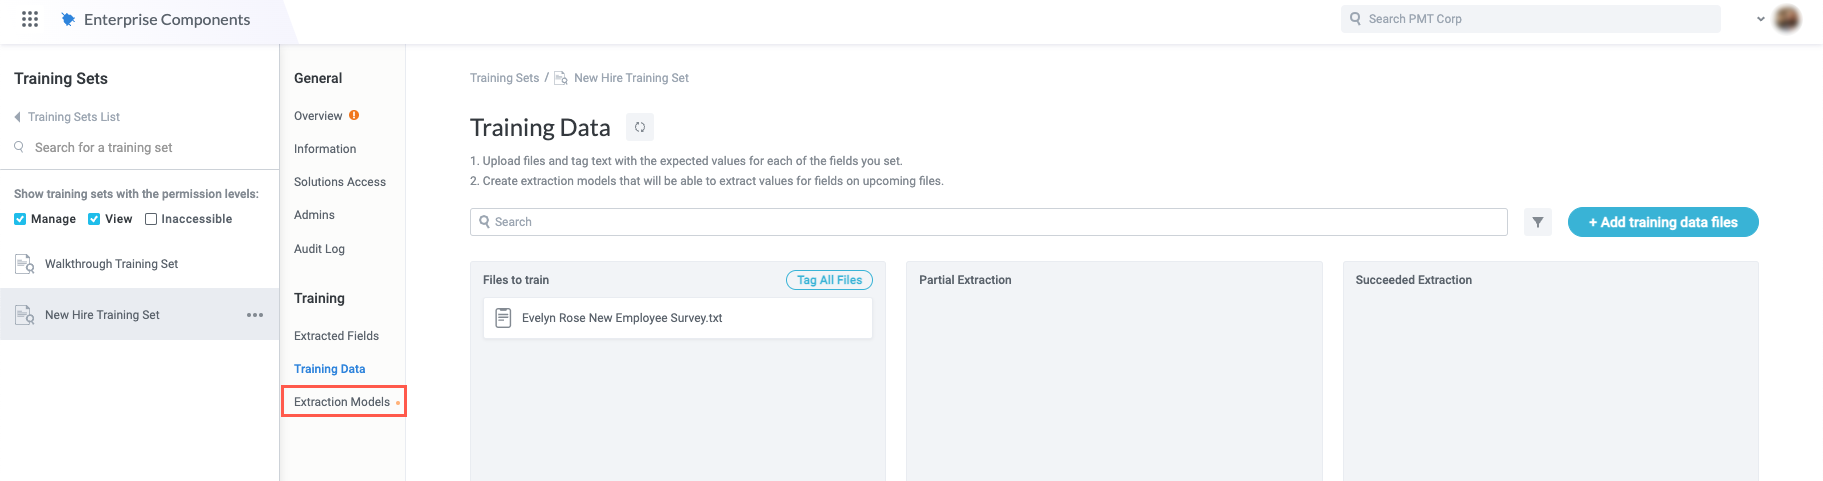
From the Training Sets configuration screen, select Training Data in the configuration panel. The Training Data screen displays.
Select + Add training data files. In the dropdown, select one of the available options:
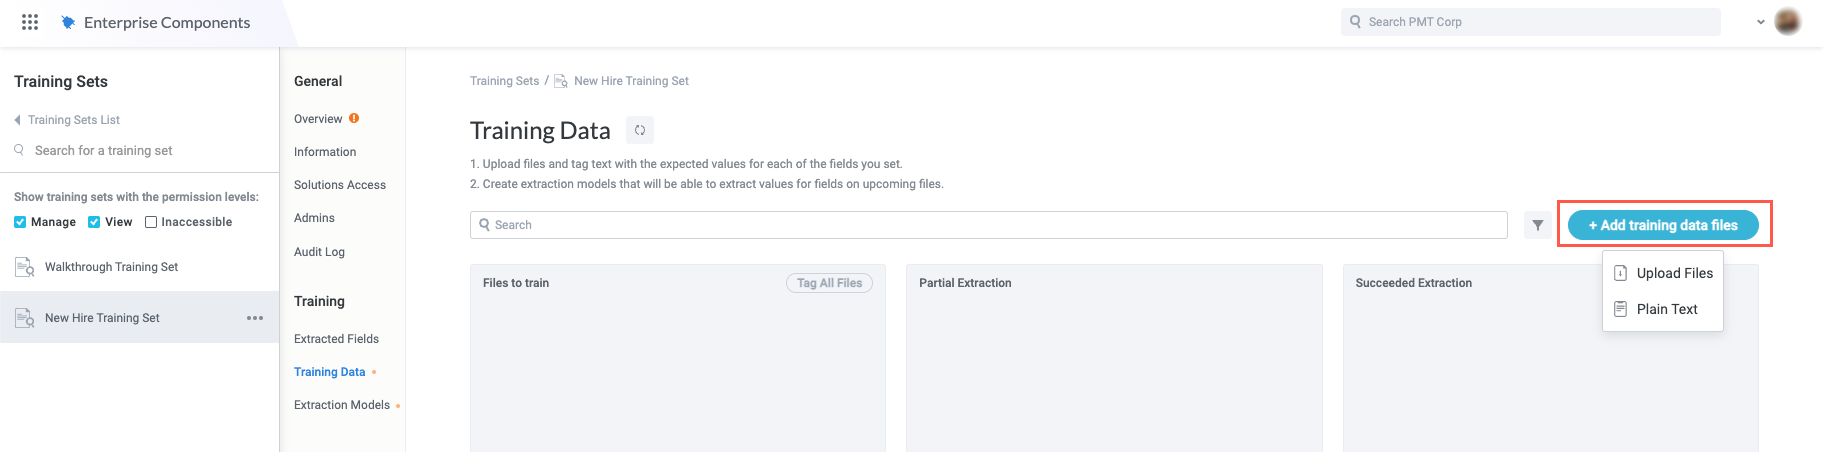
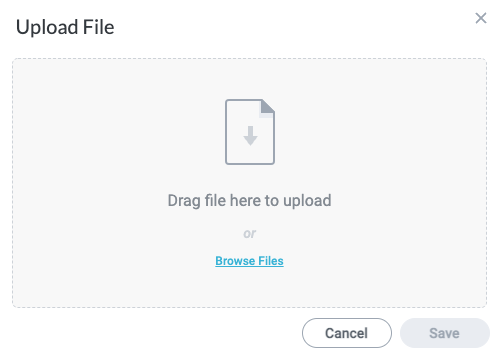
Upload Files - Upload entire files from your local machine that contain the text you want to extract fields from. This is the more common option as most users extract text from existing files (for example, PDFs). When you're leveraging the training set in a module, the vast majority of use cases involve extracting text from uploaded files.
Plain Text - Enter plain text you want to extract fields from. This option is generally used for training and configuration purposes only.
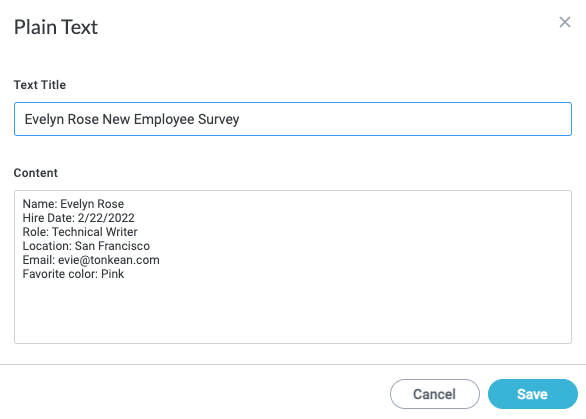
Because our example text is stored in a Google Document, we'll select Plain Text and paste the text directly into the training set for configuration purposes.
In the Plain Text window that displays, enter a Text Title and enter the text to extract fields from in the Content field. When finished, select Save. The Tag Files window displays.
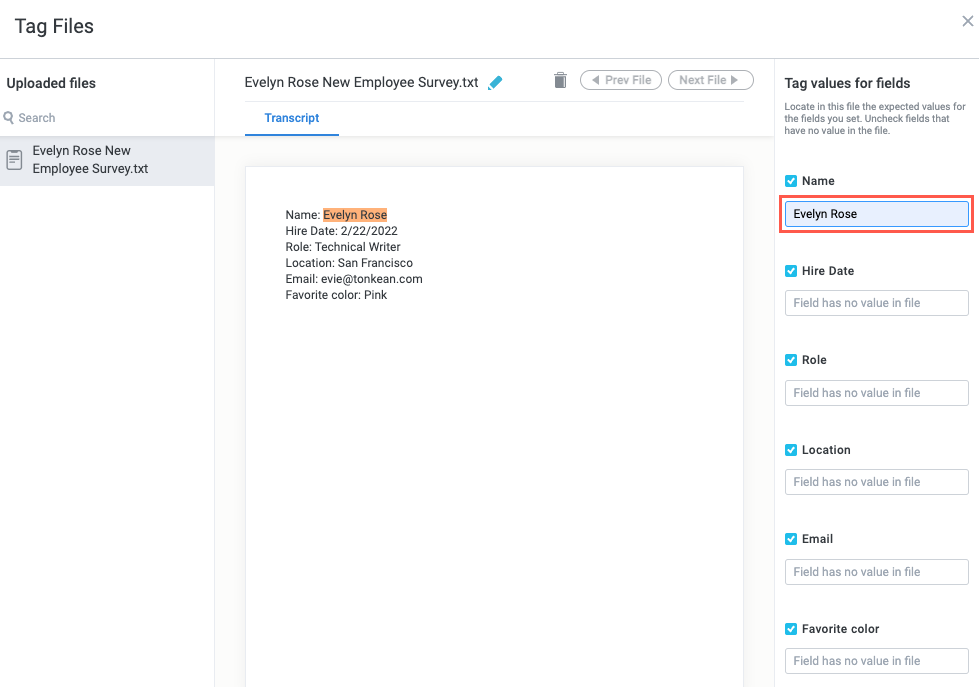
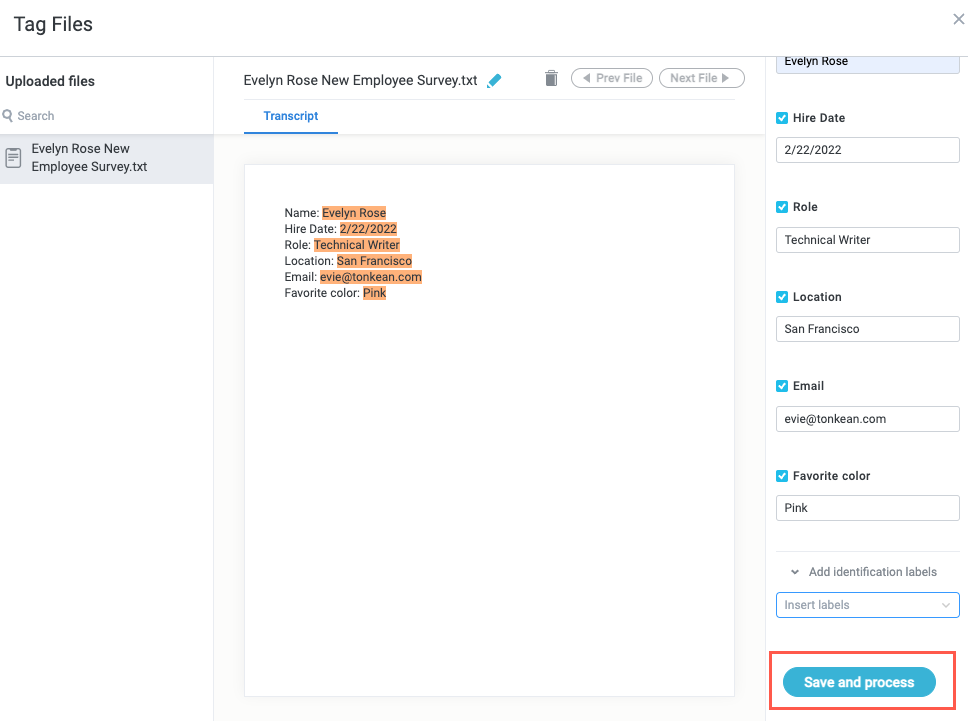
For each field, enter the corresponding value in the appropriate field. For example, for our input text, we enter "Evelyn Rose" for the Name field.
Notice that as you enter the values for each field, the corresponding text highlights in the Transcript tab.
When finished, scroll down in the Tag values for fields panel and select Save and process.
The sample training data is added and tagged.
Set Extraction Models
With the fields configured and sample training data entered into the training set, you must now define the rules for how to find and extract the specified fields. These rules are called extraction models.
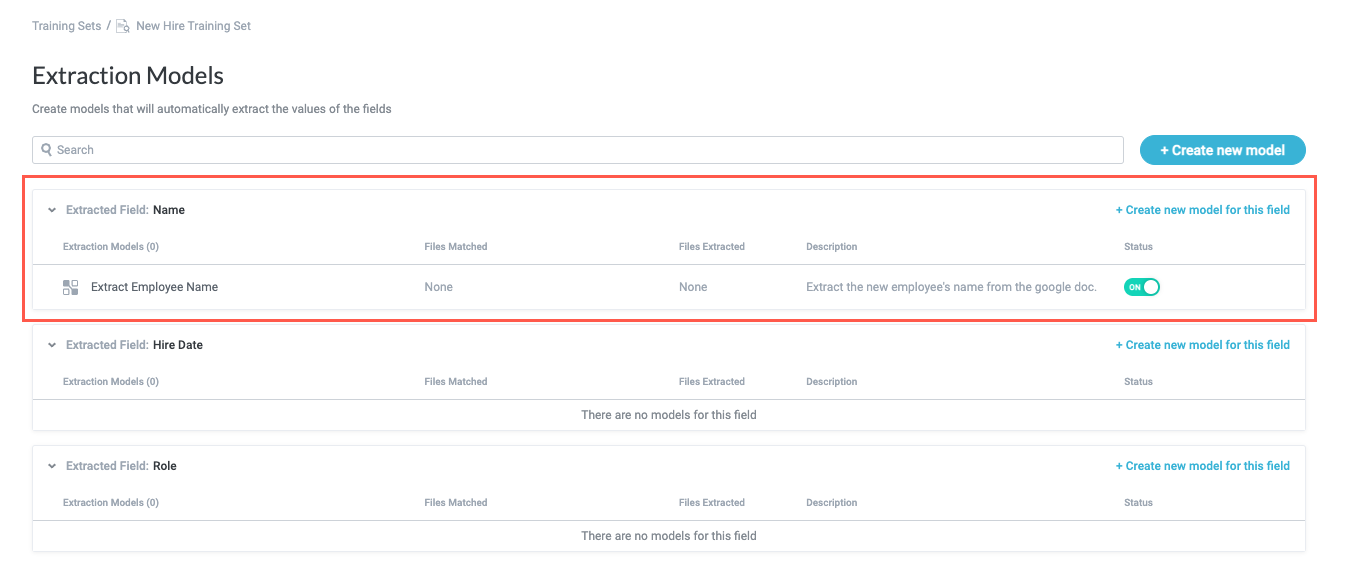
From the Training Sets configuration screen, select Extraction Models in the configuration panel. The Extraction Models screen displays.
Notice that each field you added displays on the Extraction Models screen. You must now create an extraction model for each field. Select the + Create new model button in the upper right. The extraction model configuration window displays.
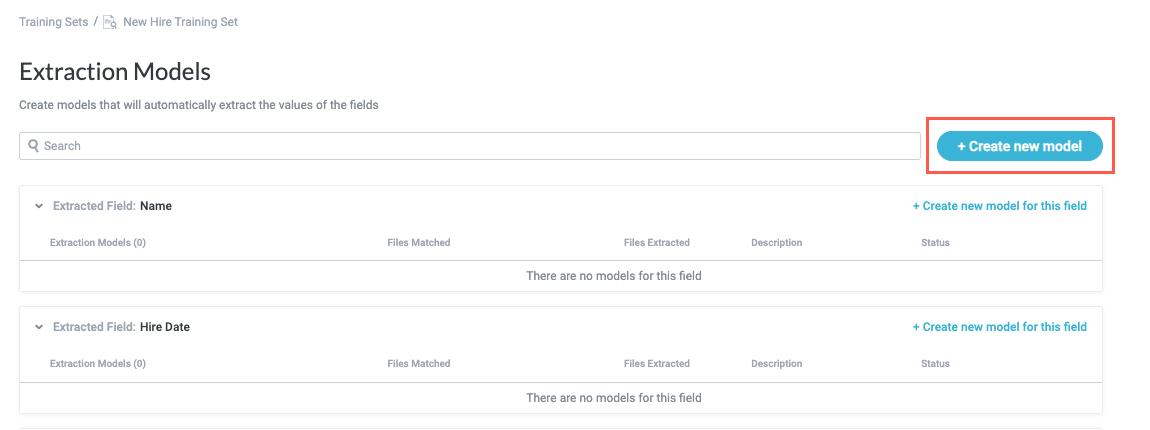
You can also select + Create new model for this field in the field card to open the extraction model configuration window and begin defining the model parameters. If you select this option, the field to extract is already selected.
Select the blue pencil icon,
 , and enter a name for the extraction model.
In the General section, select the Field to extract by model dropdown and select the field you want to extract. Then, enter a description for the extraction model, if desired.
A description is helpful in cases where the extraction model might be complex or routinely faces certain challenges. Including a detailed description can also help you more easily collaborate with your team in the future.

In the upper right, select + Add tagged Items. The Add tagged items to model window displays.
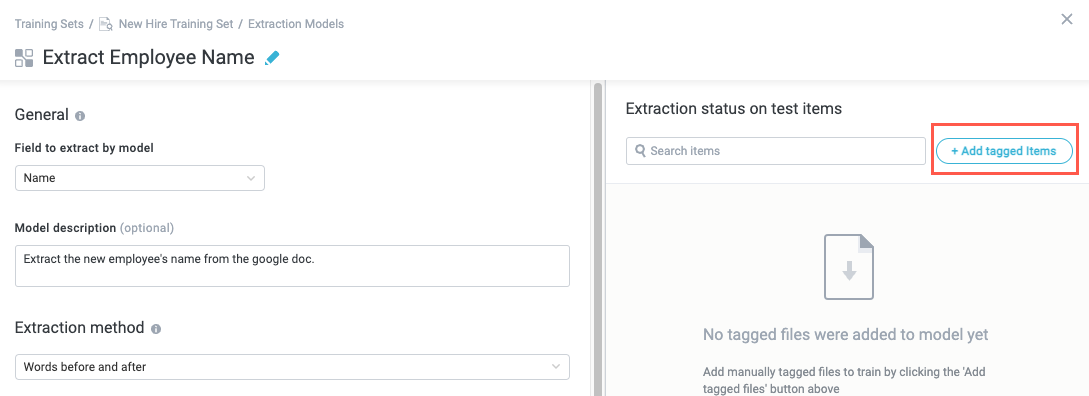
In the Add tagged items to model window, select the training data you added previously, then select Add items. The window closes.

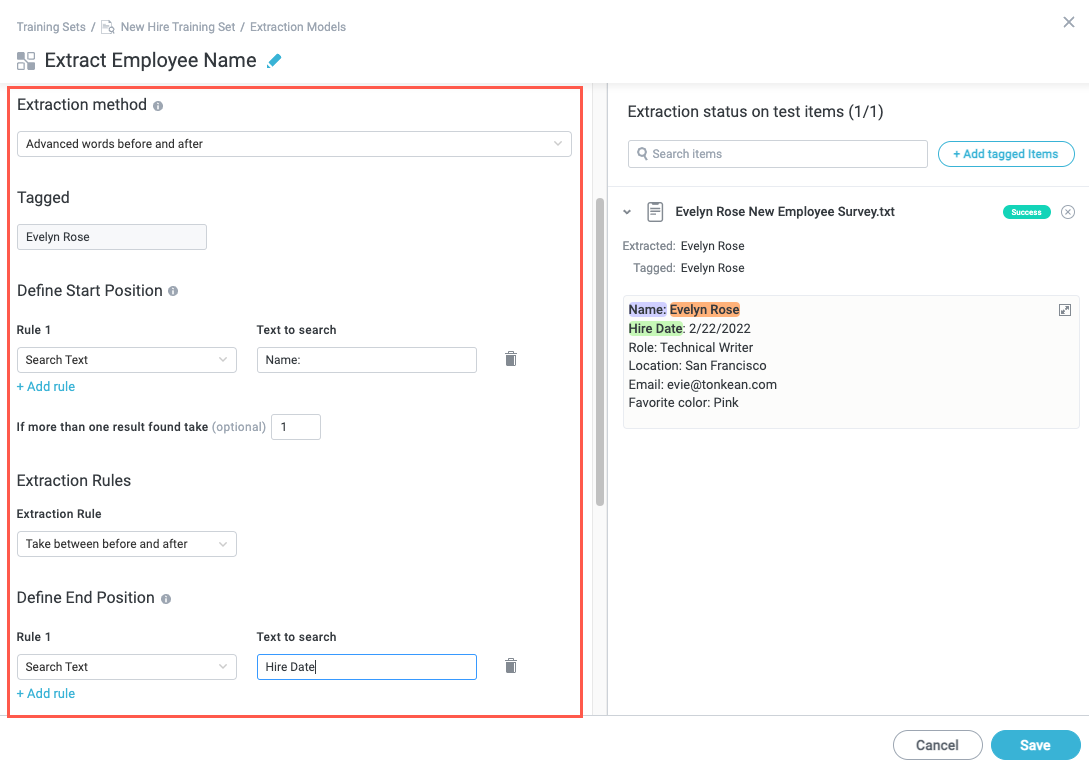
Back in the extraction model configuration window, select the Extraction method dropdown. There are several options, each with their own configuration parameters. Depending on your selection, different fields display:
Words before and after - Locate the field to extract by defining the words that precede or the words that follow the target text, or both Use this method for values located on the same line as the text before or after.
Before - Enter the text that appears directly before the field you want to extract on the same line. In most cases, we recommend extracting the target value based by specifying the text before, as most forms feature a label followed by a value.
Tagged - The defined value to extract from the training data.
After - Enter the text that appears directly after the field you want to extract on the same line.
Select the Ignore non-word characters on edges checkbox to ensure characters such as colons and dashes are not included as part of the extracted field.
As you enter values into the Before and After fields, depending on your use case, notice that the relevant fields are highlighted in the right panel and the extraction success or failure is indicated in the upper right.

Advanced words before and after - Locate the field to extract by defining a start and end position and a series of directions to locate the target field. Use this method for values that are not located on the same line as the start or end position, or for values that require more specific directions for successful extraction (for example, instead of simply taking a value before or after a defined position, taking a specified number of words or lines relative to a defined position).
When using this exaction method, you may need to create multiple models to account for variation in the type of document you're extracting data from. For example, a form may have several different configurations of the same data, so you must create an extraction model targeted for each configuration to ensure the training set extracts the necessary data.
A helpful way to think about this method is to imagine you have a cursor and you're telling the extraction model where to place that cursor as a starting point and then how exactly to move that cursor to arrive at the field you want to extract. For example, if a document contains a value without a clear label but we know there's a value that's always on the following line, we can tell the cursor to start on that line after the value we want, instruct the cursor to move up one line, and then extract that field. Working with complicated forms sometimes require a lot of trial and error, but understanding this basic concept can help simplify the process.
Tagged - The defined value to extract from the training data.
Define Start Position - Add a rule to define the starting position from which to begin the location of the target field. Select + Add rule to create Rule and Text to search fields.
Rule - Select the dropdown to choose a rule (for example, Search Text or Skip [X] Words).
Specify value - This field corresponds to the Rule dropdown and changes depending on your selection in the Rule dropdown. Enter the appropriate value to specify the start position based on the selected rule. For example, if you select Search Text in the Rule dropdown, enter the text you want the extraction model to locate as the starting position. However, if you select Skip [X] Words in the Rule dropdown, specify the number of words to skip from the beginning of the available text.
If more than one result found take - Specify which matching value to use if more than one is found. The default value is
1; the extraction model takes the first match.
Extraction Rules
Extraction Rule - Select the dropdown to choose the rule that defines the extraction behavior. Your selection may display additional fields to complete the configuartion. For example, if you select Take [X] Words in the Extraction Rule dropdown, a Number of words field appears where you specify the value of X.
Define End Position - Add a rule to define the ending position from which to orient the location of the target field. Select + Add rule to create Rule and Text to search fields.
Rule - Select the dropdown to choose a rule (for example, Search Text or Skip [X] Words).
Specify value - This field corresponds to the Rule dropdown and changes depending on your selection in the Rule dropdown. Enter the appropriate value to specify the start position based on the selected rule. For example, if you select Search Text in the Rule dropdown, enter the text you want the extraction model to locate as the starting position. However, if you select Skip [X] Words in the Rule dropdown, specify the number of words to skip from the beginning of the available text.
If more than one result found take - Specify which matching value to use if more than one is found. The default value is
1; the extraction model takes the first match.
Preset value - Locate the value to extract by specifically defining the expected value. Use this method to extract an expected value to use that value as a field.
Preset value - Enter the exact value you expect in the text.

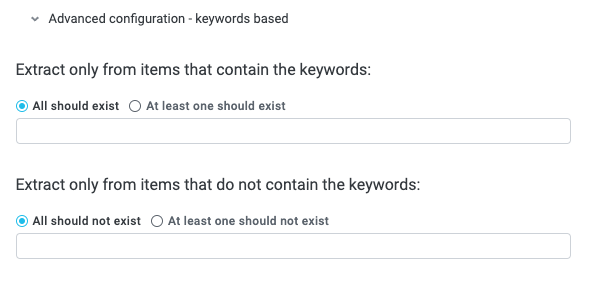
Finally, you can furhter specify conditions to extract the field depending on whether certain keywords are or are not present:
Extract only from items that contain the keywords - Choose to only extract the field from items that contain specific keywords. Additionally, select whether all specified keywords must exist or only one must exist to extract the field. Use this option for situations where you know the text contains specific keywords and only want the extraction model to process text containing those keywords (for example, if you're processing state-specific forms, you might add a state name as a keyword here).
Extract only from items that do not contain the keywords - Choose to only extract the field from items that do not contain specific keywords. Additionally, select whether all specified keywords must not exist or only one must not exist to extract the field. Use this option for situations where you want to specifically exclude texts that contain specific keywords.
When finished configuring the extraction model, select Save. The extraction model configuration window closes. Notice that the newly-created extraction model is listed on the relevant Extracted Field card.
Repeat steps #2-9 for each field you want to extract.