Microsoft Excel Online
Microsoft Excel Online is a web-based spreadsheet application offered as part of the Microsoft 365 suite. Excel allows you to create and edit spreadsheets, leverage numerous formulas and functions to process data, and collaborate with others in real time.
Excel is a popular integration with Tonkean because it provides a convenient place to store and manipulate data as it moves through a Tonkean workflow.
Grant Admin Consent to Connect Excel Online
Depending on the connection settings in your organization environment, an admin may need to grant consent for Tonkean to connect to your Microsoft Excel Online instance.
To grant consent for users in your organization to connect Excel Online as a Tonkean data source, an admin must follow the steps below:
Navigate to the following URL:
https://login.microsoftonline.com/common/oauth2/v2.0/authorize?client_id=19a7c44f-b724-4b57-b5c2-387fc4bb3e31&response_type=code&redirect_uri=https://tracks.tonkean.com/oauth.html&response_mode=query&scope=https://graph.microsoft.com/Sites.ReadWrite.All https://graph.microsoft.com/Files.ReadWrite.All offline_access
A Permissions requested window displays.
Select the Consent on behalf of your organization checkbox, then select Accept. Tonkean is granted access.

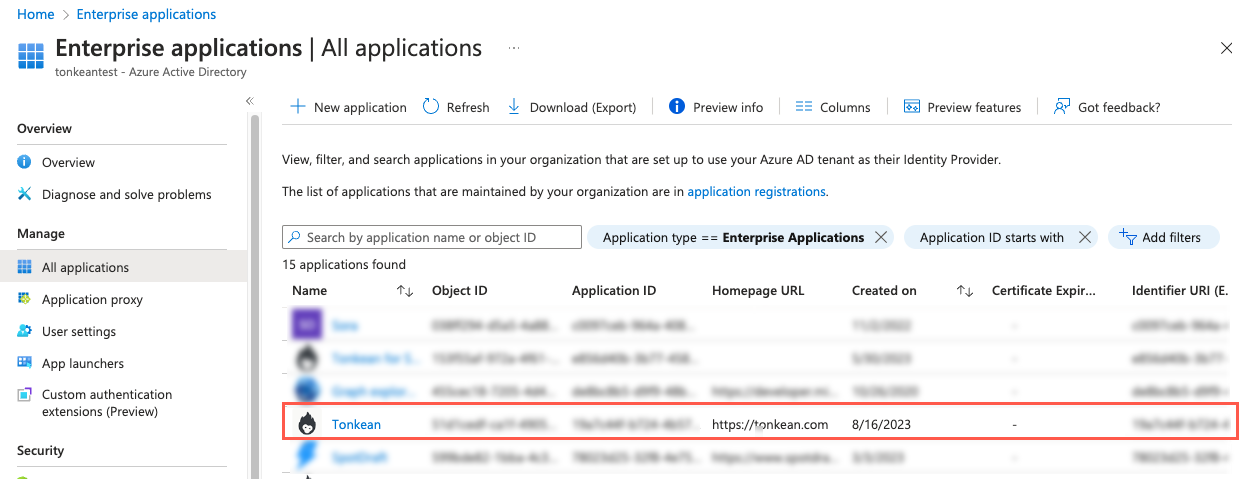
To confirm the addition of the Tonkean application to your instance, in your Azure AD admin center, navigate to Enterprise applications. The newly-added Tonkean application displays.
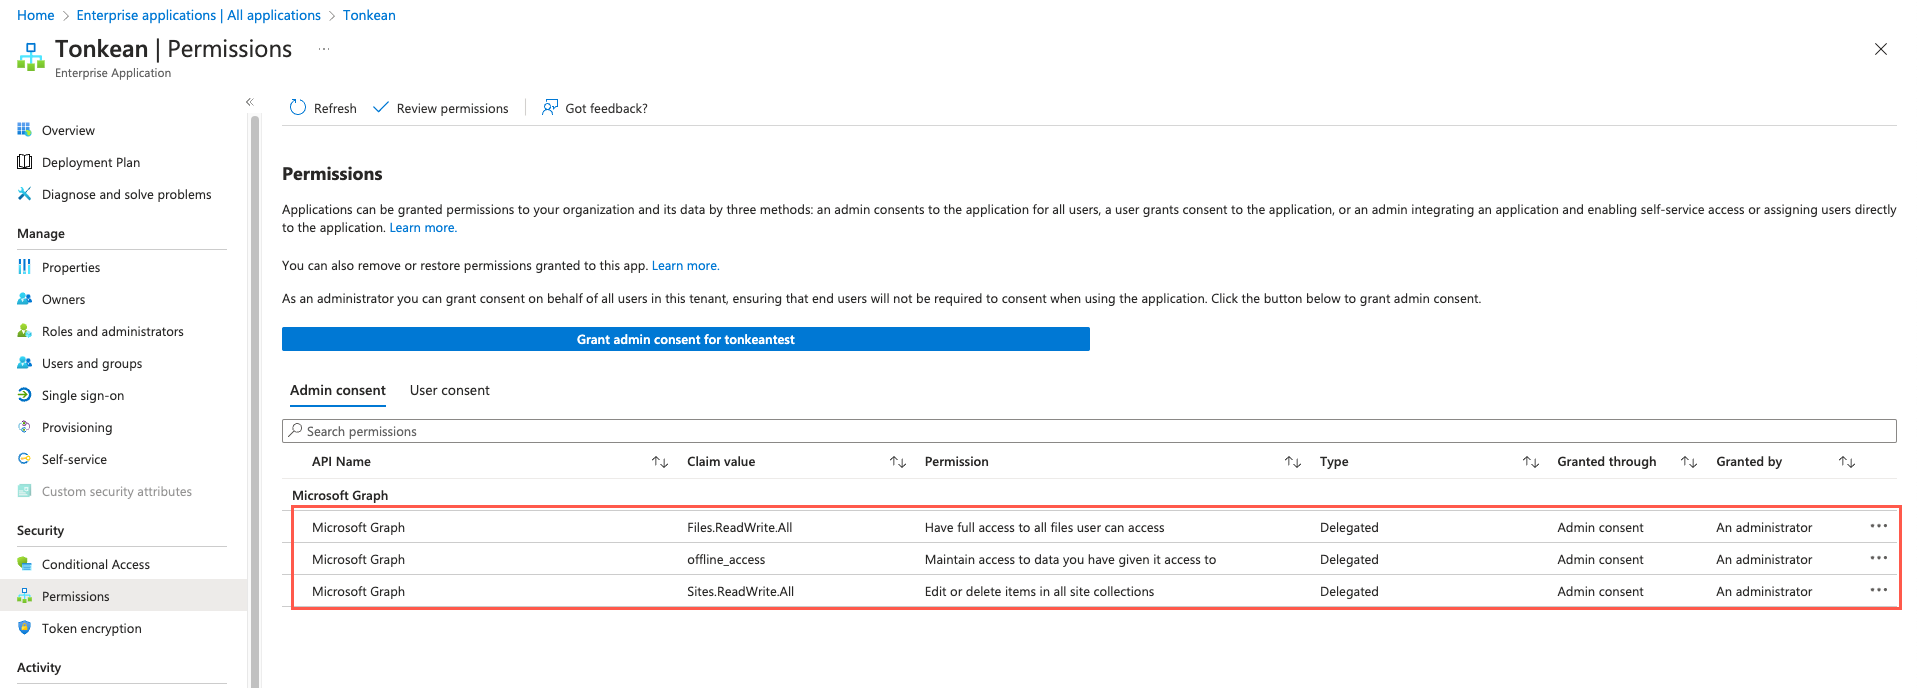
To view the granted permissions, select the Tonkean app > Permissions. The Tonkean | Permissions screen displays.
Microsoft Graph -
File.ReadWrite.AllMicrosoft Graph -
offline_accessMicrosoft Graph -
Sites.ReadWrite.All
The
Sites.ReadWrite.Allpermission is required only to select the specific Excel spreadsheet file to connect to Tonkean (see step #8 in Authenticate with Excel). If you do not wish to maintain this permission, you can revoke it once the file selection process is complete:Locate the
Sites.ReadWrite.Allpermission row.Select the context menu,
 , then select Revoke Permission. The
 Sites.ReadWrite.Allpermission is revoked.
Authenticate with Excel
To use Excel in Tonkean, you must first connect it as a data source:
Select the main nav icon,
 , in the upper left and select Enterprise Components. The Enterprise Components screen displays.
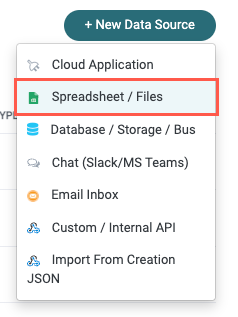
Select + New Data Source in the upper right.

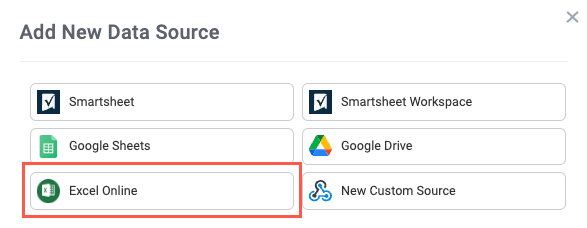
Select Spreadsheets / Files. The Add New Data Source window displays.
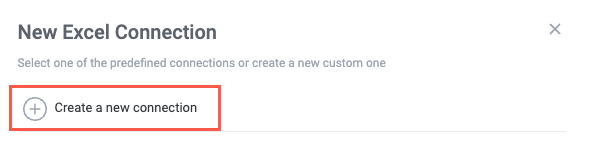
Select Excel Online. The New Excel Online Connection window displays.
Select Create a new connection. The Set Up Microsoft Excel Online window displays.
Select Authenticate with Excel Online. The Microsoft authentication window displays.
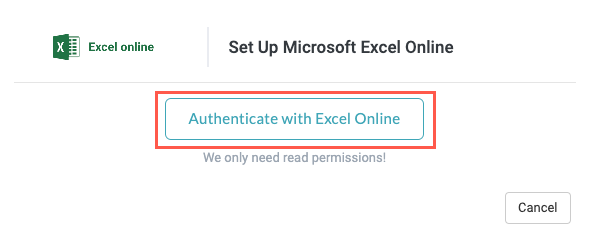
Select the Microsoft account you want to connect to Tonkean.
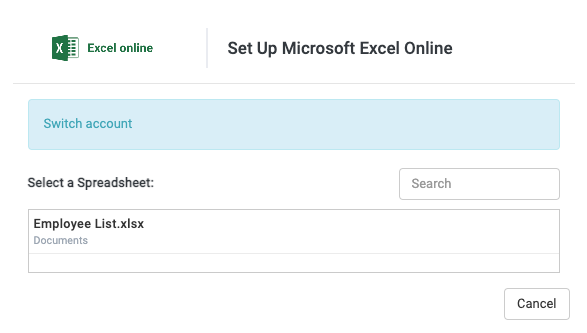
After authenticating with Tonkean, the Set Up Microsoft Excel Online window displays the Select a Spreadsheet field. Select the spreadsheet you want to connect to Tonkean. The selected spreadsheet serves as the data source, the rows and columns from which Tonkean will monitor and update with relevant actions.
The selected spreadsheet cannot be changed in the future. You must set up another Excel connection to access a separate spreadsheet.
Once you select a spreadsheet to connect, several sections display where you configure the data structure, map fields, and define the usage method.
Configure Spreadsheet Mapping and Permissions
Once your chosen spreadsheet is connected, you must configure how the spreadsheet's rows and columns are mapped to Tonkean.
Start from row - Specify which row the content starts on (that is, the first row that is not the header).
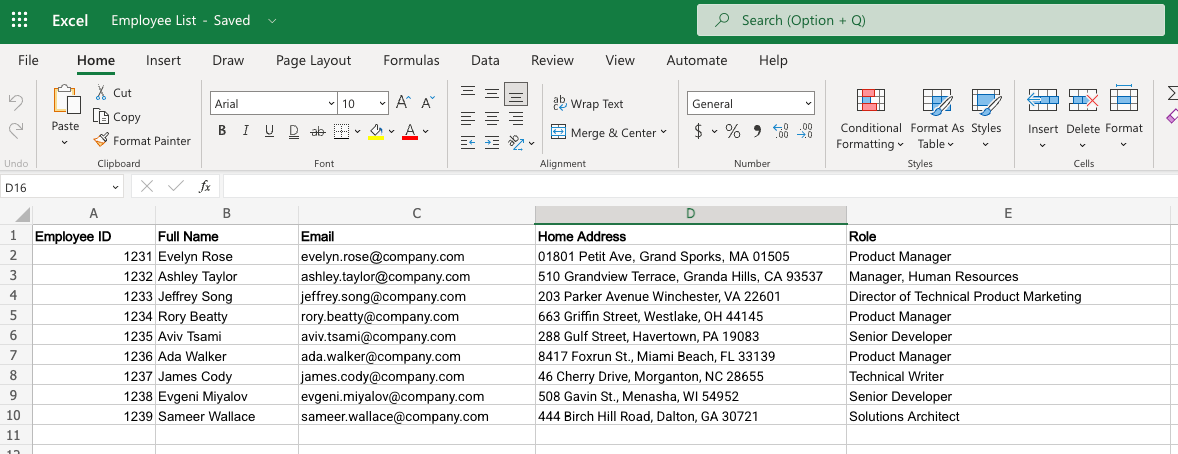
Item Name/Title (required) - The name that displays for the item; this is the data source item Title. In the example Employee List spreadsheet, column B, "Full Name", is an acceptable value.
This value must be unique.
Item Description - The description of the item. This can be any supplementary information contained within the row. In our example Employee List spreadsheet, we assign column E, "Role" as the description.
Item Owner - The user set as the owner of the item, where relevant.
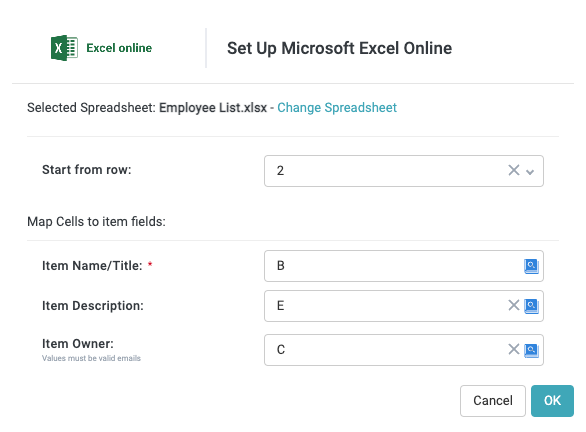
When finished, select OK. The Set Up Microsoft Excel Online window closes.
Monitor Excel as an Intake Source
Like most data sources, you can use Excel Online as the module intake source:
After creating a new module, select the item tile. The Item Details panel displays.
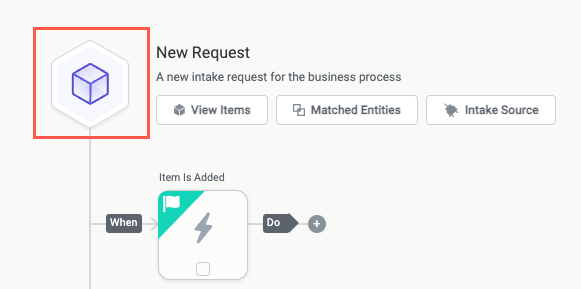
In the Select Intake Source section, select External Data Source. The Select Data Source section displays.

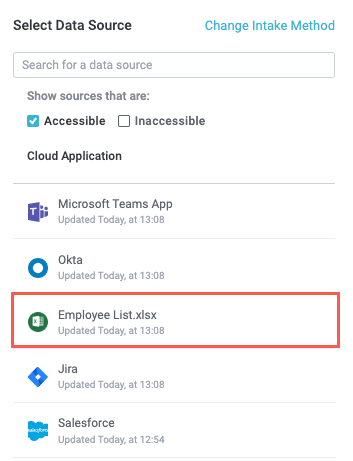
Select the Excel Online data source you want to connect as the intake source. The connection configuration screen displays.
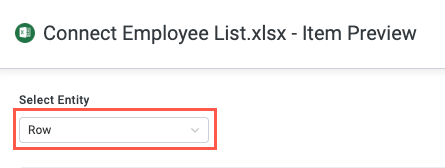
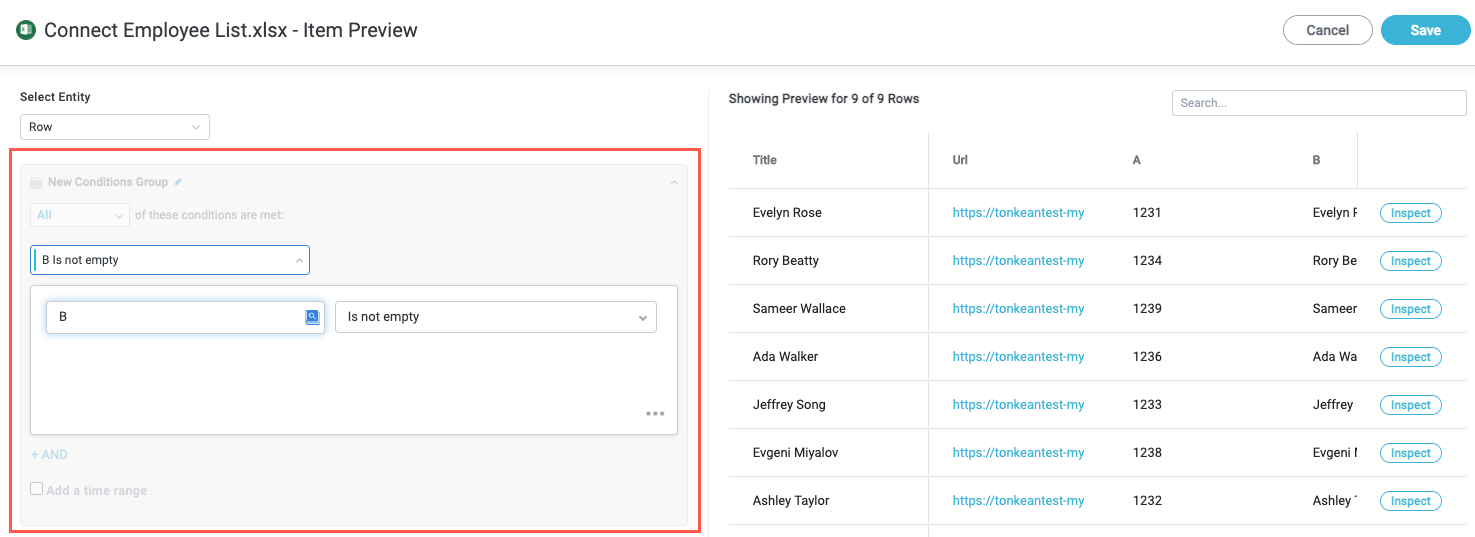
Select the entity you want to collect, where relevant.
You can currently collect only the Row entity in Excel Online data sources.
By default, Tonkean collects all entities of the selected type. If you want to filter the entities the module monitors, configure the conditions for the conditions group.
When setting up a new intake source, we recommend always adding a custom filter instead of monitoring all entities of the selected type. This ensures there's a smaller amount of data to monitor and respond to. For example, configuring the filter to monitor Rows that contain a value in a specified field is a good place to start.
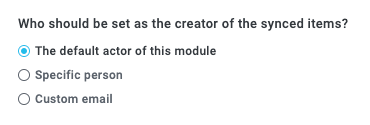
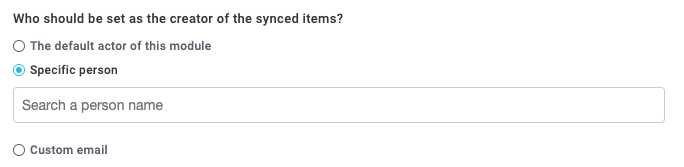
Select who to set as the creator of the items synced from the data source:
The default actor of this module - The module actor, configured in the module settings. For more information about configuring the module actor, see Configure Module Settings.
Specific person - Select a specific user from your board.
Custom email - Enter a custom email. Enter the email address manually or dynamically create the address by selecting the insert field button,
 , and using existing fields from your module.
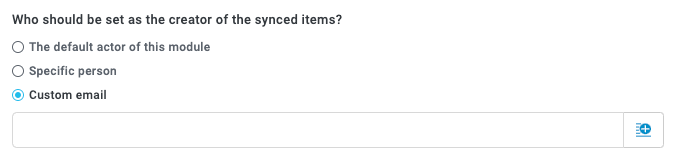
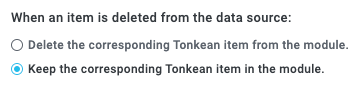
Select how to handle item deletion in the data source:
Delete the corresponding Tonkean item from the module - Delete the item that corresponds with the data source record.

Keep the corresponding Tonkean item in the module - Keep the item when the corresponding data source record is deleted.
We recommend this option for most workflows, as deleting existing items can cause processes to break and make your metrics less helpful.
When finished, select Save in the upper right.
Your module is monitoring the specified Excel Online spreadsheet.