Formulas
Formulas allow you to leverage advanced logic at the individual field level to manipulate or gain insight into all the data in your Tonkean workflows. In addition to basic formulas such as finding certain values in a data source, combining strings, or carrying out basic arithmetic, you can create more advanced formulas that enable a deeper, more complex analysis of your data.
Formulas often act as small but critical logic in a workflow. Below are some common use cases that appear in many solutions:
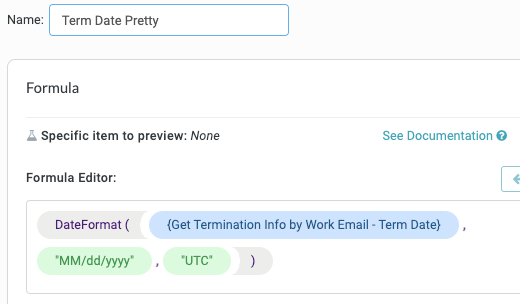
Reformatting or restructuring data so it can be effectively used by another system or application, or simply making a machine-readable date human-readable
Adding a fallback value to support dynamic actions, and handle situations where the field in question is empty

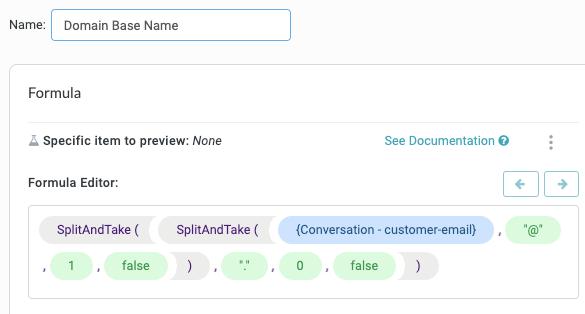
Extracting important information from a field, such as an email domain from an email address
Create a Formula
There are two ways to create a formula: from the module builder screen and from the Business Reports screen. Both methods are detailed in the sections below.
For an in-depth walkthrough of building a formula for a real-world use case, including configuring it and adding it to an existing workflow, see the video below:
Create a Formula from the Module Builder Screen
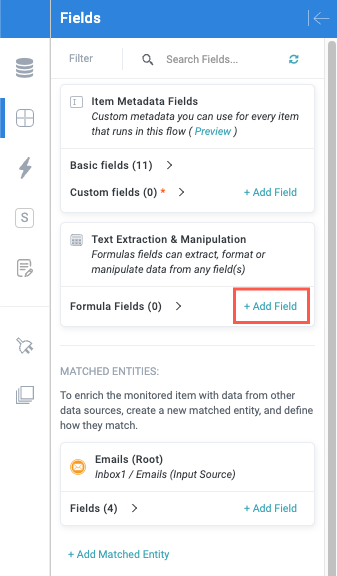
From the module builder screen, select the Fields button on the module builder toolbar. The Fields panel displays.

In the Text Extraction & Manipulation card, select + Add Field. The Field Settings screen displays.
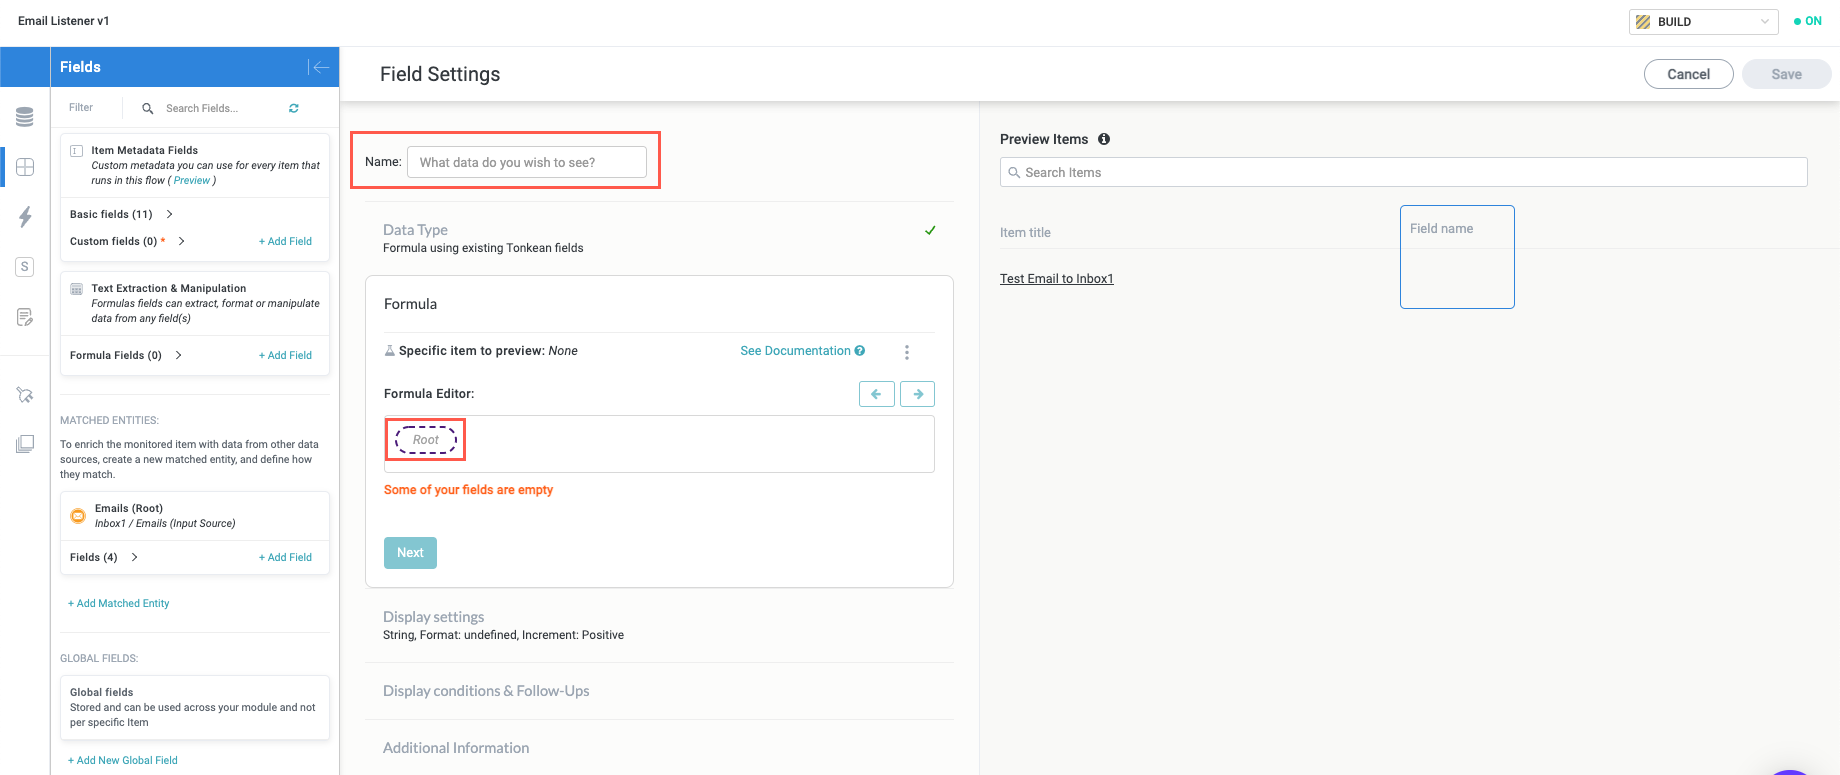
Enter a title for the field in the Name field, then locate the Formula Editor section and select Root.
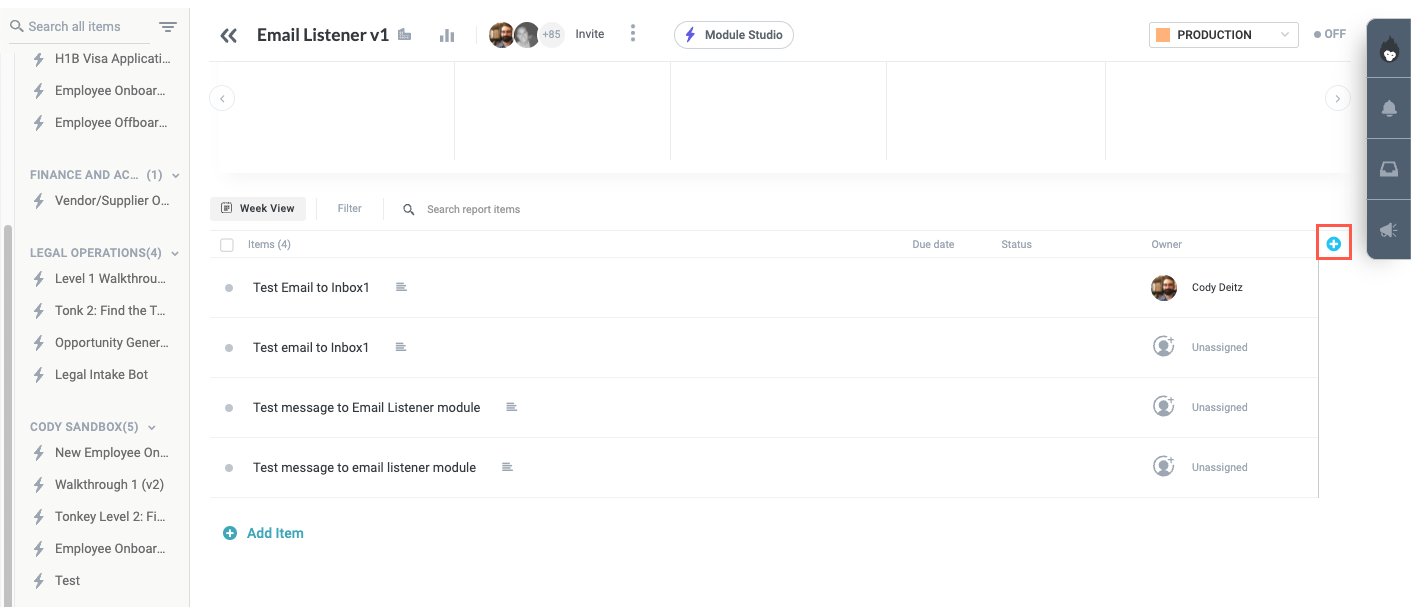
Create a Formula from the Business Reports Screen
From the Business Reports screen, select the add field icon,
 .
.
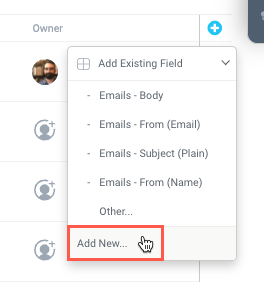
In the dropdown, select Add New. The Field Settings screen displays.
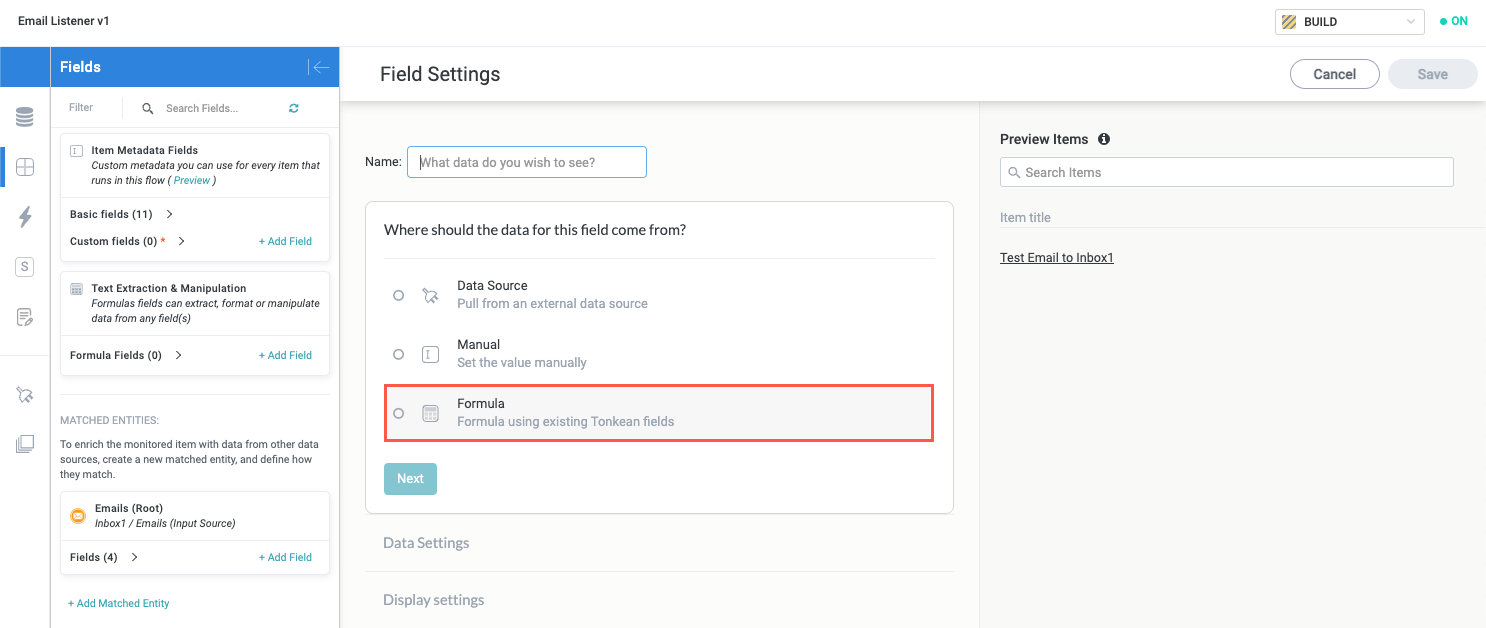
In the Where should the data for this field come from? section, select Formula.
Enter a title for the field in the Name field, then locate the Formula Editor section and select Root.
Write a Formula Expression
On the Field Settings screen, select the Root button. The Root menu displays. This menu allows you to select from a list of all available formulas, enter text manually, or select an existing field to use as a variable:
Select
 to search for or select from the list of all available formulas. This option displays by default after selecting Root.
Select
 to manually enter a static value (for example, text, number, or date).
Select
 to search for or select from a list of existing fields.
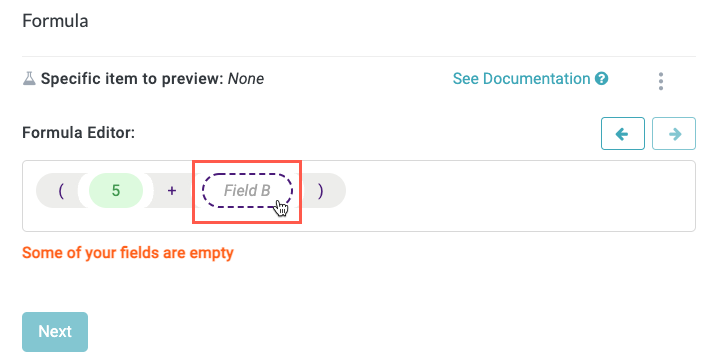
Select the fields in the Formula Editor to write and modify your formula. The options available and the required fields can vary depending on the formula you select and values you choose to include.
See Available Formulas for detailed information on formula syntax and examples.
Select Next to move on to the Display Settings section.
The options available in the Display Settings section vary depending on your selections in the Data Settings section, but for each option, you can select + Add field label to enter a brief and descriptive label for your field. When finished, select Next to move on to the Display Conditions & Follow-Ups section.

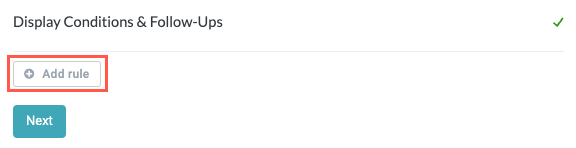
If relevant, select Add Rule to create a rule that determines the display condition and status of the field, based on a specified value. These conditions are useful when you need a module to display differently based on the particular value entered for the field.
Use the conditions dropdown to set the desired condition. For example, if you want to use color to draw attention to a value greater than zero on a business report, you can set the condition to Greater than and the color to Green; this causes the color to change to green when the value is greater than zero. The default value is Equal to and the default color is Green.
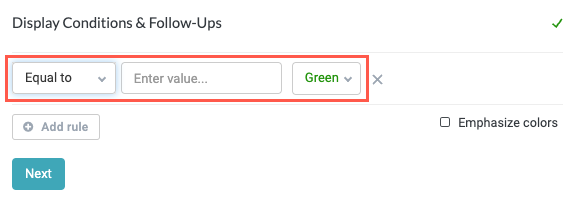
For more information about the conditions and logical operators, see Conditions.
When finished, select Next to continue to the Additional Information section.
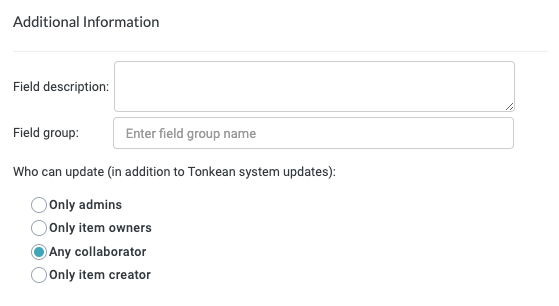
In the Additional Information section, there are several configurable fields:
Field description - Enter a brief description of the field, if relevant. While the field label you create should be as clear and unambiguous as possible, this description can still be helpful for forms that contain multiple similar fields of where some ambiguity is unavoidable. This description displays beneath the field when used on a form.
Field group - Enter a name to assign this field to a field group. This is designed for advanced use cases whereby you can use entire groups of related fields, identified by this field group name, in formulas and other operations.
Who can update - Select who can populate or update the field value. This is an important permissions setting at the individual field level, because it determines who can change a field value after it has been entered.
Tonkean is always able to update field values through your workflow business logic (for example, automatically updating a field value with an Update Field action).
It is common to use a combination of these settings across different fields on a single item, depending on your use case and specific needs. For example, if you're including several manual fields on an interface that is the intake source for a module, you may want some fields to be editable only by the requester completing the form while other fields (such as a status field) to be editable only by the reveiwer who is processing or approving the request.
Only admins - Only solution administrators can update the field value. Select this option for fields whose values should never be updated except in rare cases, such as correcting errors.
Only item owners - Only users that have been assigned an item in the relevant item interface can update the field value.
By default, there is no owner assigned to an item, so setting this field to Only item owners without assigning a user to that item would result in the field value being locked to all users.
Any collaborator (default) - Anyone can update this field value. Select this option to allow anyone, including external collaborators, to update the field value. Because manual fields are so commonly used for externally-facing forms, this is the default selection.
Only item creator - Only the user that entered the value in the field (for example, the user that completed the form that contains the field) can update the field value. When using a field on a form, select this option to ensure that only the person who completed and submitted the form can update the field value to protect the integrity of the data.
When finished, select Save in the upper right.
Conditions
Where formulas define the ways that one or more fields are calculated or manipulated, conditions add another layer of logic that helps further define the interaction between different fields or data sources.
For example, you may want to compare one field against another, extract a string from a data source only when it contains certain words, or any number of other operations. Formulas and conditions used together provide an almost endlessly customizable way to manipulate and understand data. Below, each of these conditions is defined:
Logical Conditions
Equal To | Being of the exact same value compared to the specified value. This condition supports numbers, text, dates, and most other field types. Examples:
|
Not Equal To | Being any value that differs from the specified value. This condition supports numbers, text, dates, and most other field types. |
Like | Being of a similar value compared to the specified value. This condition generally ignores hyphens and other minor differences, and generally functions like a Match condition set to Strict. This condition supports numbers, text, dates, and most other field types. The Like condition is case-sensitive. For example, setting Examples:
For some values, the difference between the presence of certain punctuation is substantially different from the same value without that punctuation, and the Like condition takes this into account. For example, |
Equals One Of | The value of the item or field (left side) exists in the field provided (right side). |
Not Equals One Of | The value of the item or field (left side) does not exist in the field provided (right side). |
Not Like | Being of a dissimilar value compared to the specified value. This condition ignores hyphens and other minor differences, and generally functions like a Does Not Match condition set to Strict. The Not Like condition is case-sensitive. For example, setting |
Match | The value matches the specified value, depending on the level of matching. This condition is not case-sensitive. There are two levels of matching based on the desired looseness or strictness (spelling and grammar mistakes, nicknames, acronyms). Regardless of which level of matching you choose, the Match condition always checks each phrase individually against the specified value; if one phrase matches the specified value, it is considered a match. The level of matching largely determines how many mistakes are tolerated while still considering a particular phrase a match. Levels of matching:
|
Does Not Match | The value does not match the specified value. This condition is not case-sensitive. There are multiple levels of matching based on the desired looseness or strictness (spelling and grammar mistakes, nicknames, acronyms). See above for level definitions. |
Is Empty | The value does not have any contents (is null). |
Is Not Empty | The value has any content (is not null). |
Numerical Conditions
Between | Selects values within a given range. The values can be numbers, text, or dates. Note that “Between” is inclusive: beginning and end values are included. |
Greater Than | When a quantity or number is bigger or larger than the second quantity or number. |
Lesser Than | When a quantity or number is smaller or lesser than the second quantity or number. |
Increased By | When your original value increases by an exact amount, or less than or more than a specific amount. |
Decreased By | When your original value decreases by an exact amount, or less than or more than a specific amount. |
Date and Time Conditions
In the Past | Takes the exact date and time when the trigger runs, and, based on the value you input, calculates (subtract) whether the criteria matches or not. Possible conditional values are: days, hours, and minutes. Example: Close-Date = 1/23/2020 Timestamp of Trigger = 1/25/2020 Condition = {} in the past 4 days Result = Trigger will run because it’s only been 2 days since the trigger ran and the date of the Close-Date |
In the Next | Takes the exact date and time when the trigger runs, and, based on the value you input, calculates (add) whether the criteria matches or not. Possible conditional values are days, hours, and minutes. Example: Close-Date = 1/27/2020 Timestamp of Trigger = 1/25/2020 Condition = {} in the next 4 days Result = Trigger will run because the Close-Date is within the next 4 days |
Before | Takes the date field you enter and determines if that date is before the specified value. The conditional value is a hard-coded date in mmm-dd-yyyy format. |
After | Takes the date field you enter and determines if that date is after the specified value. The conditional value is a hard-coded date in mmm-dd-yyyy format. |
In This | Takes the date field you enter and determines if it falls within the parameters of the selected conditions. Possible conditional values are week, month, quarter, and day. |
Older Than | Takes the exact date and time when the trigger runs, and, based on the value you input, calculates whether the criteria matches or not. Possible conditional values are days, hours, and minutes. Example: Close-Date = 1/23/2020 Timestamp of Trigger = 1/25/2020 Condition = {} older than 4 days Result = Trigger will not run because it’s only 2 days old |
Further Than | Takes the exact date and time when the trigger runs, and, based on the value you input, calculates whether the criteria matches or not. Possible conditional values are days, hours, and minutes. Example: Close-Date = 1/30/2020 Timestamp of Trigger = 1/23/2020 Condition = {} further than 4 days Result = Trigger will run because 1/30/2020 is further than 4 days away from 1/23/2020 |
Is Past | A binary condition that takes the provided date value and determines if the specified value is in the past, based on the time the trigger runs. This condition uses the exact date and time of when the trigger runs. |
In the Future | A binary condition that takes the provided date value and determines if the specified value is in the future, based on the time the trigger runs. This condition uses the exact date and time of when the trigger runs. |
Available Formulas
Follow the links below for detailed information about each type of formula, including the specific format and examples, where relevant: