Update a Block
This custom action enables makers to update an existing block of any type in their Notion data source.
For additional details regarding the Notion API reference for this action, see Update a block in the Notion developer documentation.
Configure the Request
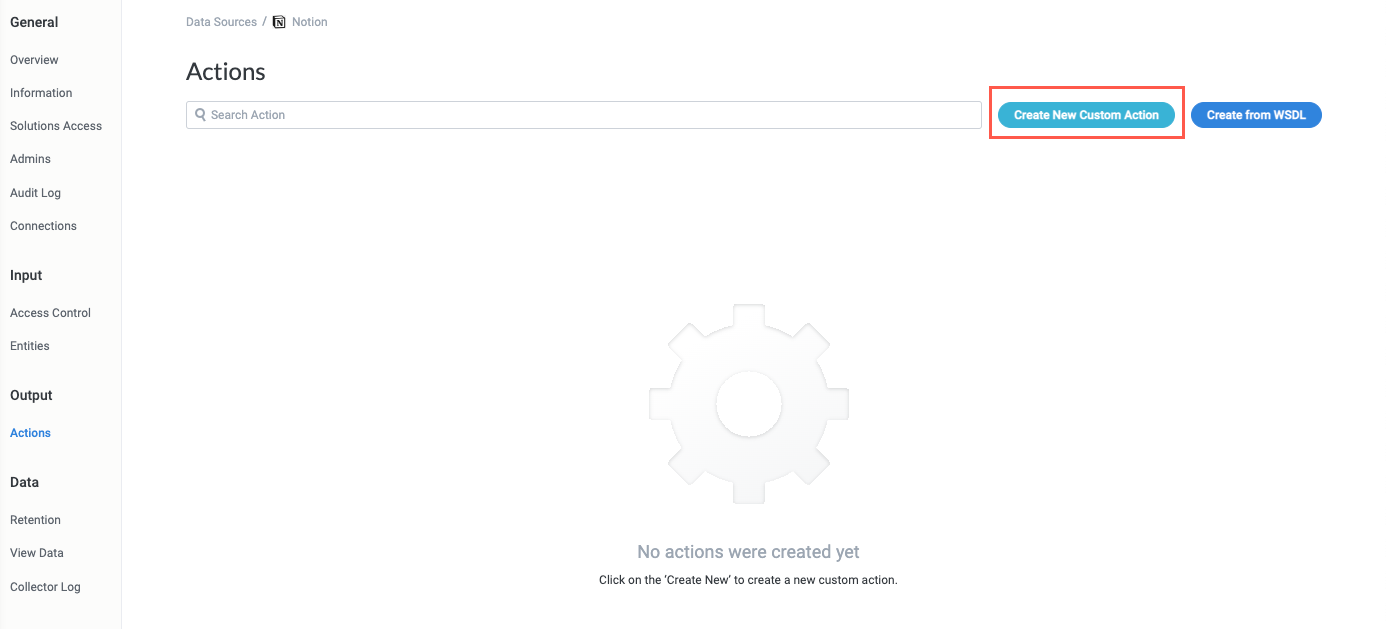
In Tonkean, navigate to your Notion data source and select Actions in the data source configuration panel. The Actions screen displays.

Select Create New Custom Action in the upper right. The New HTTP Custom Action window displays.
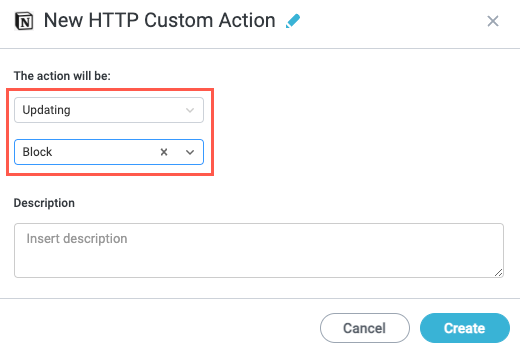
In the The action will be field, select the first dropdown and select Updating, then select the second dropdown and select Block. When finished, select Create. The window closes and the Custom Action General screen displays.
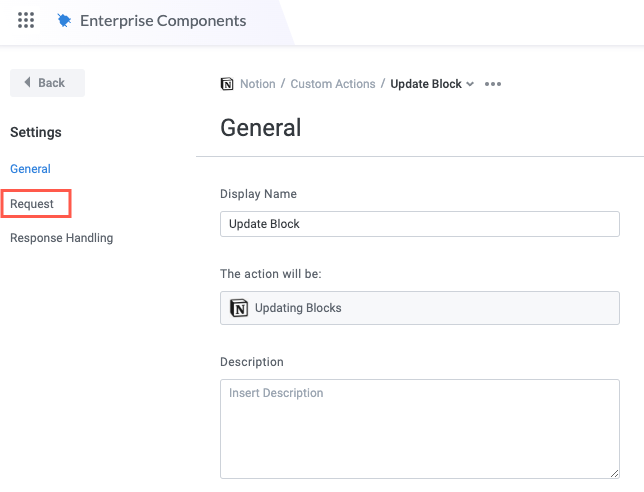
Enter a unique Display Name for the action. This is the title of the action that displays to other makers.

In the Settings panel, select Request. The Request screen displays.
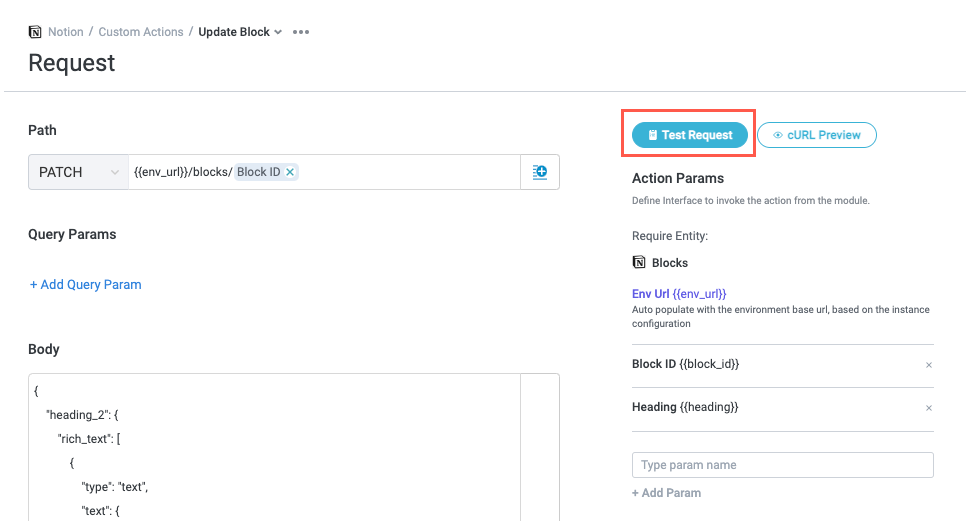
In the Path field, select the method dropdown and select PATCH, then enter the endpoint URL:
v1/blocks/[block_id]
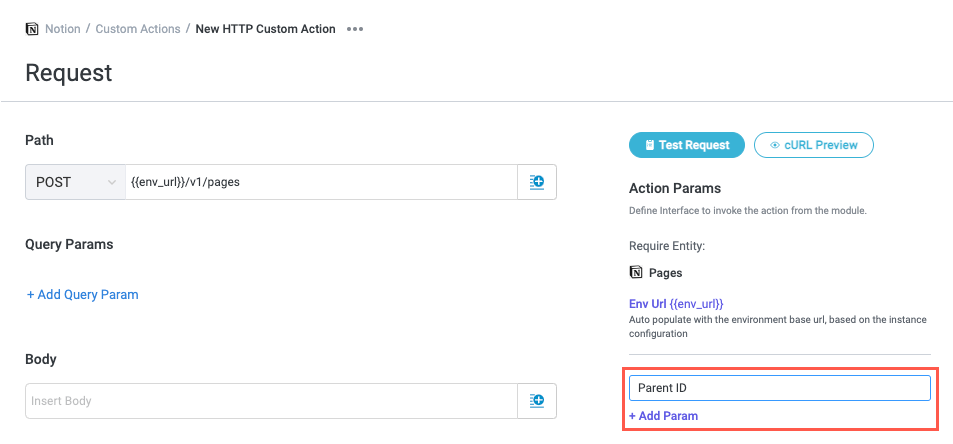
Create an action param for the block ID. Enter "Block ID" in the available field in the Actions Params section, then select + Add Param.

Replace the placeholder
[block_id]value in the endpoint with the newly-created action param. Remove[block_id]in the endpoint, then select the insert field button, , and choose the Block ID field.
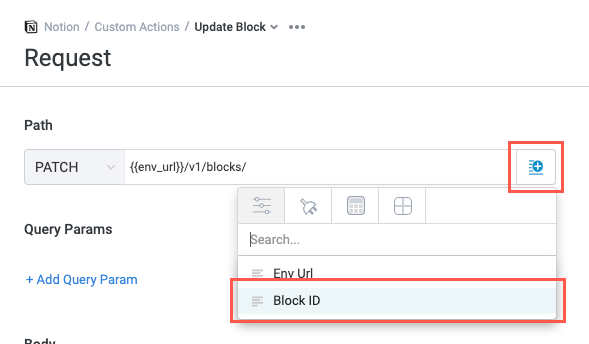
The complete endpoint path should display as follows:

In the Body field, enter the request body with the block you want to update.
The parent element in the example below (
heading_2) is specific to the type of block you want to update. Refer to the Notion API documentation for information regarding the specific block type you want to update.{ "heading_2": { "rich_text": [ { "type": "text", "text": { "content": "" } } ] } }For each required dynamic value, create a new param and include it in the body. For this example of the action, only a
Headingparam is required.To create a param, follow the steps below:
In the Actions Params section, enter a param name in the available field, then select + Add Param.
Repeat step #1 for each param you want to create.
For each value where you must include a param, place your cursor between the quotes, then select the insert field button,
and choose the action param to insert.
When finished, the Body field should appear as in the image below, with the appropriate params included:

In the Headers section, select + Add Header. A new Header Name and Header Value fields display.
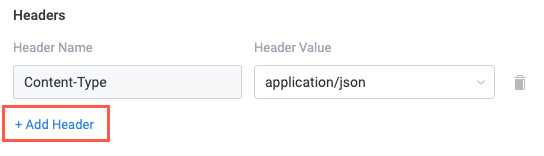
Enter the following values:
Header Name -
Notion-VersionHeader Value -
2022-06-28

The request is complete and ready for testing.
Test the Request
Select Test Request. The Test Action window displays.
Enter values for each action param:
Block ID - The ID for the block to update.
The block ID must be specific to the block object type you want to update. That is, if your request body includes a
paragraphobject type, the corresponding block ID must be that of a paragraph block.Heading - The new heading value.
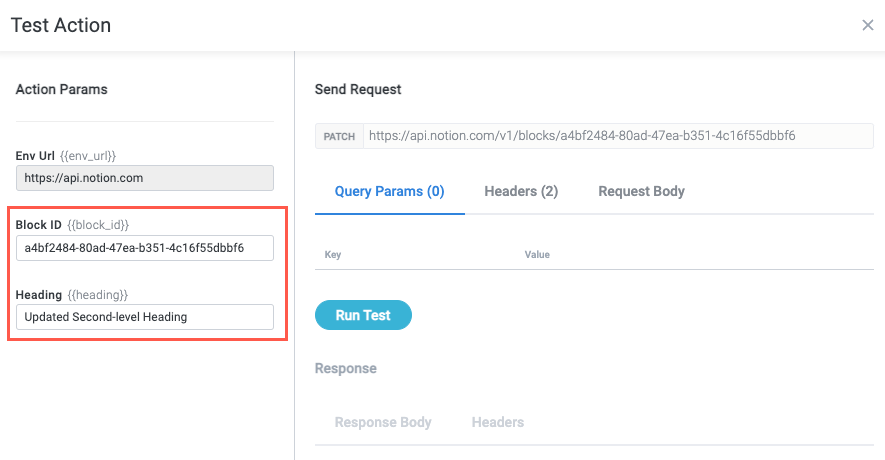
Select Run Test. The request runs with the param values you provided and the Response section populates, including a notification with the HTTP response code. The Response Body and Headers tabs in the Response section display the response from the endpoint.

If the test is successful, a 200 Success response code displays.

If you don't receive the expected response, or your test request fails, close the Test Action window and return to the Request screen to troubleshoot the problem.
Some common errors with Notion custom actions are caused by a particular entity not being shared with Tonkean. In Notion, navigate to the relevant entity (in this case, a page) and select Share in the upper right. Ensure the Tonkean integration has edit permissions.
If the test is successful and you receive the response you expect, close the Test Action window and select Save Action Changes in the upper right of the Request screen.
The Update a Block custom action is complete and ready to use in a module.