Create a New No-Code Data Source
Before you create a new no-code data source, locate the API or developer documentation for the application or service you want to connect to Tonkean. Ensure the application has an API that supports the collection of the entities you're interested in and supports an authentication method that's acceptable for your organization (that is, security protocol may require that you use OAuth instead of an API token, for example).
When you have confirmed the API for the application is sufficiently robust and supports the features you need, follow the steps below to create a new no-code data source.:
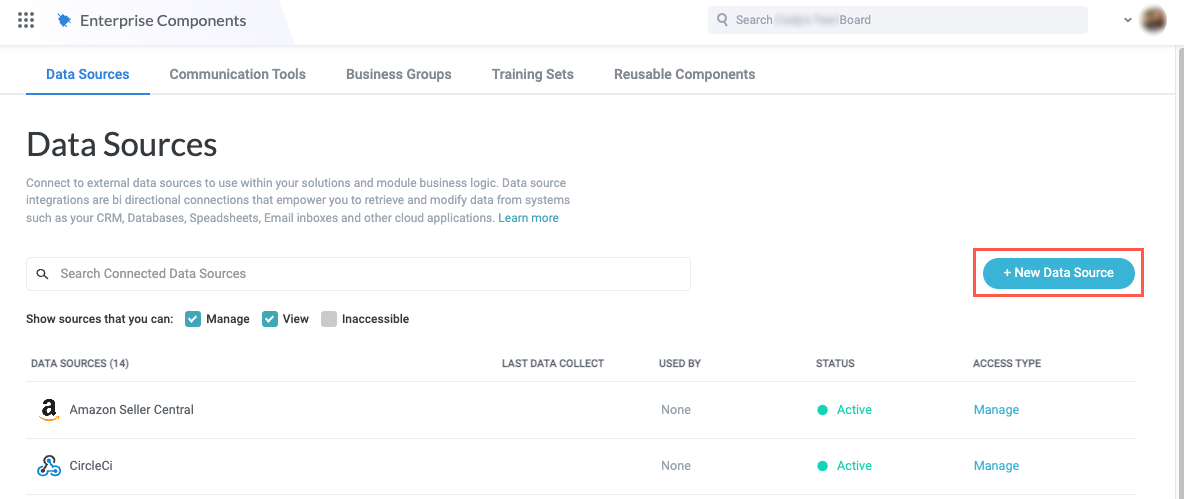
Select the main nav icon,
 , in the upper left and select Enterprise Components. The Enterprise Components screen displays.
Select + New Data Source in the upper right.
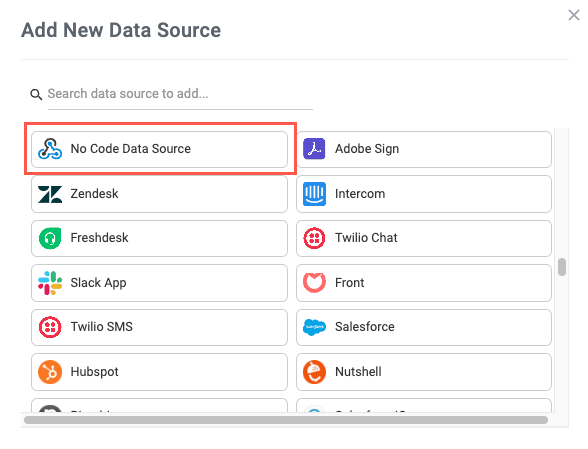
Select Cloud Application from the dropdown. The Add New Data Source window displays.

Scroll down or enter "No-Code Data Source" in the search field, then select No-Code Data Source. The New No Code Data Source Connection window displays.
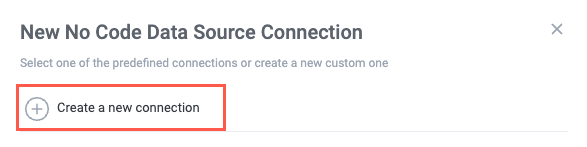
Select Create a new connection. The Set Up Data Source window displays.
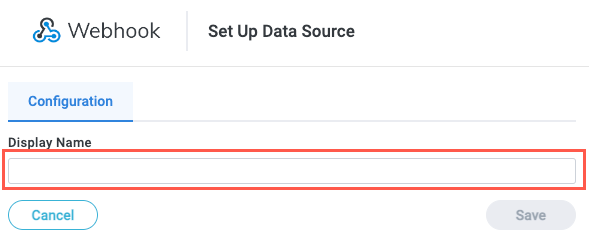
Enter the Display Name for the data source. This is the name that displays for other users in your organization. When finished, select Save. The data source configuration screen displays.
We recommend simply using the name of the application you're connecting. For example, if you're creating a no-code data source for Zluri, name the data source "Zluri".
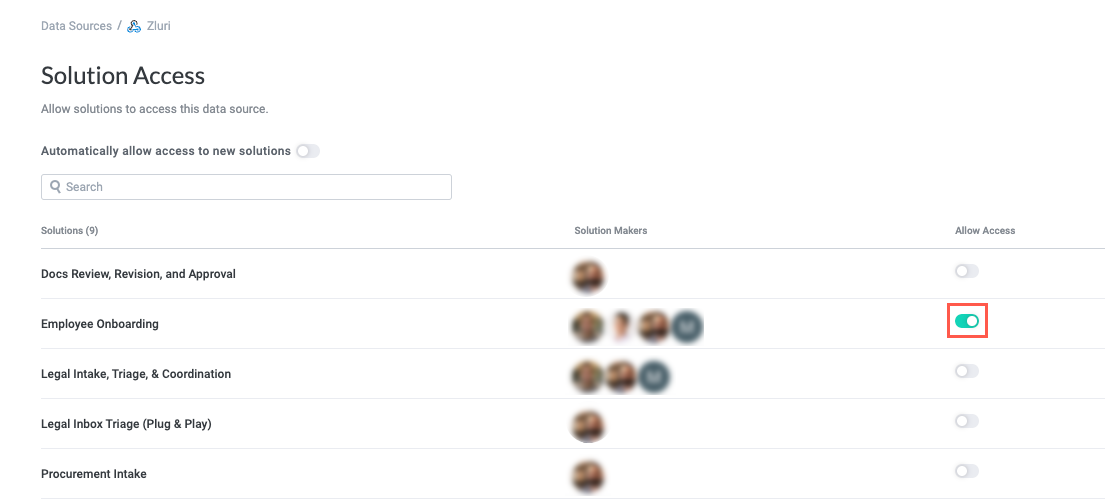
To allow makers to use the data source once it's ready, you must allow solution access to it. In the data source configuration panel, select Solutions Access. The Solutions Access screen displays.
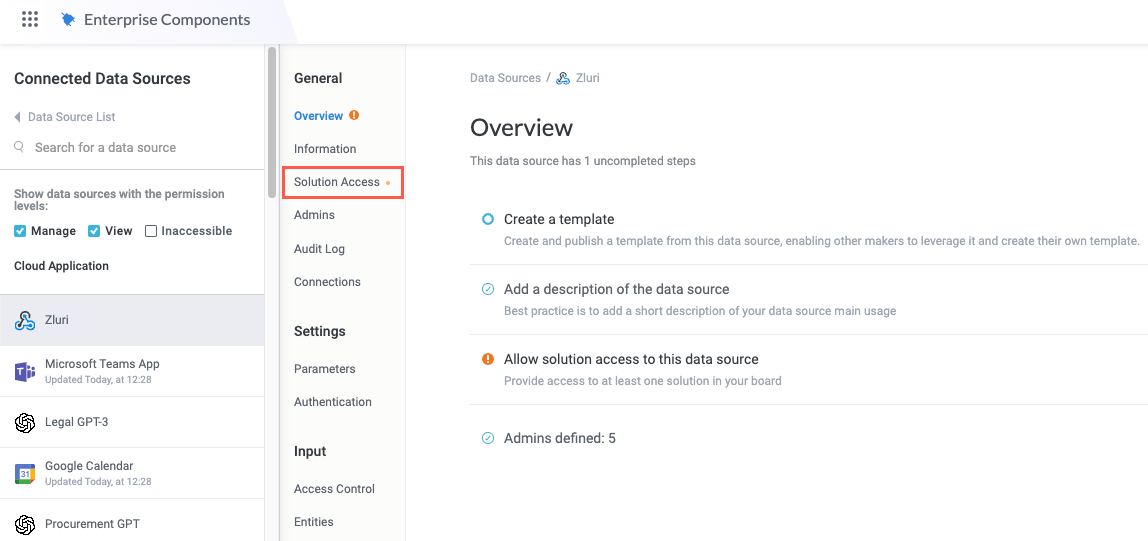
Select the toggle that corresponds to the solution you want to have access to the data source.
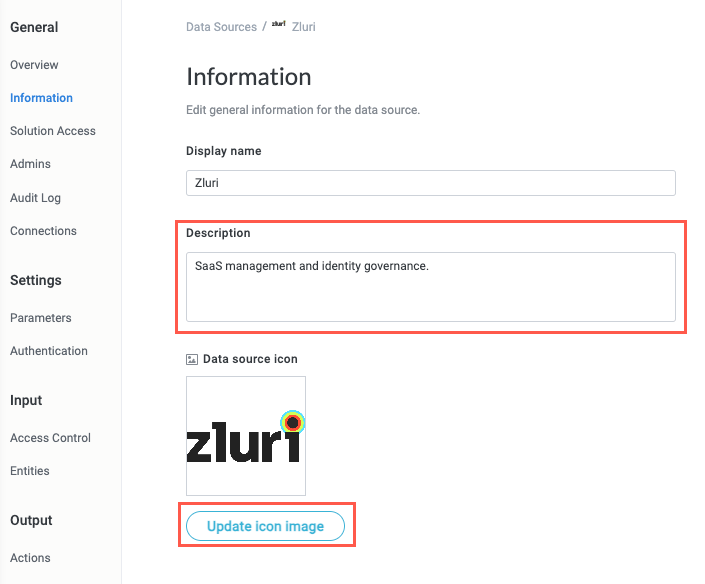
To help makers locate your data source, we recommend adding an icon and including a description of the data source. In the data source configuration panel, select Information. The Information screen displays.
Enter a Description, then select Upload icon image to include an icon for the application you're connecting.
Your new no-code data source is created and is ready for configuration. Next, add parameters that can be used throughout the data source configuration.