Use Forms in a Module
Create forms and update forms both play important roles in many processes and are often combined to create a seamless experience for process contributors. However, because each form type plays a different role in the module workflow, the process for using these forms differs. Additionally, there are some special considerations when using the different types of update forms: update fields, collect inner items, and upload files.
The sections below provide instructions for using each form type in a module, as well as additional guidance for getting the most out of forms in your workflows.
Use a Create Form as an Input Source
One of the simplest ways to use a form in a module is as an intake source. With the use of a create form, a process contributor fills out and submits the form, generating an item in the module and starting the module workflow.
To use a create form as an intake source, follow the steps below:
Create a new module.
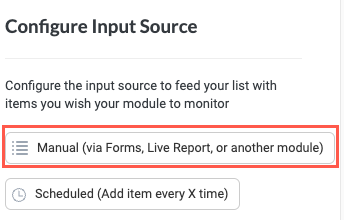
Select the Input Source tile. The Configure Input Source panel displays.
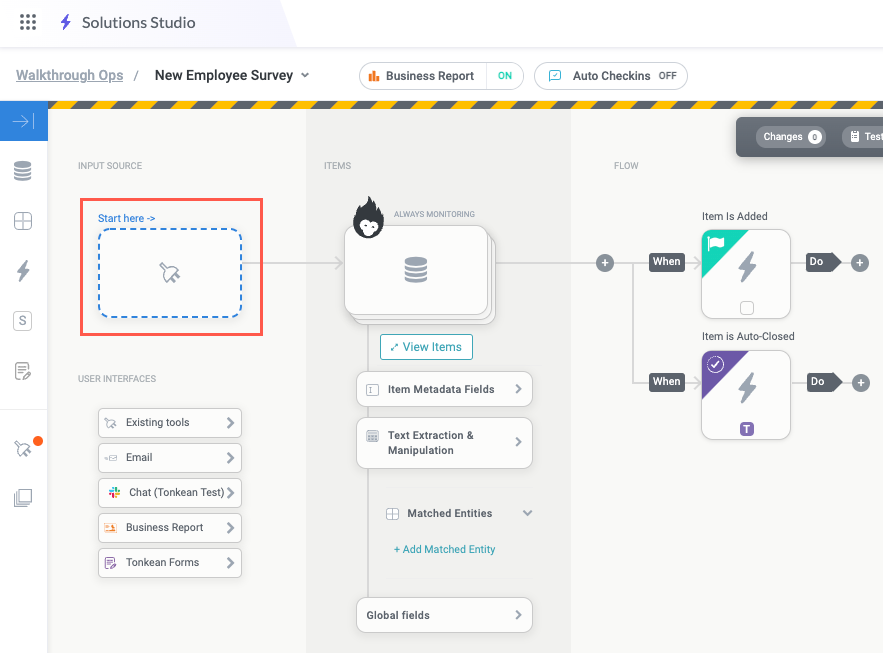
On the Configure Input Source panel, select Manual, then select an empty point outside the panel to close the Configure Input Source panel.
Select the Item is Added trigger block. The Item is Added configuration panel displays.
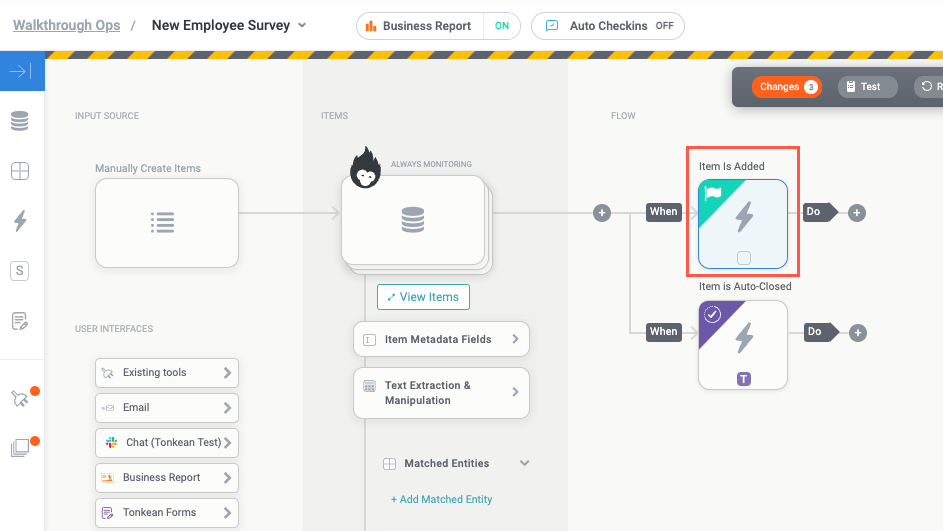
To configure the module to monitor a create form as an intake source, you must change this initial trigger to a Form Filled trigger. Select the edit icon,
 , and select Form Filled in the Change Type To dropdown. The panel changes to a Form Filled panel.
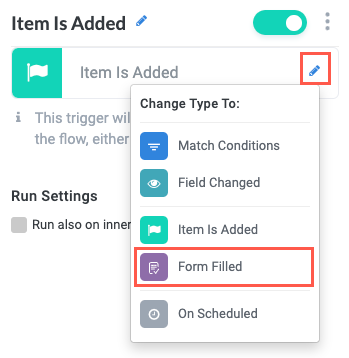
We recommend updating the name of the Form Filled trigger to something specific, ideally something that includes the name of the create form the module is monitoring.
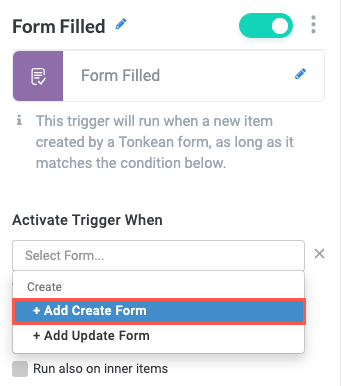
In the Activate Trigger When section, select the Select Form dropdown. If you already have a create form you want to monitor, select that form. Otherwise, select + Add Create Form. The Create Form screen displays.
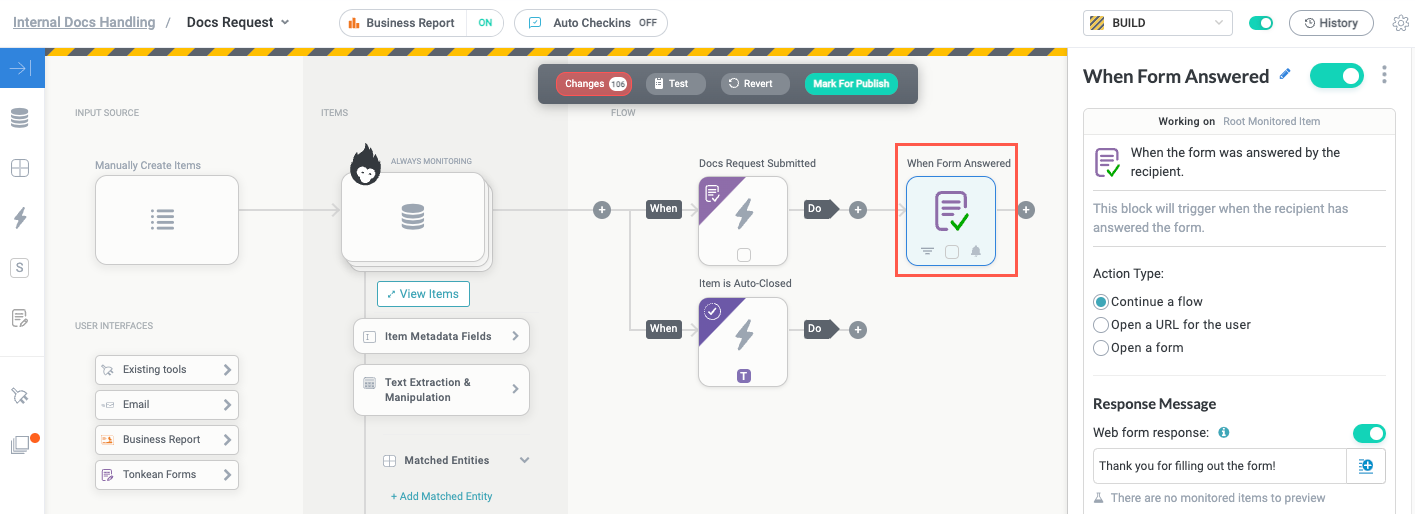
Configure the new update fields create form as desired, then return to the module builder screen. Note that once you select a create form to monitor in the Form Filled trigger, a new When Form Answered action is created. This action follows all Form Filled actions and allows you to define how the workflow proceeds after the form is filled and submitted.
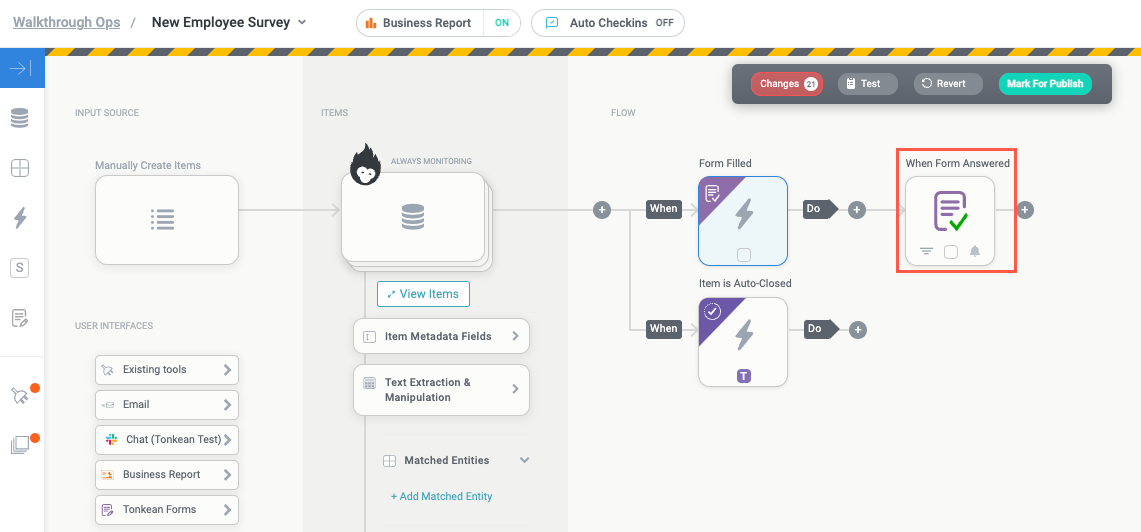
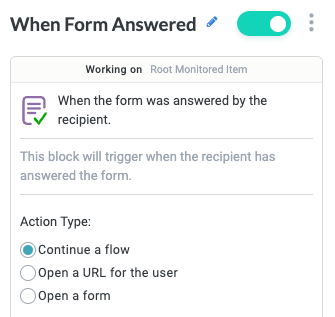
Select the When Form Answered action. The When Form Answered panel displays.
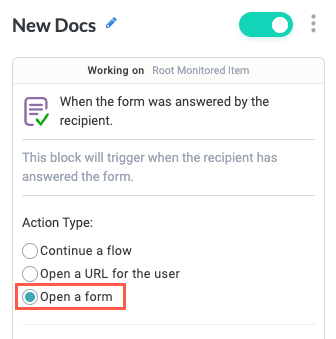
Configure the When Form Answered action as desired. The three options in the Action Type section specify how the workflow proceeds:
Continue a flow - Proceed to the actions that follow the When Form Answered action. This option allows you continue the workflow, adding whatever logic is needed in the module.
Open a URL for the user - Open a webpage at a specified URL. This option allows to insert fields to dynamically provide a web address or hard-code a web address users should navigate to.
Open a form - Open another form for users to fill and submit. Use this option to create a sequence of two or more forms. Create forms are generally followed by update forms that add to or modify the fields in the initial create form.

Add a Send Update Form Action
Update forms are used as part of actions in the module, either as Send Update Form actions or as a When Form Answered action, continuing a series of forms.
Use an Update Fields Form
The update fields type of update form allows users to add or update fields in an existing item.
To use an update fields form in a module, follow the steps below:
Select the plus icon,
 , to add an action block in the relevant location. The Action Block Panel displays.
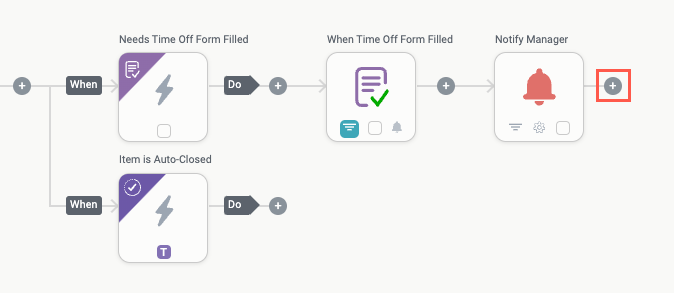
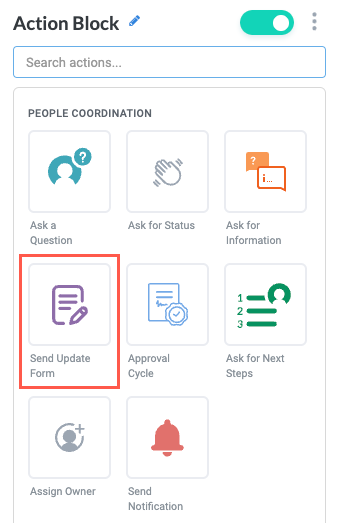
Select Send Update Form in the People Coordination section. The Send Update Form panel displays.
Select the edit icon,
, and rename the action with a specific title. We recommend including the name of the update form you're sending.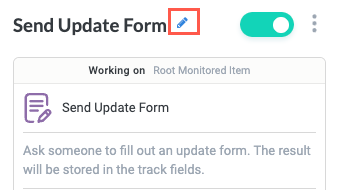
Configure the action as desired, selecting the appropriate update fields type of update form.
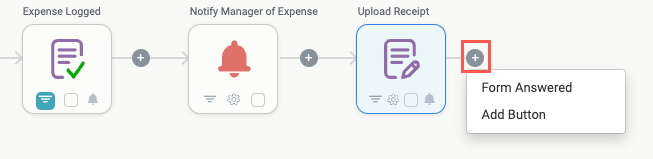
When finished configuring the action, select the plus icon after the Send Update Form action. A dropdown displays that provides two options:
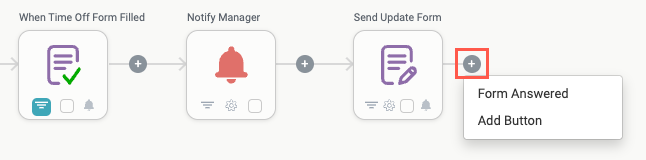
Form Answered - Add a When Form Answered action that allows you to specify how the workflow proceeds once the form is filled and submitted.
Add Button - Add a button that displays to the user receiving the notification from the Send Update Form action. This button allows you to specify how the workflow proceeds based on the button being selected.
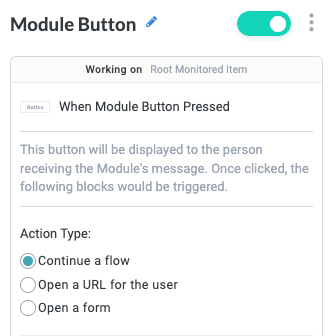
Use either the When Form Answered or Module Button action to continue the workflow as desired.
Use a Collect Inner Items Form
Collect inner items forms are a type of update form that allows users to add inner items to an existing item. These inner items are child items that are directly related to or are contained with an item.
To use a collect inner items form in a module, follow the steps flow:
Select the plus icon,
, to add an action block in the relevant location. The Action Block Panel displays.Select Send Update Form in the People Coordination section. The Send Update Form panel displays.
Select the edit icon,
, and rename the action with a specific title. We recommend including the name of the update form you're sending.Configure the action as desired, selecting the appropriate collect inner items update form.
When finished configuring the action, select the plus icon after the Send Update Form action. A dropdown displays that provides two options:
Form Answered - Add a When Form Answered action that allows you to specify how the workflow proceeds once the form is filled and submitted.
With collect inner items forms, this option allows you to add an Add Monitor trigger to monitor the inner items submitted on the form. This is necessary to use these inner items in your workflow.
Add Button - Add a button that displays to the user receiving the notification from the Send Update Form action. This button allows you to specify how the workflow proceeds based on the button being selected.
Once there is a When Form Answered action with its Action Type set to Continue a flow, select the plus icon that follows the When Form Answered action. A dropdown displays that provides two options:
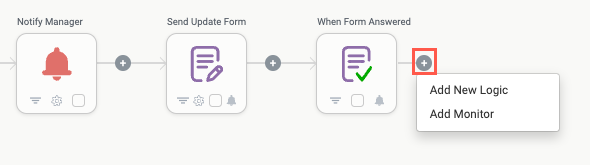
Add New Logic - Create a new action block and select an action.
Add Monitor - Add a Monitor Items trigger that continues the workflow for each new inner item. Ensure Continue the flow on is set to Each action item to run each inner item through the module.
This trigger is required to make use of the inner items from a collect inner item form.
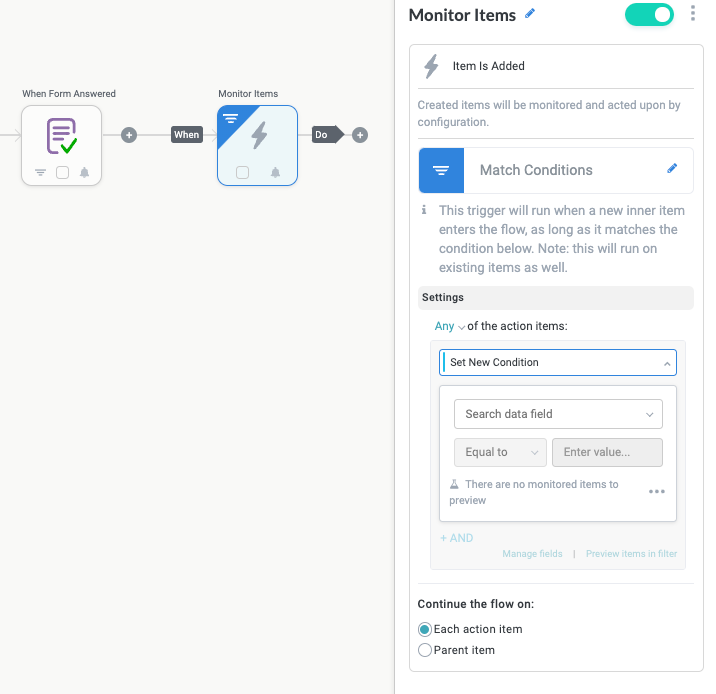
Set conditions for the inner items as desired, then select the plus icon after the Monitor Items trigger to contine the module workflow.
Use an Upload File Form
Upload file forms are a type of update form that enables users to upload files up to 15mb that can then be used in your module workflow. Much like the collect inner items form, each uploaded file becomes an inner item to the root item.
To use an upload file form in your module, follow the steps below:
Select the plus icon,
, to add an action block in the relevant location. The Action Block Panel displays.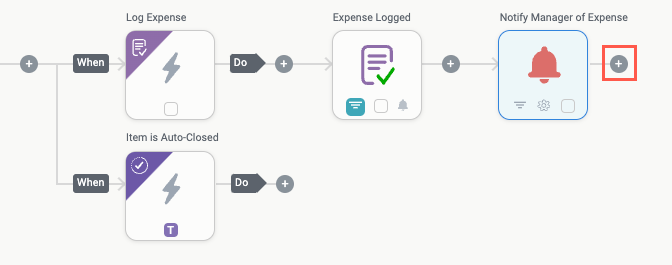
Select Send Update Form in the People Coordination section. The Send Update Form panel displays.
Select the edit icon,
, and rename the action with a specific title. We recommend including the name of the update form you're sending.Configure the action as desired, selecting the appropriate upload file update form.
When finished configuring the action, select the plus icon after the Send Update Form action. A dropdown displays that provides two options:
Form Answered - Add a When Form Answered action that allows you to specify how the workflow proceeds once the form is filled and submitted.
Select Continue a flow to complete the form logic and continue with other actions.
Add Button - Add a button that displays to the user receiving the notification for from the Send Update Form action. This button allows you to specify how the workflow proceeds based on the button being selected.
Select Continue a flow to complete the form logic and continue with other actions.
Once there is a When Form Answered action with its Action Type set to Continue a flow, select the plus icon that follows the When Form Answered action. A dropdown displays that provides two options:
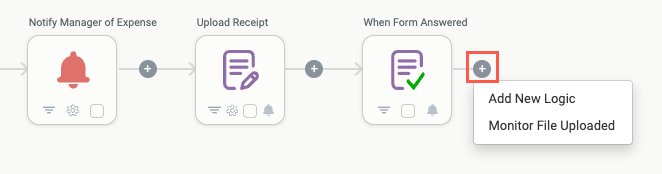
Add New Logic - Create a new action block and select an action.
Monitor File Uploaded - Add a Monitor File Uploaded trigger that continues the workflow for each new inner item (that is, each uploaded file). Ensure Continue the flow on is set to Each action item to run the inner items through the module.
This trigger is required to make use of the uploaded files from an upload file form.
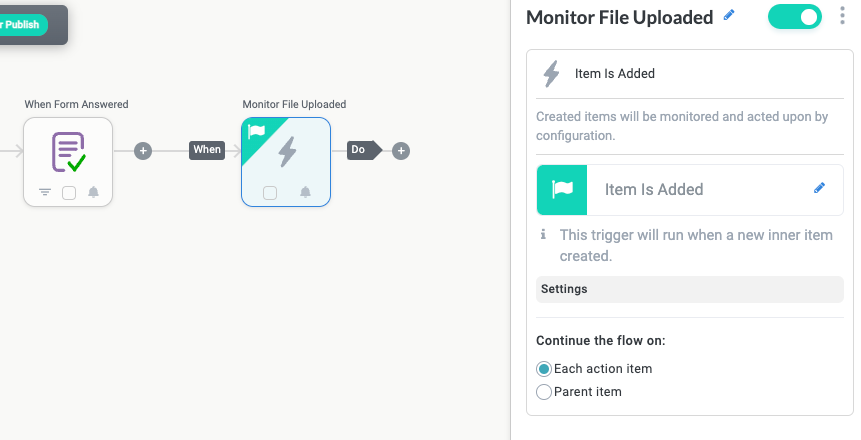
Set conditions for the inner items as desired, then select the plus icon after the Monitor File Uploaded trigger to continue the module workflow.
Use Conditions to Create Series of Forms
Forms are often designed in a series, with different follow-up forms being sent to a user depending on their selections.
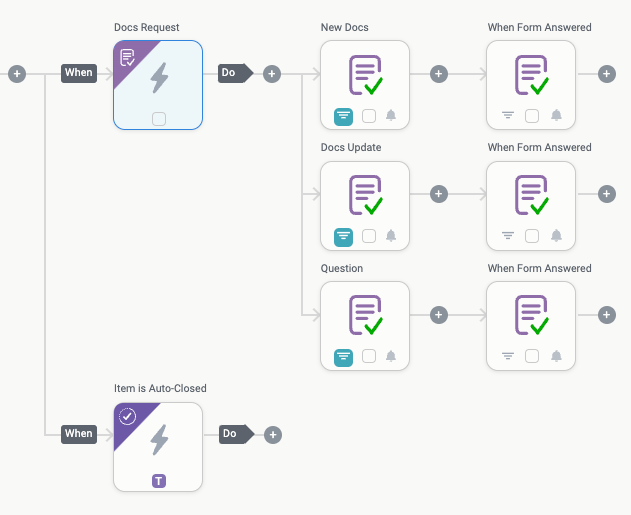
The use cases and complexity for form series range significantly. Some form series can be simple, with one form presenting a multiple-choice question and a follow-up form sent that corresponds with each response. This basic structure is displayed in the example below, where an initial create form asks internal users which type of request they would like to send to the documentation team: for new content, updates to existing content, or a just general question. A different update form is sent for each option:
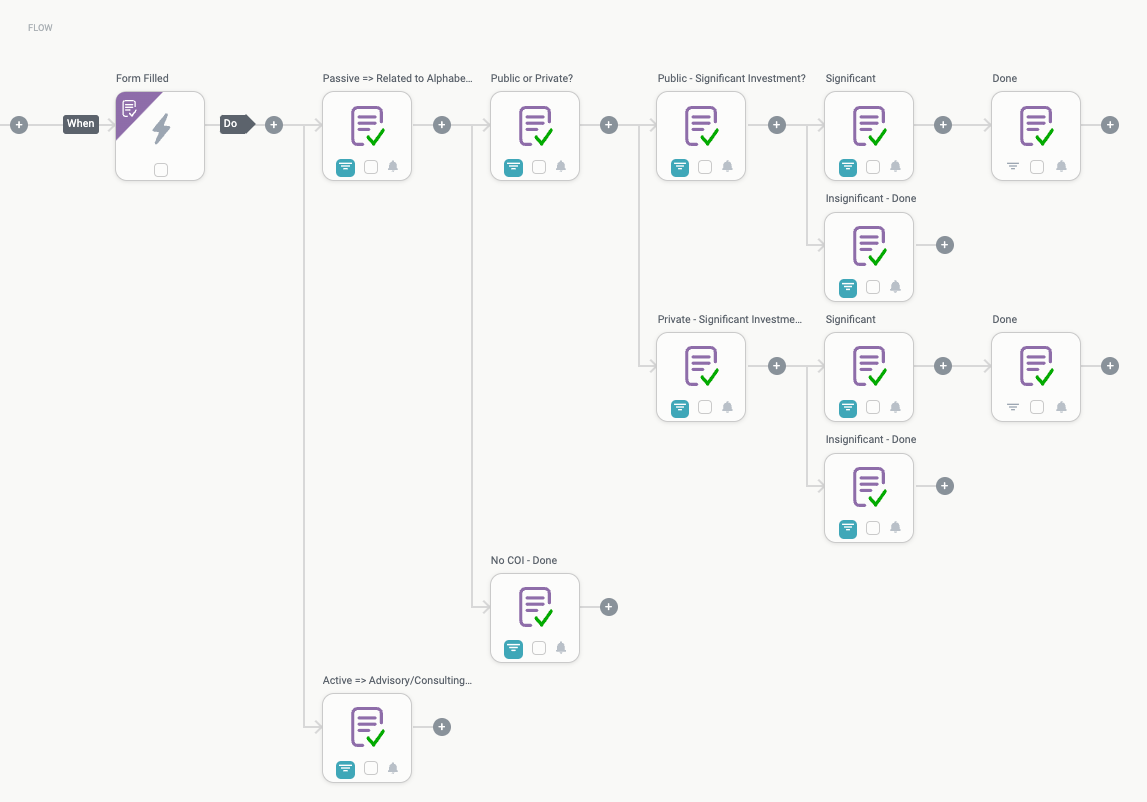
Alternatively, form series can be very complex, containing numerous branches of forms, each with their own conditions and unique logic. At this level, forms can be used to create elaborate automated experiences, not unlike chat bots, where the user's interaction with the forms determines one of numerous potential pathways.
Most form series are somewhere between these two examples, but what both of these examples share is their use of conditions to dictate a user's progression through the form series. Conditions enable you to control which actions are activated in a way that corresponds with a user's form selections.
To create a series of forms using conditions, follow the steps below. To demonstrate how to use conditions to create form series, we're creating the example series above featuring a documentation request.
Before you create the logic for a form series in your module, outline the basic workflow for your series. This helps ensure you know what forms and fields you need for each part of the process.
Create the forms you need for each part of the series, as well as the fields that contain the information you want users to provide. For this series, we create four forms:
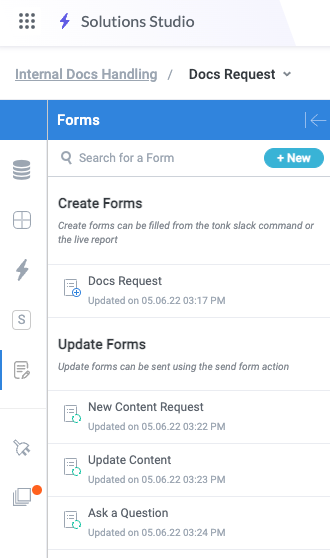
The "Docs Request" create form asks users which type of request they would like to send to the documentation team, and each update form corresponds to one of the three selections available in the "Docs Request" form.
After configuring the initial trigger, "Docs Request Submitted" to monitor the "Docs Request" create form, select the plus icon,
, after the initial trigger. A dropdown displays that provides two options: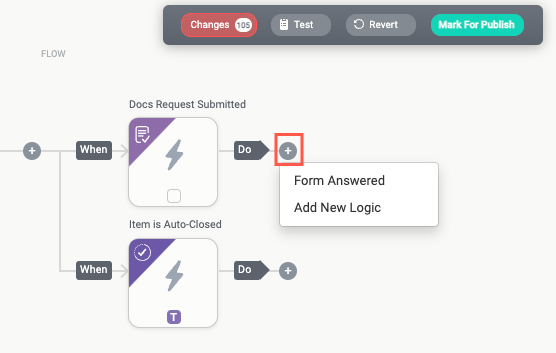
Form Answered - Add a When Form Answered action that allows you to specify how the workflow proceeds once the form is filled and submitted.
Add New Logic - Create a new action block and select an action.
Select Form Answered. A When Form Answered action is created and the When Form Answered panel displays.
Select the edit icon,
, and rename the When Form Answered action to the name of the update form you will send based on the first possible response. Because the first option in the "Docs Request" create form is to request new documentation, we name the this action "New Docs".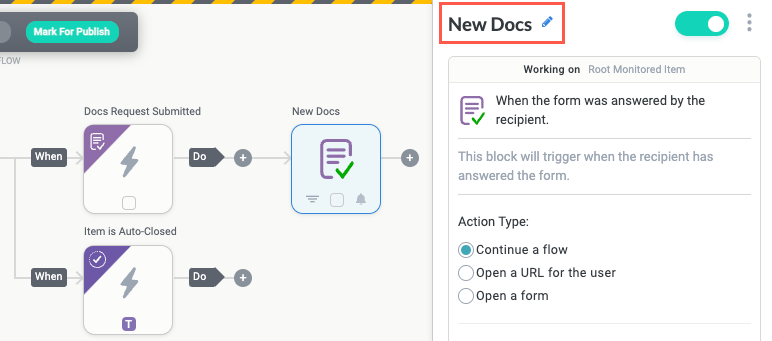
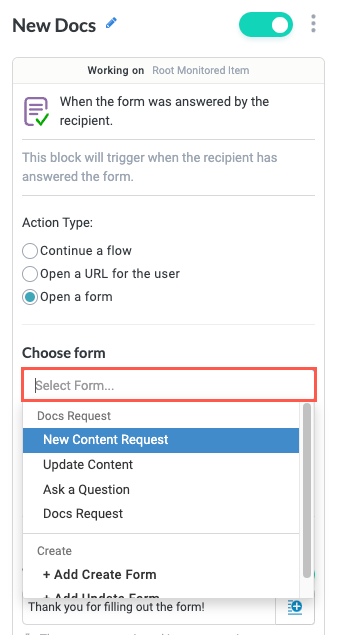
In the Action Type field, select Open a form. The Choose from section displays beneath the Action Type field.
In the Choose form section, select the dropdown and select the update form you want to send if the user selects the first option in the initial create form.
The first option in the create form is "New content", which aligns with the form "New Content Request", so we select New Content Request in the dropdown.
For demonstration purposes, we align the first option in the create form with the first update form as we build the logic, but you can order the update forms any way you choose as long as the conditions are set correctly.
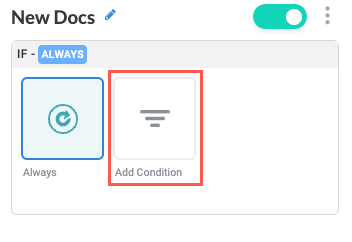
To ensure the "New Docs" action activates only when the user selects the appropriate option in the initial create form, we need to add a condition that specifies this logic. Select the conditions icon on the "New Docs" action block. The New Docs condition panel displays.

Select Add Condition. A condition configuration section displays.
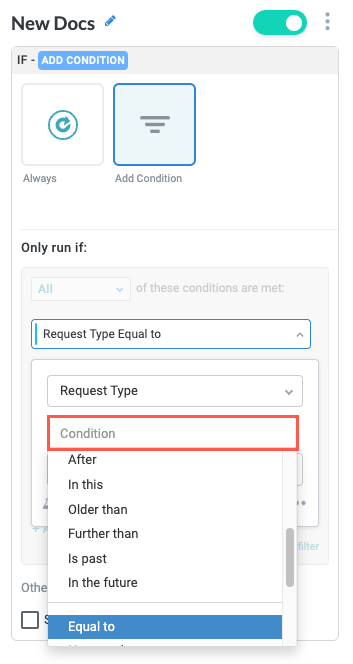
Select the Search data field dropdown and select the field in the create form whose options you want to trigger the various update forms you created. In this example, the create form field that determines which update forms the user receives is "Request Type".
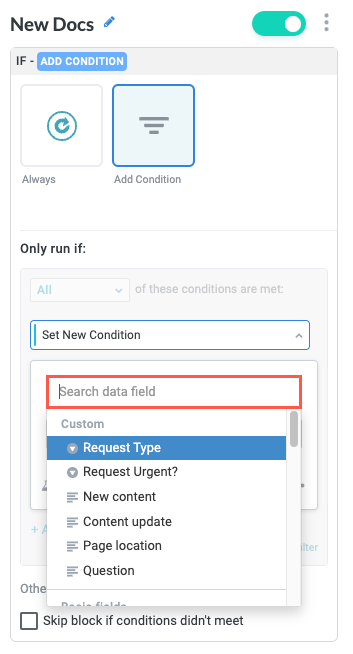
Select the Condition field and select the appropriate condition. In this example, we select the default value Equal to, because we want the update form to be sent when the user chooses a specific value in the "Request Type" field.
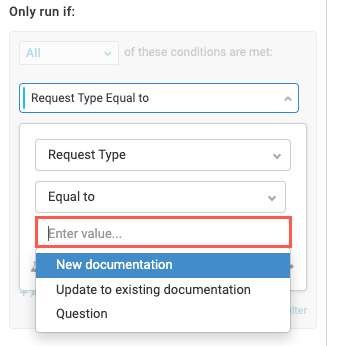
Select the Enter value field and select the value that, when a user selects it, sends the update form. In this example, we want the option "New documentation" to send this update form.
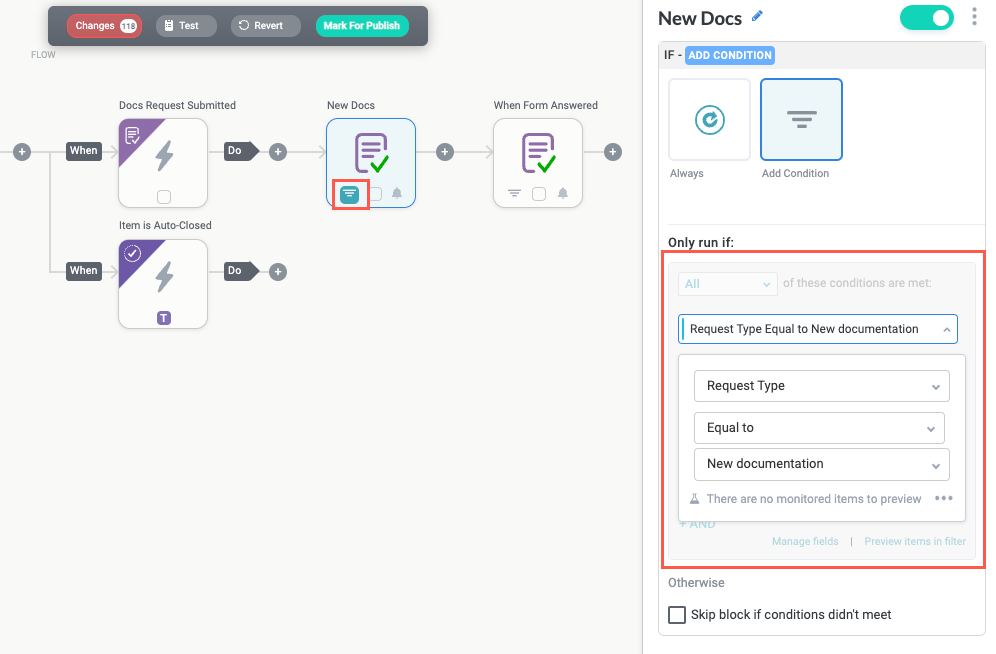
At this point, we have added a new condition and specified that the New Docs action is activated when the value of the "Request Type" custom field we created is equal to New documentation. That is, when a user selects "New documentation" in the create form, this action is activated and sends the "New Content Request" form.
Note that the condition icon is highlighted, indicating we have added a condition to the action block.
We strongly recommend you select the Skip block if conditions didn't meet checkbox when configuring multiple branches of forms with conditions. This option ensures that, in particularly complicated situations, multiple branches don't activate at the same time.
To add When Form Answered actions for the remaining options in the create form, select the plus icon following the initial trigger and repeat steps #4-12.
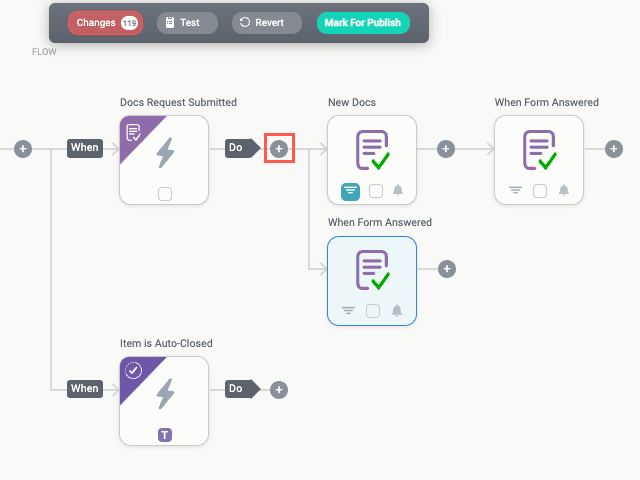
When complete, we have three When Form Answered actions, renamed for the update forms sent by each action. Each action includes a condition specifying that the action activates only when the "Request type" field is equal to the appropriate value.
At this stage, you can add further actions as needed, from notifying the appropriate person the documentation has come in to even creating a Jira ticket for the request.