Create a Matched Entity
In order to create a matched entity, the data source you want to link to must already exist in Tonkean. For example, if you want to create a matched entity that links a field in an incoming email to a field in Salesforce, that Salesforce instance must already be a connected data source.
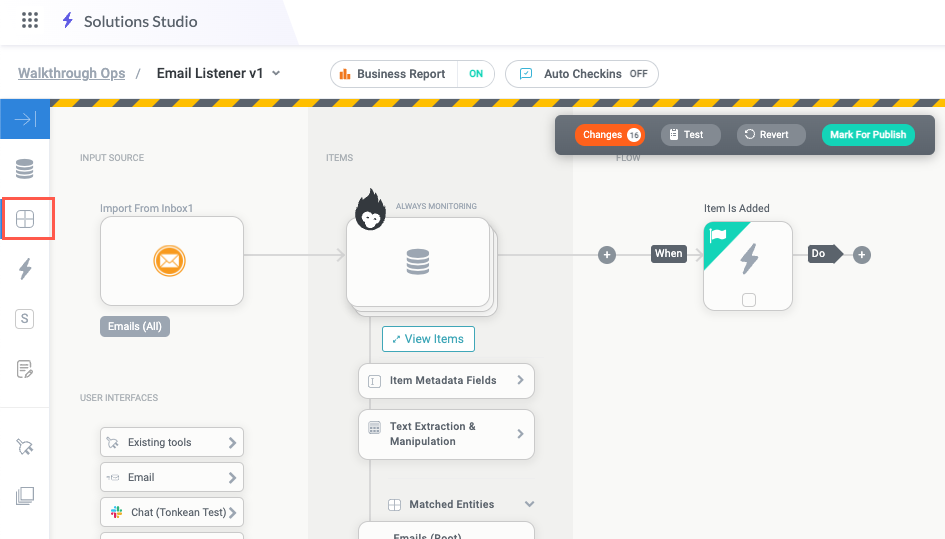
From any screen, select the main nav icon,
 , in the upper left and select Solutions Studio. The Solutions Studio screen displays.
Select the module you want to create the matched entity in. The module builder screen displays.
From the module builder screen, select the Fields button on the module builder toolbar. The Fields panel displays.
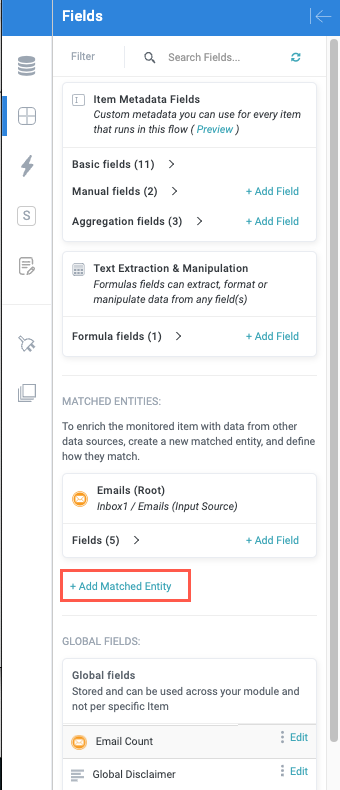
In the Matched Entities section, select + Add Matched Entity. The Matching Field Settings screen displays.
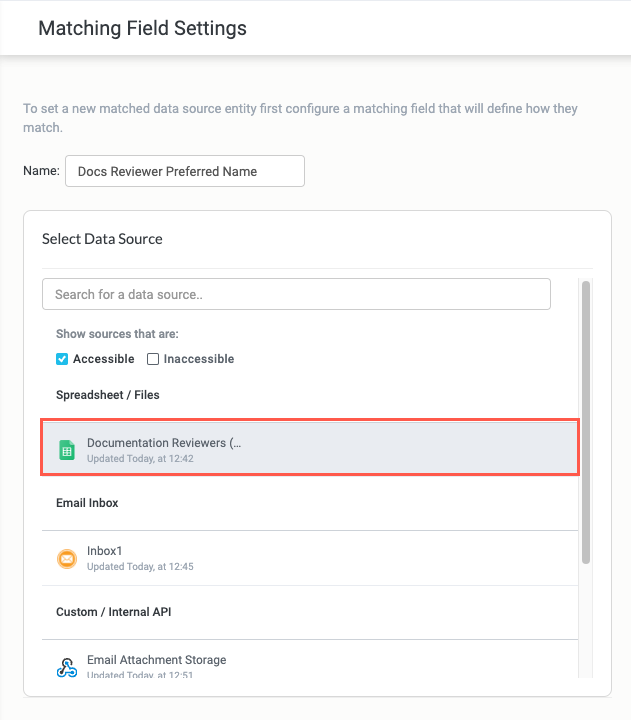
Enter a name for the matched entity.
If you don't name the matched entity, the name defaults to the name of the selected data source.
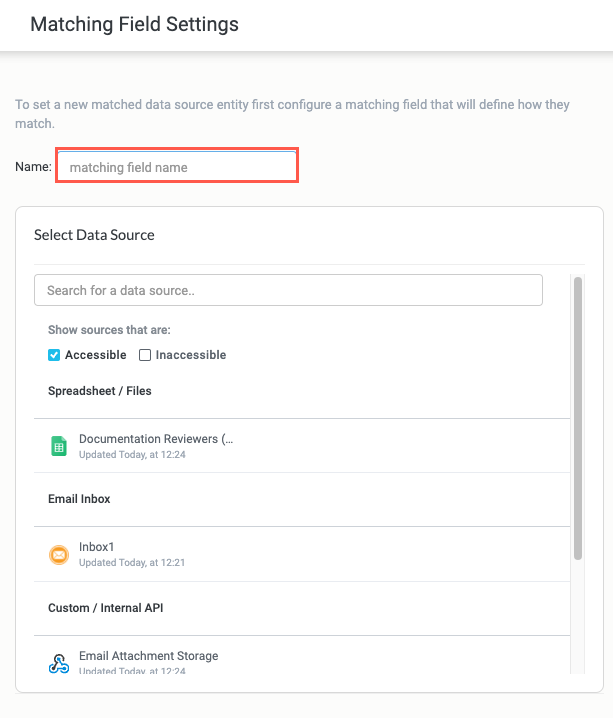
Select the data source you want to create a matched entity for. In this example, we're creating it for a Google Sheets spreadsheet.
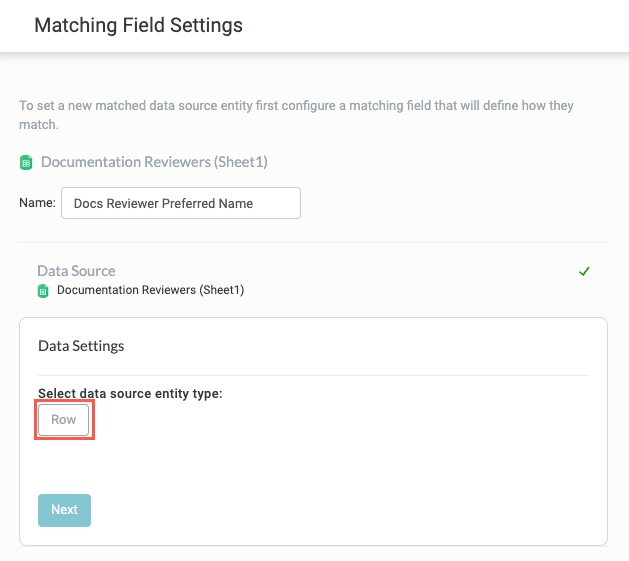
Select the data source entity type. The Match by section displays.
For some data sources, only one entity type displays. For example, Google Sheets has only one entity type (Row), while other data sources, like Salesforce, have Accounts, Opportunities, and Leads, among others.
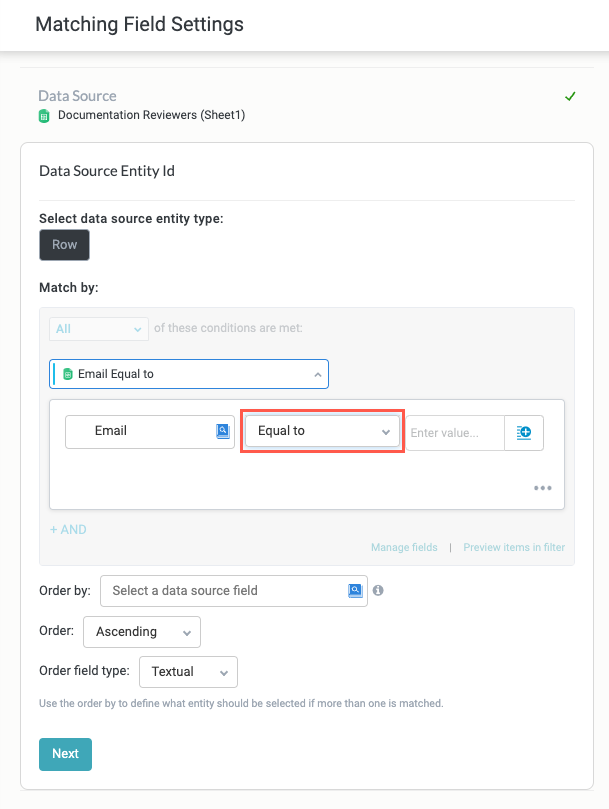
Select Search data field to locate and select a field in the matched data source. This is the field that you're matching to a field in the intake source. In the example below, we're matching an email address from the Google Sheet, so we select the corresponding column in the table.
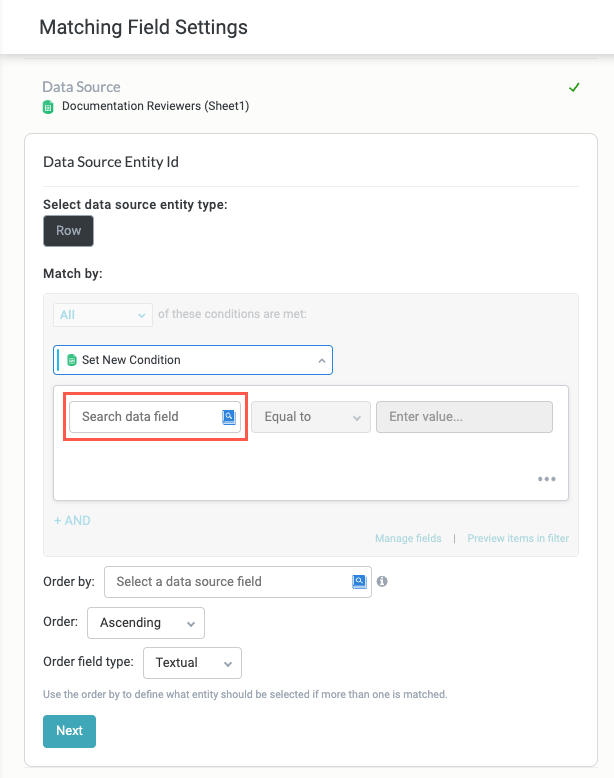
Select the condition. The condition defines the interaction between the two selected fields. The field default is Equal to, as shown in the example below.
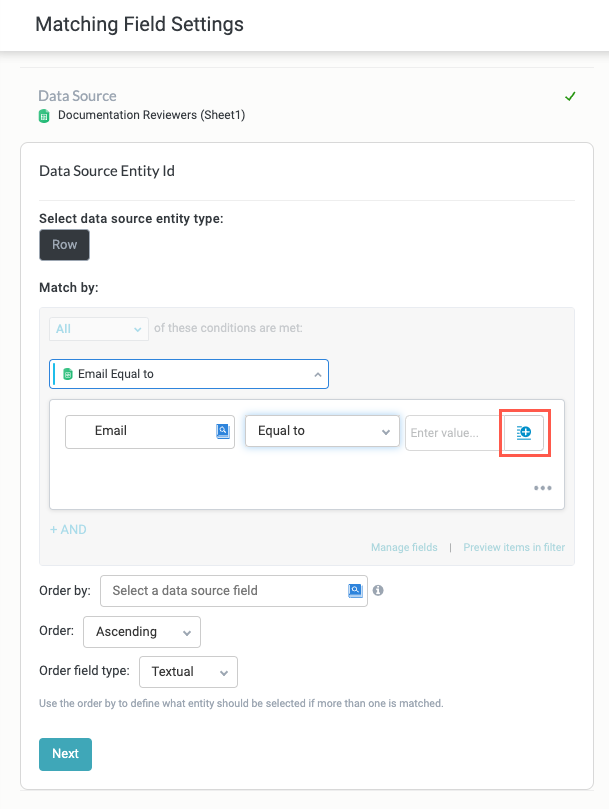
Select the insert field button,
 , and select the field from the intake source to match with the field from the matched entity data source. In the example below, we're matching the Email column from the Google Sheet to Emails - From (Email) in the email inbox intake source.
These fields must already exist for the intake source before they appear in this dropdown.
In the case that multiple items match the specified conditions, you can configure how Tonkean will prioritize and select from the available matches:
Select Order by to select a field in the matched entity data source to sort the matches by.
Select the Order dropdown to select to order the multiple matches in Ascending or Descending order.
Select the Order field type dropdown to select the field type to sort by.

When finished, select Save in the top right. The matched entity is ready to use anywhere in the module.
Add Matched Entity Fields
Once a matched entity is added to a module, you must select the fields from the matched entity data source before you can use them in the module workflow.
In the Fields panel, locate the relevant matched entity in the Matched Entity section.
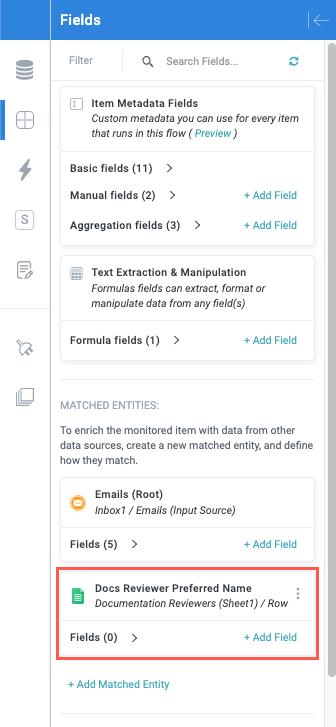
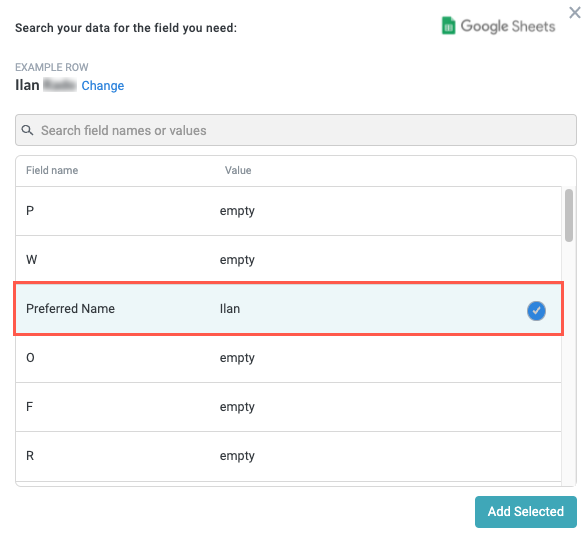
Select + Add Field. The field selection window displays.
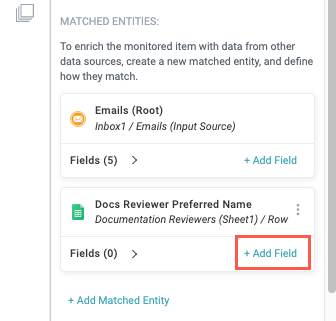
Select all the fields to include in the module. When finished, select Add Selected.