Create a Webhook Connection
Webhooks provide near-real time data updates in response to changes in an external application, allowing your solutions to stay up to date without the need to continually poll the data source. Webhooks allow you to connect and sync data with virtually any third-party application with the appropriate support. Tonkean supports webhooks for most applications without native integration support, providing some flexibility with your unique process or set of apps. There are two types of webhooks:
Inbound webhook - A third-party application or external system sends data to Tonkean.
Outbound webhook - Tonkean sends data to a third-party application or external system.
Setting up an inbound webhook in Tonkean requires the third-party application to support outbound webhooks (that is, the sending of data from their system to Tonkean). We recommend you research the webhook support for any third-party application or system you would like to connect. This information is usually found in the application's documentation, usually within their API or developer documentation.
Create an Inbound Webhook
Before you can create an inbound webhook, confirm the third-party application you want to connect supports outbound webhooks. Once you've confirmed this support, follow the procedure below to create an inbound webhook:
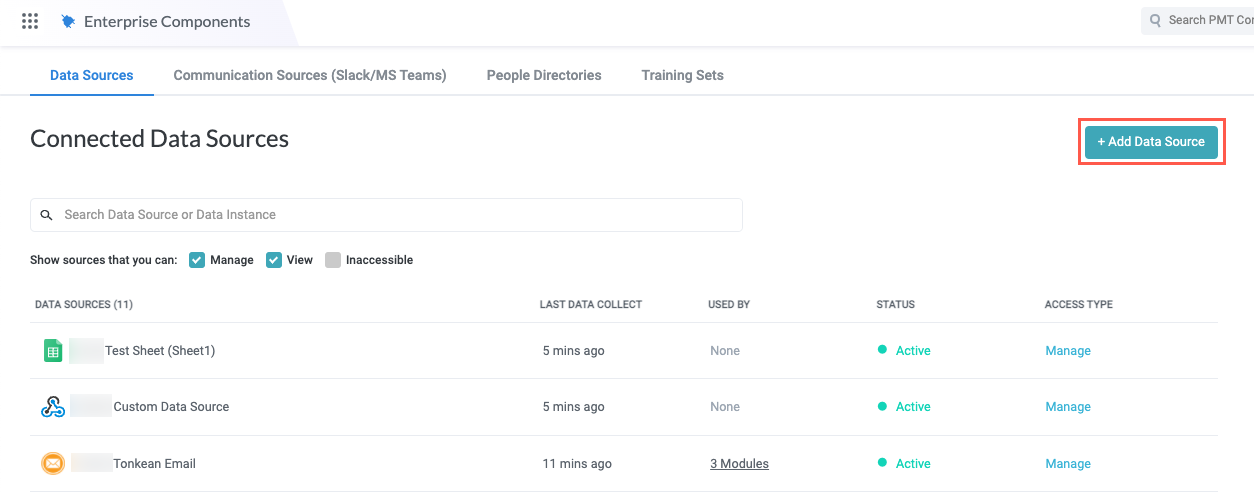
Select the main nav icon,
 , in the upper left and select Enterprise Components. The Enterprise Components screen displays.
Select + New Data Source in the upper right.
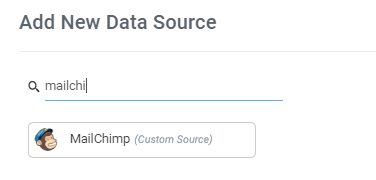
Select Cloud Application. The Add New Data Source window displays.

Scroll through the list to locate the application you would like to connect or enter the application name in the search field. Select the desired application to connect. Data sources that marked with the italicized text "(Custom Source)" can be connected using a webhook.
After you select the application, special setup instructions may display. This may include options to upload only your current data or set up continuous data integration using a webhook.
If the application you're looking for doesn't appear in the list, you can select New Custom Source, which will allow you to set up a custom data source instead.
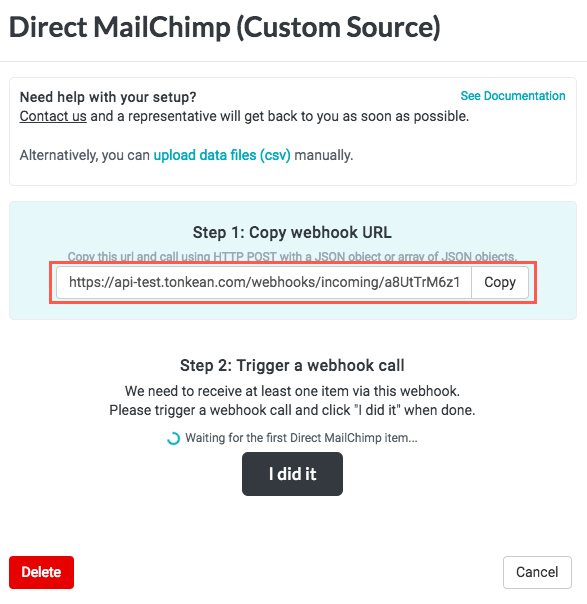
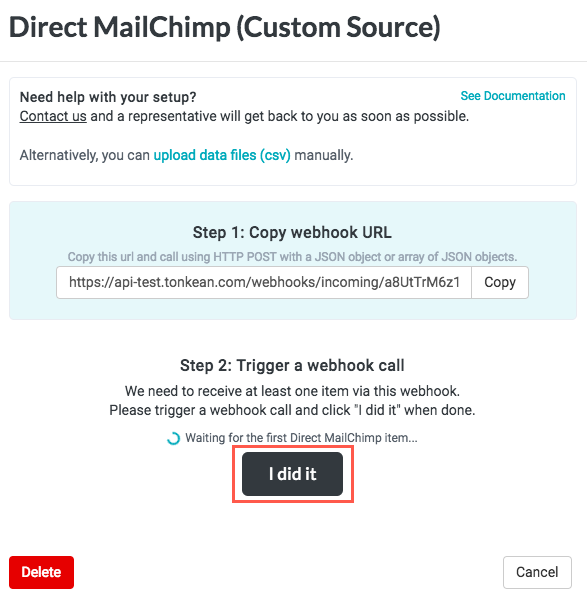
Copy the webhook URL. This is the URL you provide to the connecting application (Mailchimp, in this example) that allows that application to send data to Tonkean.
Configure the External Application
In addition to creating the data source in Tonkean, you also need to configure the application you're connecting so it can effectively communicate with Tonkean. The exact process for setting up an outbound webhook varies from application to application, but the core principles are the same. See the process below for an example, but reference the documentation for your particular application or system.
Tonkean accepts any valid JSON object, an array of JSON objects, or XML. No authentication headers are needed—just set Content-Type to application/json or application/xml, respectively.
In Mailchimp, follow the process below for configuring your outbound webhook:
Navigate to the List that contains data you want to send to Tonkean, then select Settings > Webhooks > Create New Webhook.
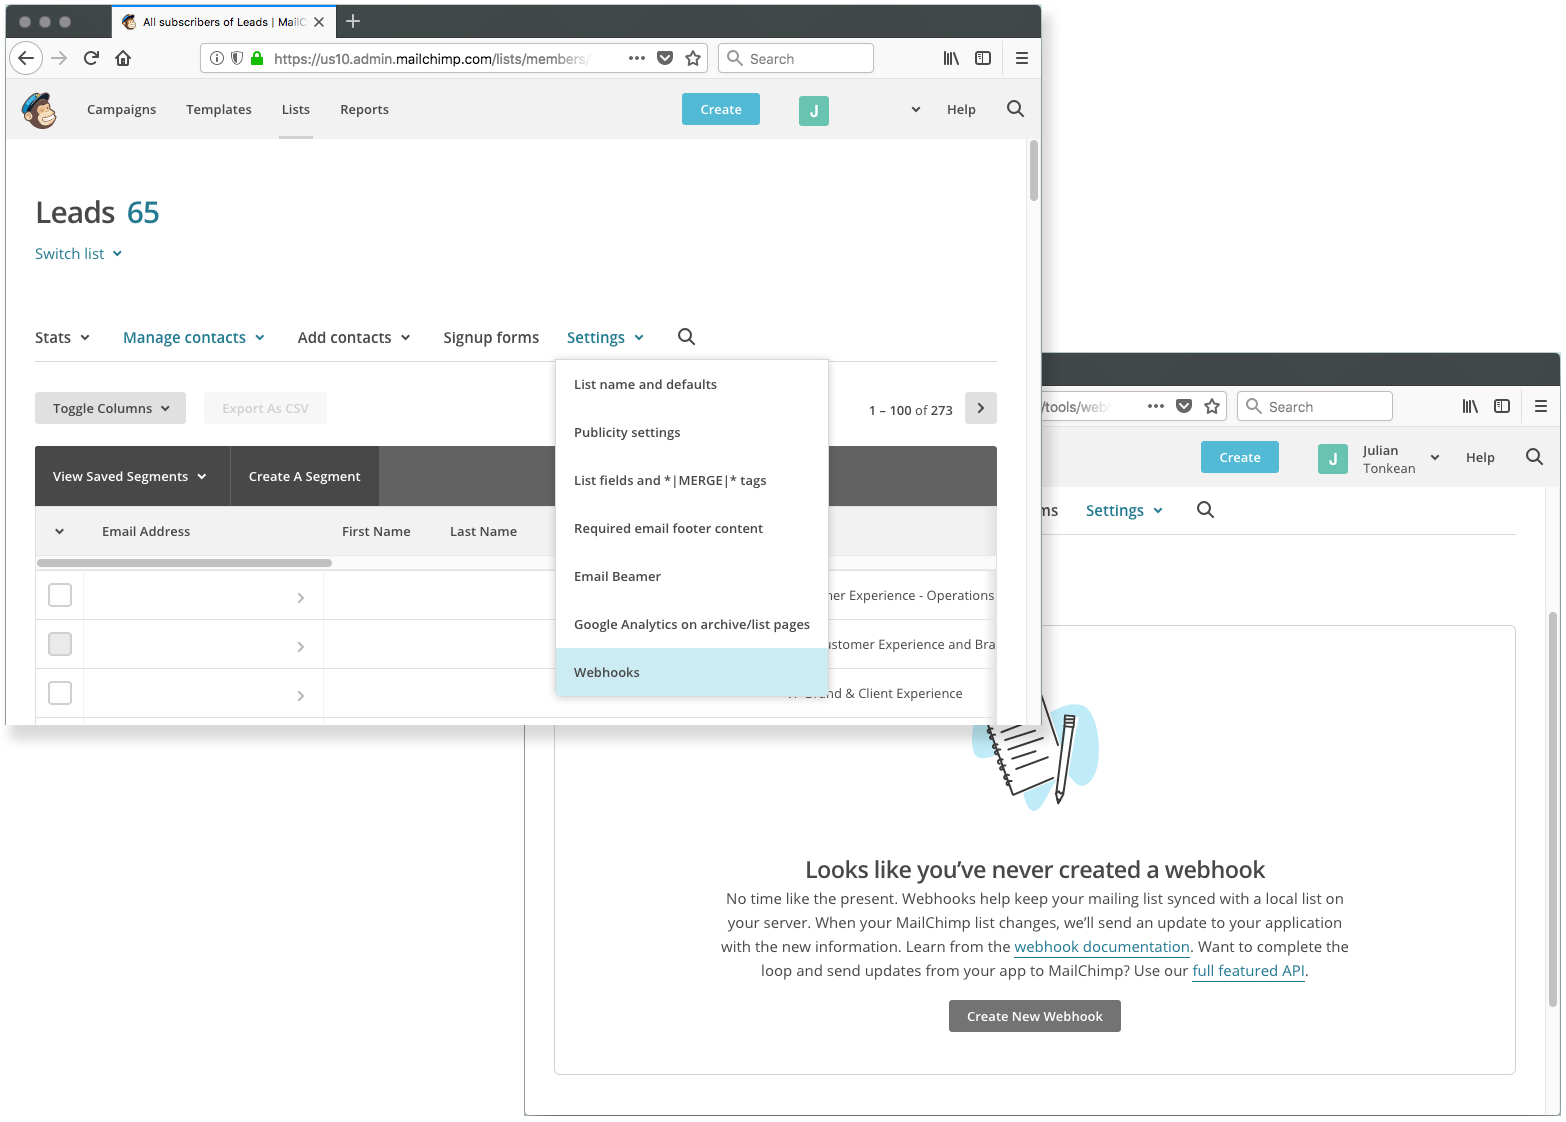
In the Callback URL field, enter the URL copied from Tonkean. Select the appropriate checkboxes for the data you would sent to Tonkean and select Save.

After setting up the connect, send one item to Tonkean as a test (that is, make one call). This process helps ensure the connection is made correctly between the two systems, though it will vary from application to application.
After sending this item, return to Tonkean.
Check for Data Received in Tonkean
In Tonkean, return to the same data source setup window from step #6 above. If you have configured the webhook correctly, you will receive a preview of the received data from the third-party application or system.
In the same window in Tonkean, select I did it. The Inbound Webhook window displays.
The Inbound Webhook window displays the content received in the webhook call from the application, but the fields from the application are not yet mapped in Tonkean, so a warning message may display telling us we need to fix the mapping. In this example, the id and title field paths must be mapped. The id field is the unique ID assigned to the item by the application (in this case, Mailchimp); the title field is the name the item is given in Tonkean. Leave the id field mapped to "id" and provide a path for the title field. For this example, the id field represents the Mailchimp subscriber's ID and the title field represents the subscriber's email.
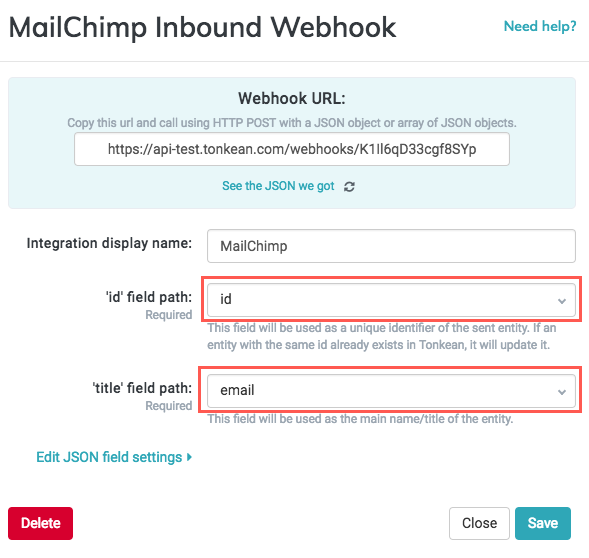
When finished, select Save.
You can also select See the JSON we got to view the raw JSON received in the webhook call.
Your application is now connected to Tonkean. Any data received through the webhook is indexed and can be used in actions, triggers, fields, or other elements in your modules.
Now that data is being sent from your third-party application, you can select fields in your modules that you can use as triggers and actions (for example, carrying out a certain process when an item changes in the third-party application). The process is the same for custom data sources using webhooks and for native data sources. See Create and Manage Fields for detailed information.
Create an Outbound Webhook
Just as you can configure third-party apps to send data to Tonkean using webhooks, you can also create webhooks that send data from Tonkean to other apps. You can create outbound webhooks in much the same way as you create inbound webhooks:
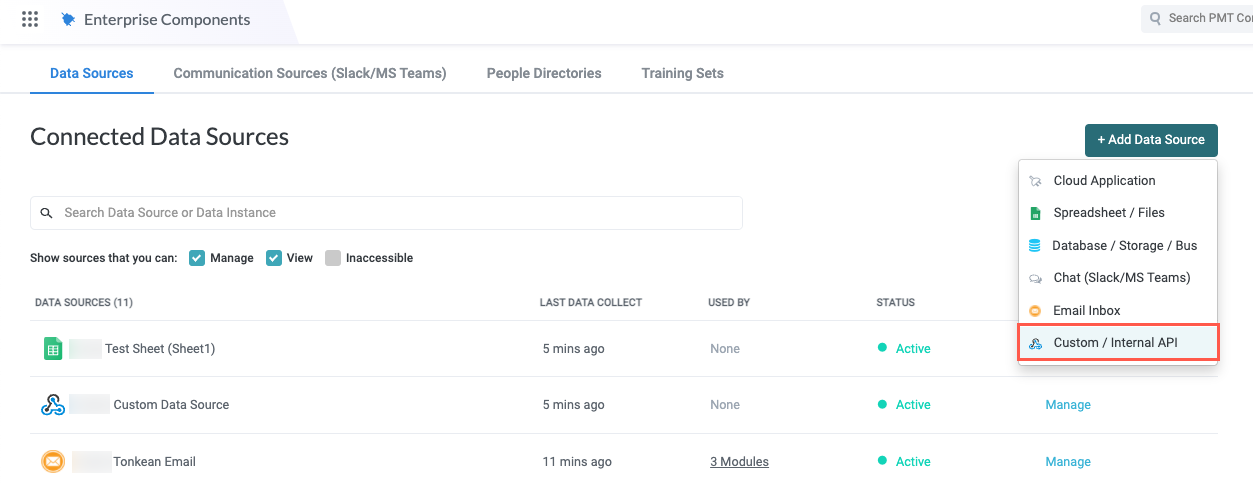
Select the main nav icon,
, in the upper left and select Enterprise Components. The Enterprise Components screen displays.Select + Add Data Source in the upper right.
In the dropdown, select Custom / Internal API. The Add New Data Source window displays.
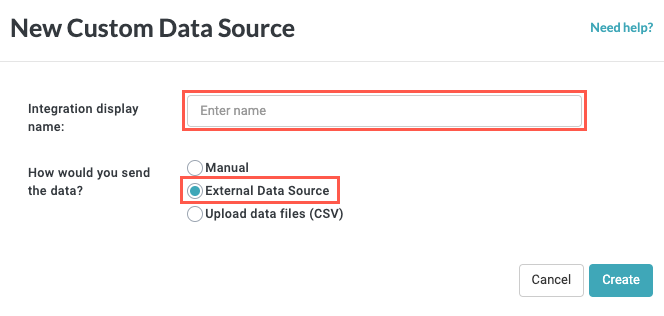
Select New Custom Data Source. The New Custom Data Source window displays.
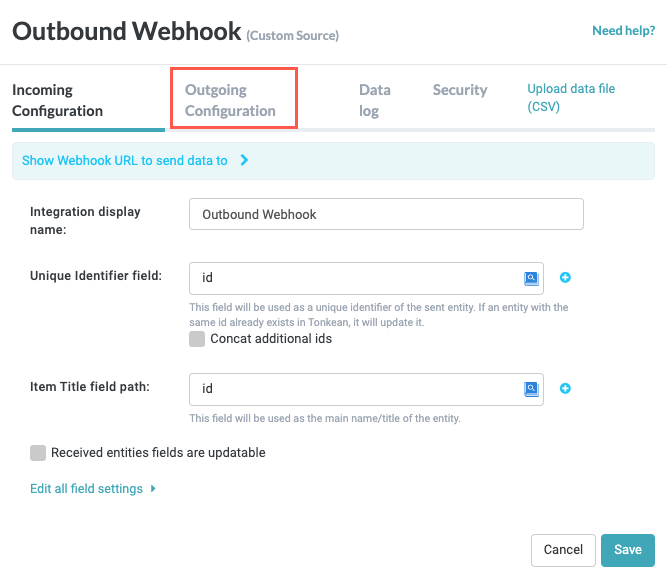
Enter a descriptive name for your webhook in the Integration display name field and select External Data Source in the How would you send the data? field. The name of the window updates to the name entered. When finished, select Create. The data source detail screen displays.
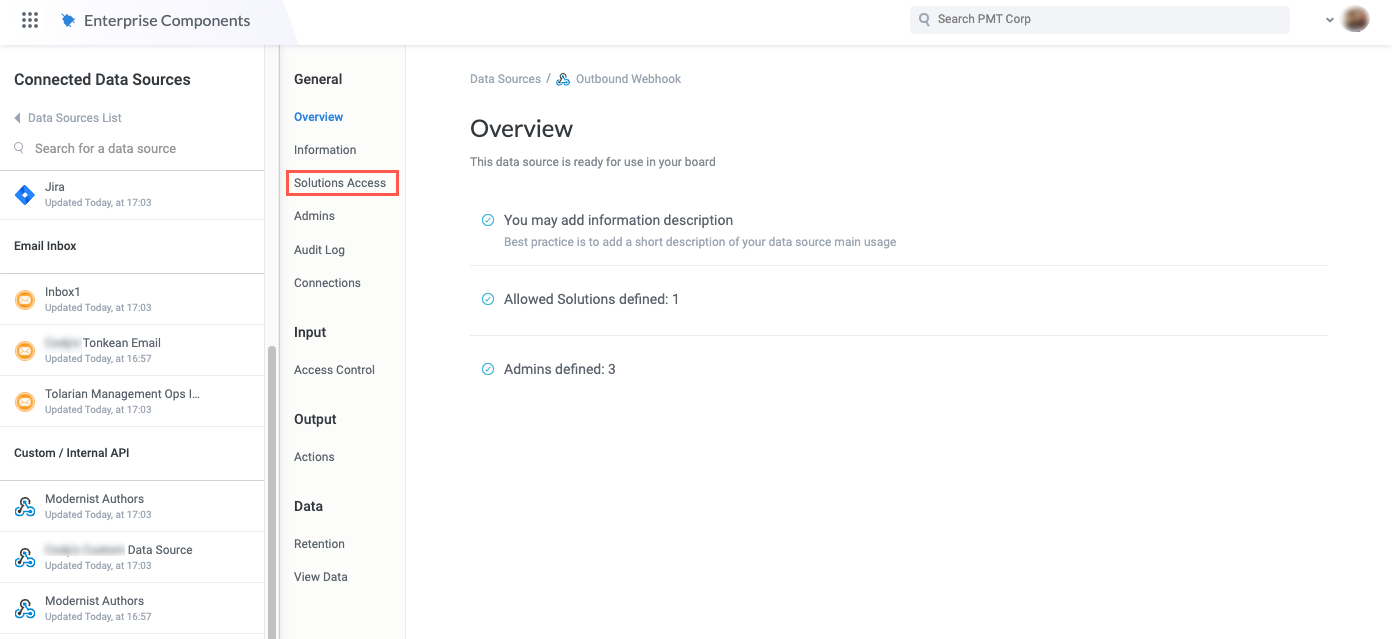
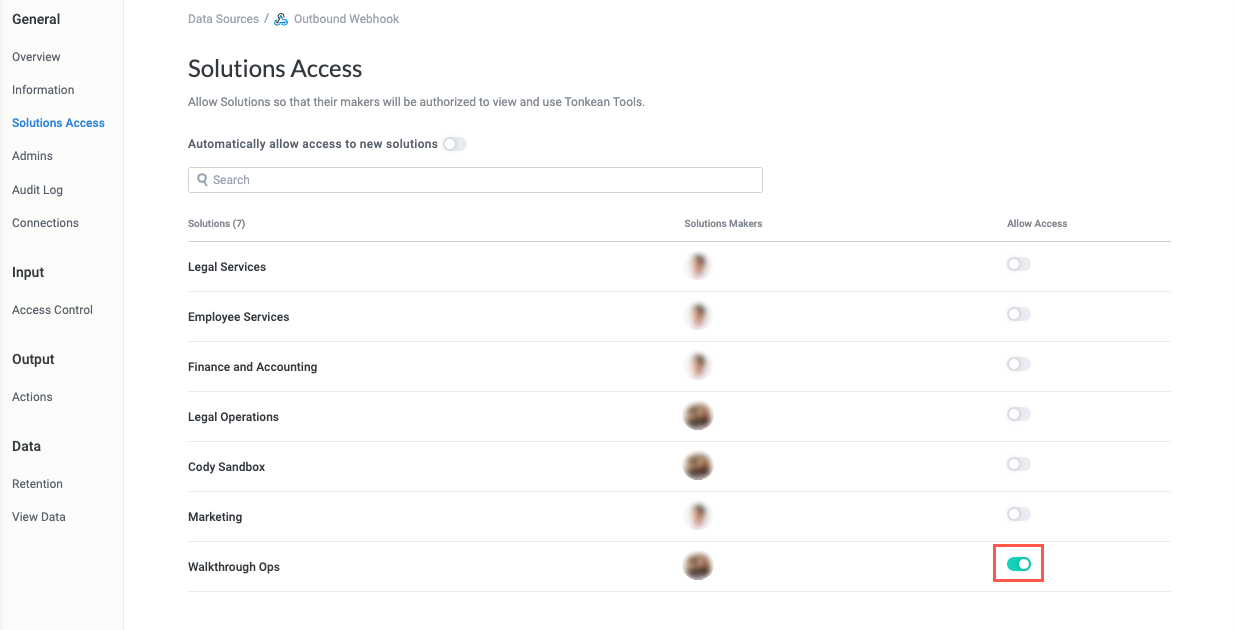
On the data source detail screen, select Solutions Access in the data source configuration panel to allow a solution access to your new custom data source. The Solutions Access screen displays.
Select the toggle that corresponds with the solution that contains the module you want to give access to.
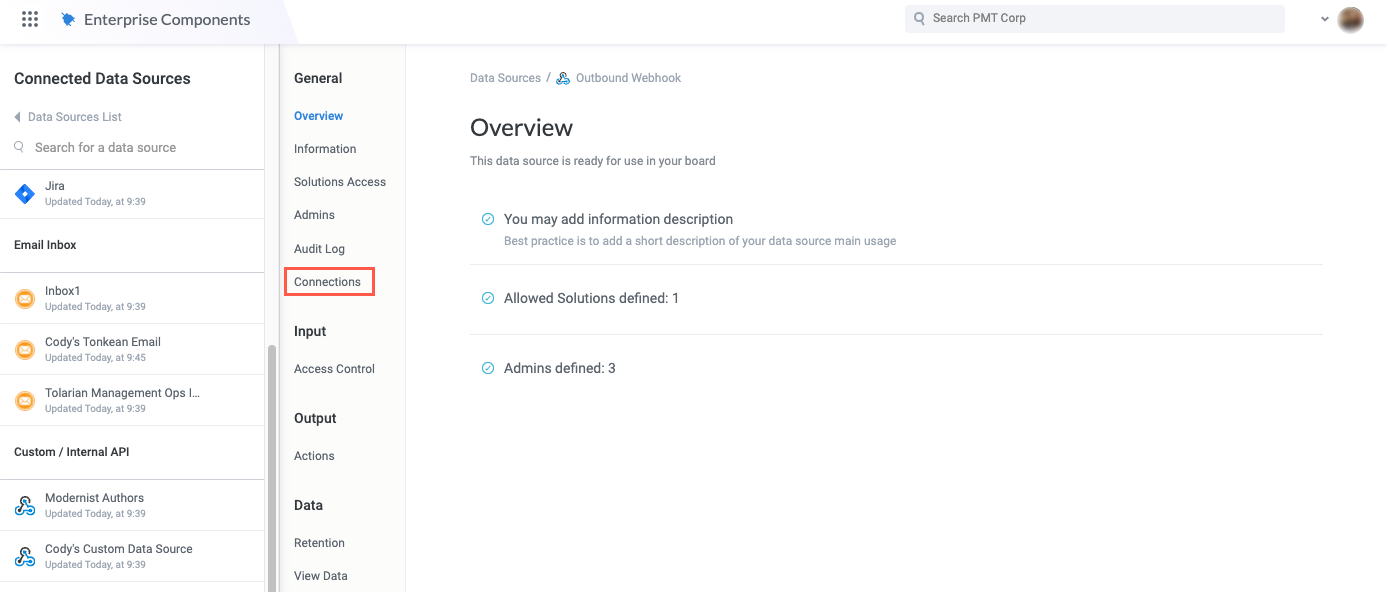
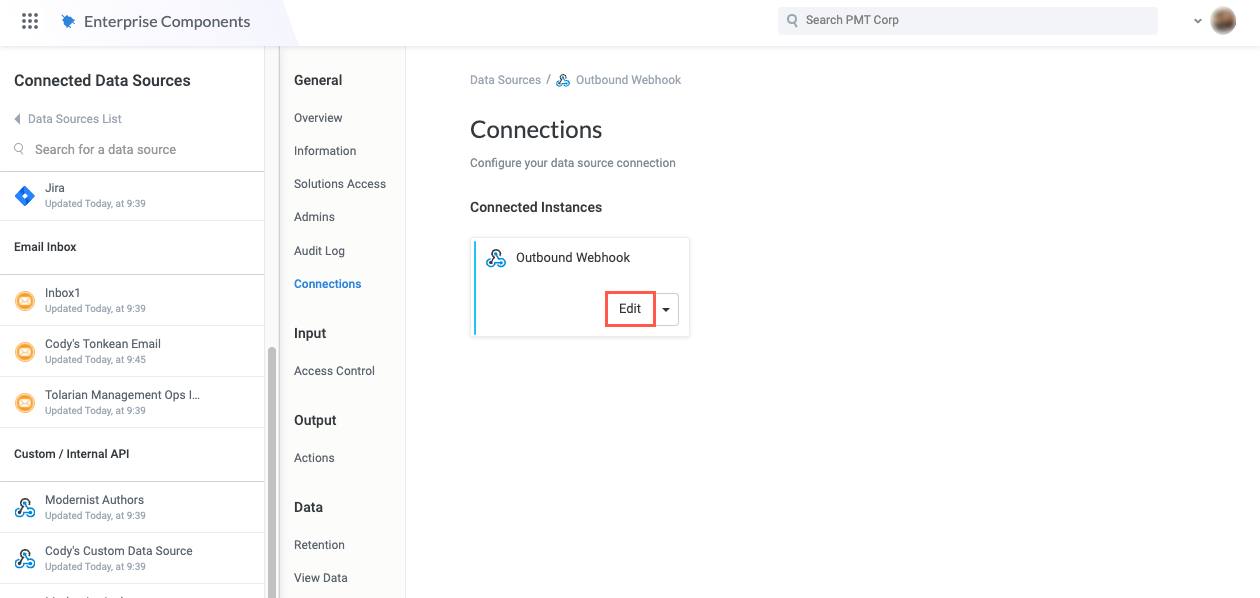
Select Connections in the data source configuration panel . The Connections screen displays.
Select Edit. The data source setup window displays.
Select the Outgoing Configuration tab.
Retrieve the URL from the application you want to send data to and enter that URL in the Base Url field.
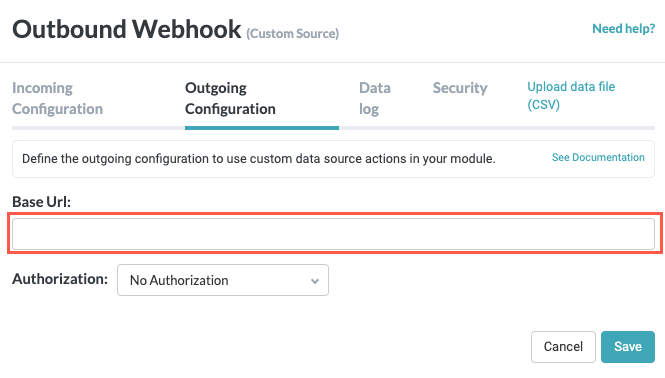
To include authorization information, select the Authorization dropdown, select Other, then enter the Header Name and Header Value.
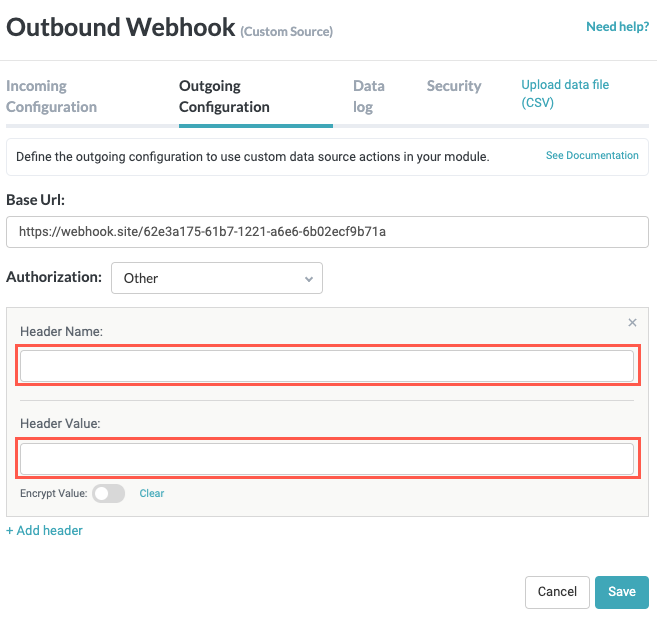
When finished, select Save.
If the URL entered in the Base Url field isn't valid or encounters an error, you will be unable to save and an error message displays when you attempt to save.
To use the outbound webhook in a module, add it as you would any other data action in the module builder screen and adjust the outbound data as is relevant to your specific module.