Tonkean Application - Share Selected Sites
When an admin connects this application, they allow Tonkean access to only one site in their SharePoint environment. Setting up this application requires extracting a unique identifier for each SharePoint site you want to share, then running a PowerShell script to give Tonkean access. An admin must repeat this process for each SharePoint site they want to connect using this application.
This method creates a SharePoint data source for each site connected to Tonkean, requiring Tonkean users to potentially maintain multiple SharePoint data sources. While this method does require significantly more administrative overhead than the "All Sites" application, it does provide an additional layer of access control.
Prerequisites
You are an admin at your organization with the appropriate access and permissions in Microsoft Online and Azure.
You have installed the most recent stable version of PowerShell.
If you already have the Tonkean for SharePoint - All Sites application installed in Azure, you must locate and delete that application before installing and configuring the Tonkean for SharePoint - Selected Sites application. Attempting to give consent to both applications simultaneously results in an error.
Grant Access to the Tonkean for SharePoint - Selected Sites Application
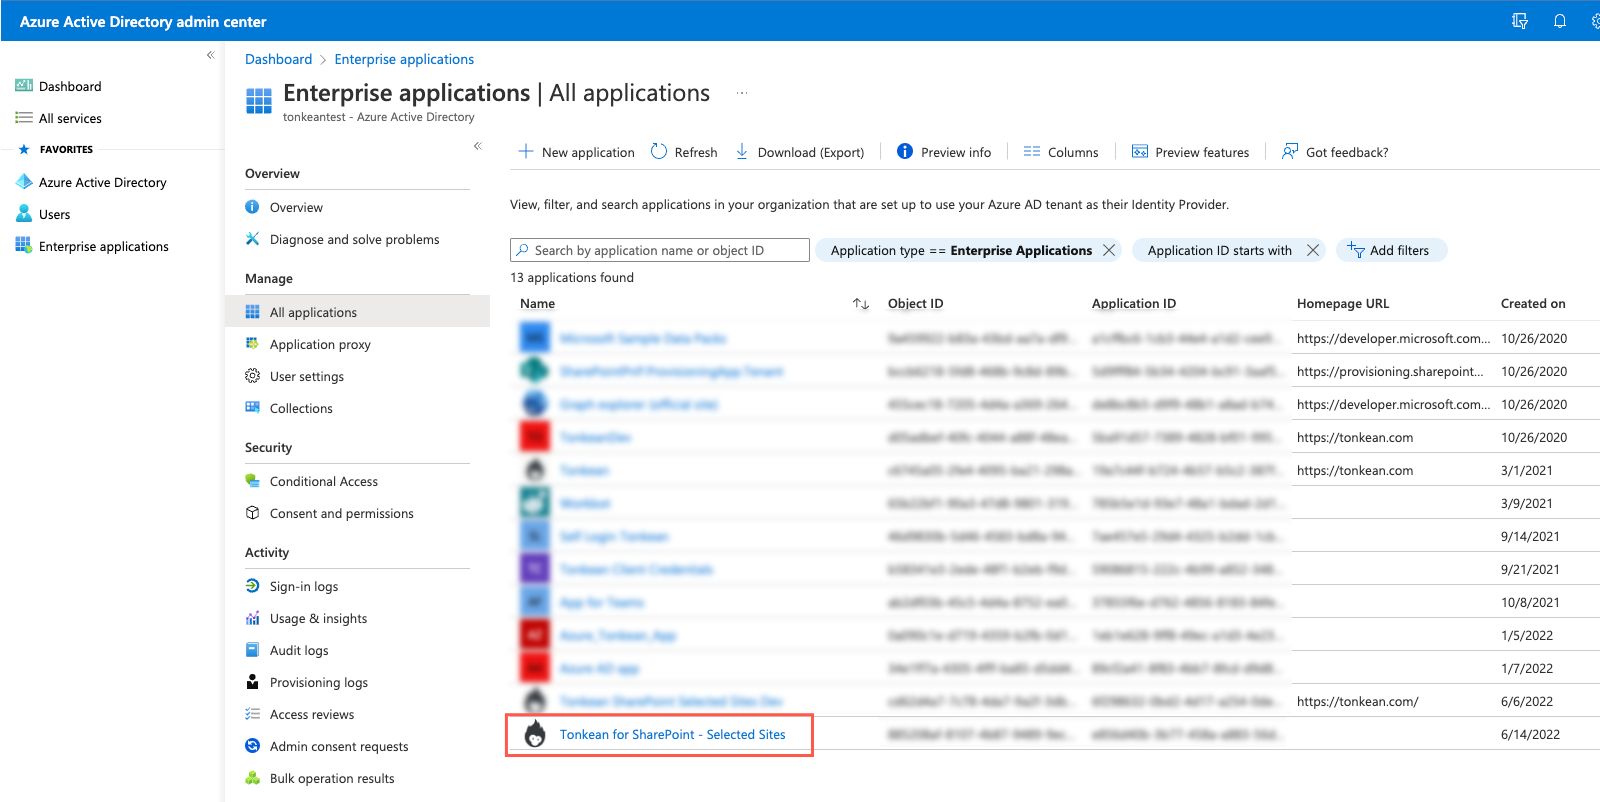
Before you can connect SharePoint as a data source using a tenant-level connection, an admin must connect the Tonkean for SharePoint - Selected Sites application. This application displays on the Enterprise application screen in your Azure Active Directory admin center.
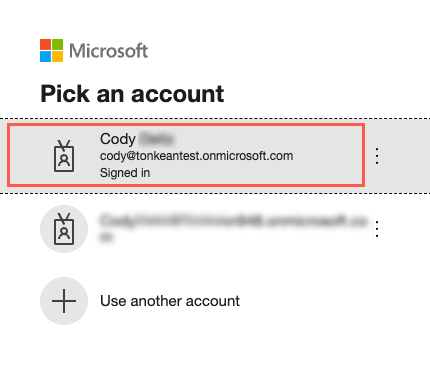
Log in to your Microsoft Online account and ensure you have the appropriate admin permissions to perform this setup process.
Navigate to the following link: https://login.microsoftonline.com/common/adminconsent?client_id=e856d40b-3b77-458a-a883-56dcb226337d
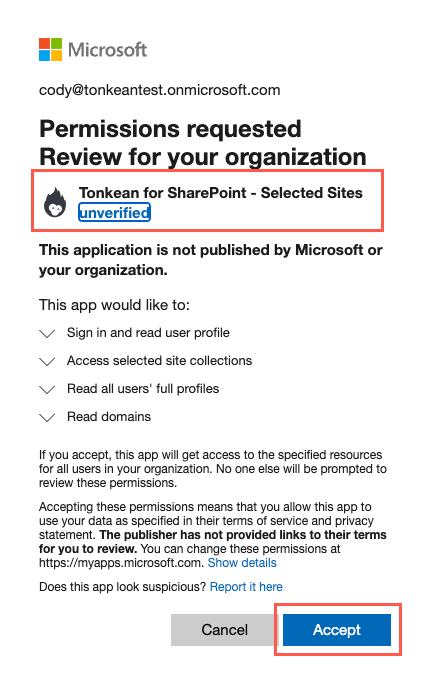
Select the appropriate Microsoft account. A Permissions requested window displays.
Confirm that the application name reads "Tonkean for SharePoint - Selected Sites", then select Accept. If installation of the application is successful, you are redirected to the Solutions screen in Tonkean.
In your Azure Active Directory admin center, navigate to Enterprise applications. The newly-added Tonkean for SharePoint - Selected Sites application displays in your list of applications.
Find Your SharePoint Site ID
To specify the SharePoint site you want to give Tonkean access to, you must find the unique identifier for the site, the Site ID. Finding the Site ID requires locating and extracting a few key pieces of data and combining them into a string in the following format: [hostname],[spsite-id],[spweb-id].
To find this Site ID, follow the steps below:
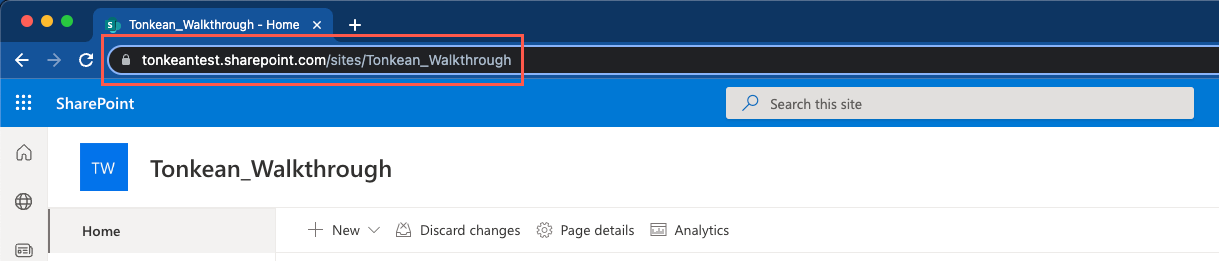
Navigate to the SharePoint site you want to allow Tonkean to access.
In the browser address bar, locate the site URL.
To locate the values needed, you will manipulate this URL to access raw XML and extract those values.
First, add
/_api/site/urlto the URL, then select the Enter key. The URL should display in the following format:https://{sub-domain}.sharepoint.com/sites/{site-name}/_api/site/urlA new screen displays, containing raw XML. Locate the site hostname value (indicated in the image below), copy it, and paste it into a separate document, followed by a comma.
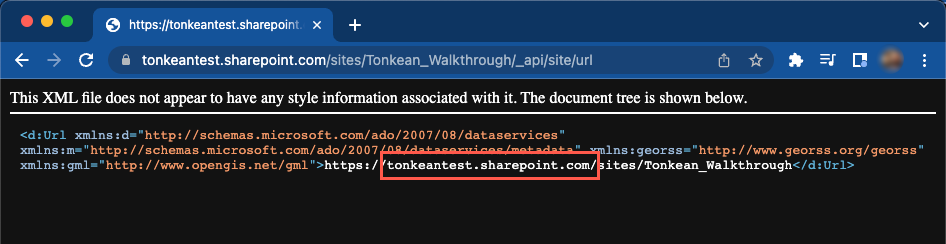
The resulting string in your separate document should be as follows:
{hostname}.sharepoint.com,Return to the browser and replace the
/_api/site/urlin the address bar with/_api/site/id, then select the Enter key. The URL should display in the following format:https://{sub-domain}.sharepoint.com/sites/{site-name}/_api/site/idA new screen displays, containing raw XML. Locate the site spsite-id value (indicated in the image below), copy it, and append it to the hostname value in your separate document, followed by a comma.

The resulting string in your separate document should now be as follows:
{hostname}.sharepoint.com,{spsite-id},Return to the browser and replace the
/_api/site/idin the address bar with/_api/web/id, then select the Enter key. The URL should display in the following format:https://{sub-domain}.sharepoint.com/sites/{site-name}/_api/web/idA new screen displays, containing raw XML. Locate the site spweb-id value (indicated in the image below), copy it, and append it to the spsite-id value in your separate document.
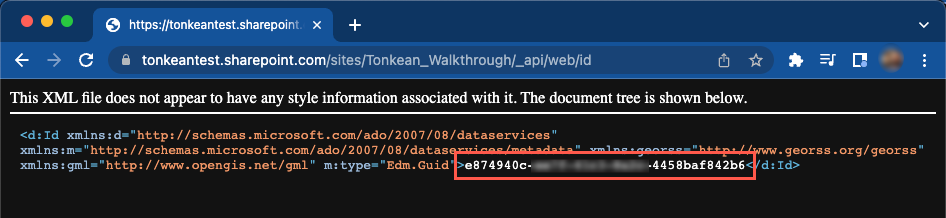
The resulting string in your separate document should now be as follows:
{hostname}.sharepoint.com,{spsite-id},{spweb-id}
With your Site ID complete, save it in your separate document. You need the Site ID value to give the Tonkean for SharePoint - Selected Sites application access to your SharePoint site and also to connect SharePoint using application authentication in Tonkean. The complete Site ID should display in the following format:
{hostname}.sharepoint.com,{spsite-id},{spweb-id}For example, the Site ID value for the site shown in the images above is
tonkeantest.sharepoint.com,80dd51de-XXXX-XXXX-XXXX-73af1471076e,e874940c-XXXX-XXXX-XXXX-4458baf842b6Make sure there are no spaces in the Site ID value.
Provide Tonkean Access using PowerShell
With the Site ID generated, you can allow the Tonkean for SharePoint - Selected Sites application to access your SharePoint site. You need to install and connect to the PowerShell Graph API module in order to complete this process.
To provide access to the Tonkean for SharePoint - Selected Sites application, follow the steps below:
Open Microsoft PowerShell.
Install the PowerShell Graph API module by running the following command:
Install-Module Microsoft.Graph -Scope CurrentUserIf you encounter the below error when running this command, you must take additional steps to ensure you have access to the PowerShell module repositories:
Install-Package: No match was found for the specified search criteria and module name'Microsoft.Graph'. Try Get-PSRepository to see all available registered modulerepositories.
Run the
Register-PSRepositorycmdlet to register the default repository for PowerShell modules:Register-PSRepository -Default
Read more about this cmdlet in the PowerShell scripting reference.
After you run the script to register the directory, you can run
Get-PSRepositoryto confirm registration was successful.PowerShell may return a message that you are installing an "untrusted repository" when running the script to install the Graph API module. This is expected. Enter
Yto install the modules from'PSGallery'.After you've successfully installed PowerShell Graph API module, connect to the module by running the following command:
Connect-MgGraph -Scopes “Sites.FullControl.All”If the commands are executed successfully, a Permissions requested window displays for Microsoft Graph PowerShell. Select Accept. The Microsoft Graph PowerShell application is added to your enterprise applications in Azure.

Grant access for the specific SharePoint site to the Tonkean for SharePoint - Selected Sites application by running the script below in PowerShell.
You will need the Site ID for the specific SharePoint site you want to allow Tonkean to access.
Import-Module Microsoft.Graph.Sites

$params = @{
    Roles = @(
        “write”
    )
    GrantedToIdentities = @(
        @{
            Application = @{
                Id = “e856d40b-3b77-458a-a883-56dcb226337d”
                DisplayName = “Tonkean SharePoint Selected Sites”
            }
        }
    )
}
$siteid = “tonkeantest.sharepoint.com,80dd51de-XXXX-XXXX-XXXX-73af1471076e,e874940c-XXXX-XXXX-XXXX-4458baf842b6”

New-MgSitePermission -SiteId $siteid -BodyParameter $params
The application
Idvalue,e856d40b-3b77-458a-a883-56dcb226337d, is the unique ID for the Tonkean for SharePoint - Selected Sites application.For each SharePoint site you want to allow Tonkean to access, you must extract and generate the Site ID and run the above PowerShell script. Repeat these steps as necessary to provide access to each SharePoint site. Note that each site you provide access for this way displays as a unique data source in Tonkean.
Connect SharePoint Using Application Authentication
Once the Tonkean for SharePoint - Selected Sites application is added to your enterprise applications in Azure, you can create a new SharePoint data source using application authentication.
In Tonkean, select the main nav icon,
 , in the upper left and select Enterprise Components. The Enterprise Components screen displays.
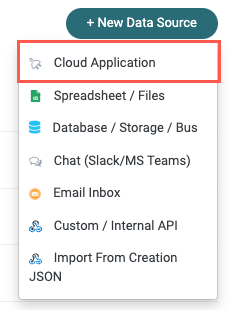
Select + New Data Source in the upper right.

Select Cloud Application from the dropdown. The Add New Data Source window displays.
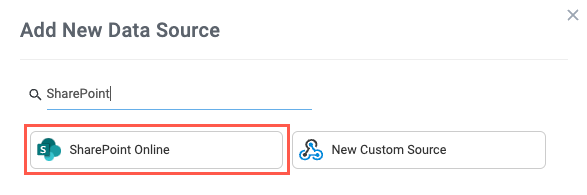
Enter "SharePoint" in the search field and select SharePoint Online from the results. The New SharePoint Online Connection window displays.
Select Create a new connection. The Set Up Data Source window displays.

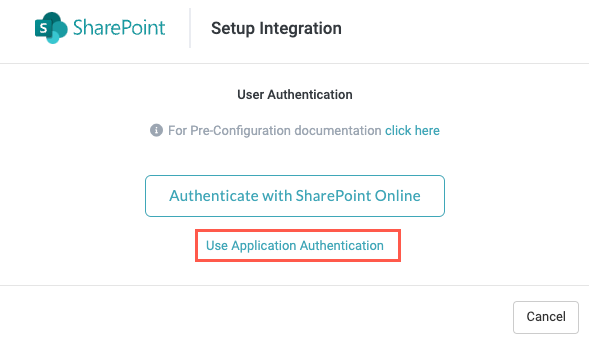
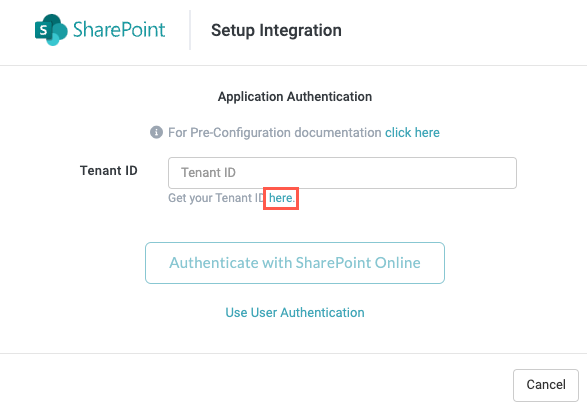
Select Use Application Authentication. The Application Authentication section displays.
Locate the helper text beneath the Tenant ID field and select here where it says "Get your Tenant ID here." A new tab opens in your browser where the Azure Active Directory admin center displays.
If you are not logged into Microsoft Online, you are prompted to log in when the new tab opens.
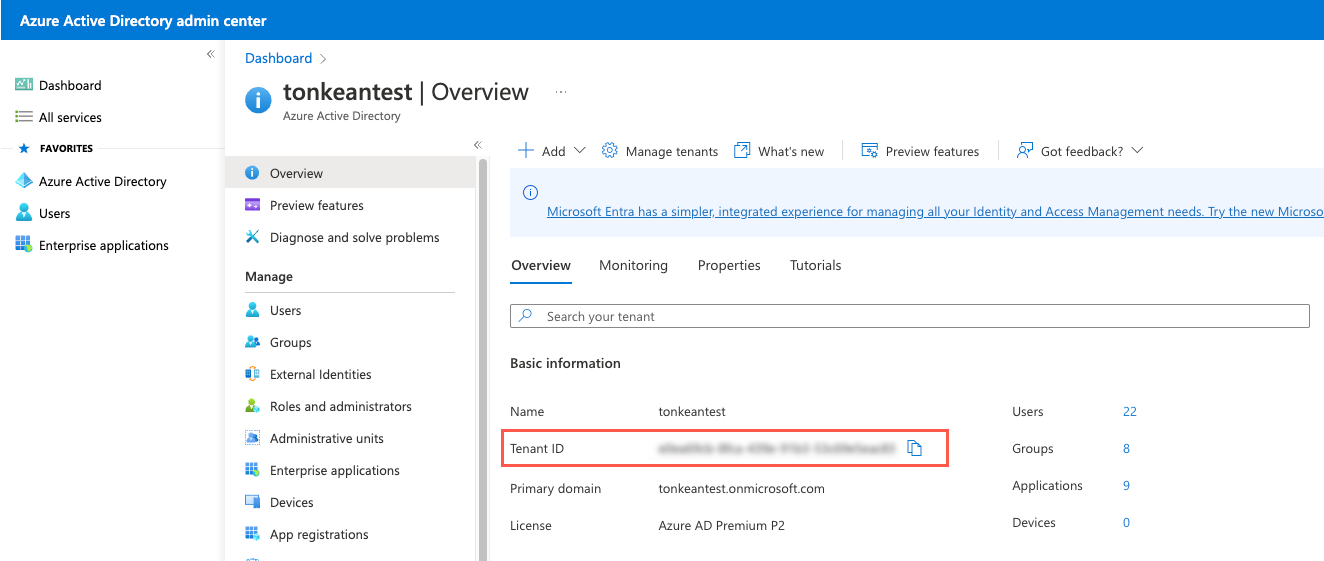
On the Overview screen for your Azure Active Directory, locate your Tenant ID and copy the value.
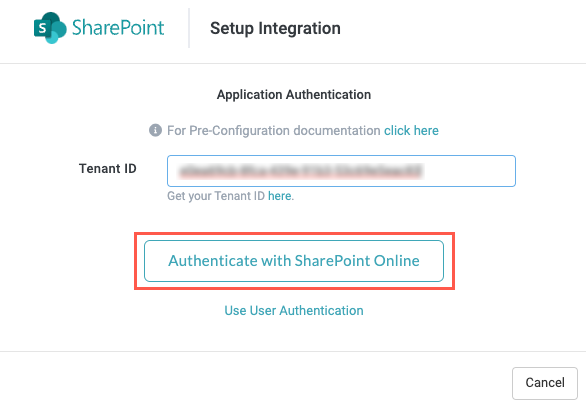
Return to Tonkean and paste the Tenant ID value into the Tenant ID field, then select Authenticate with SharePoint Online. If authentication is successful, a success message appears at the top of the Set Up Data Source window that reads "Authenticated".
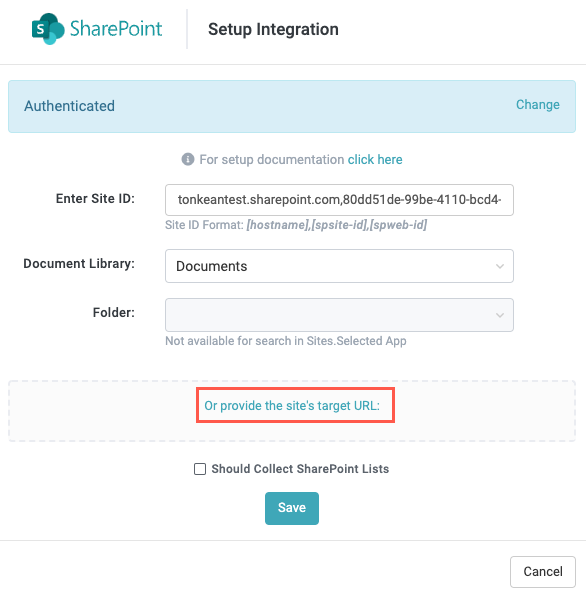
The Set Up Data Source window now displays the Enter Site ID field, which is a unique identifier for the specific SharePoint site you want to allow Tonkean to access. Enter the Site ID you generated previously and select the Document Library dropdown to choose a library. When finished, select Save.

Note that the Folder dropdown is grayed out when connecting using the Selected Sites application.
If you want to connect to a specific folder in your SharePoint site, follow the steps below:
Select Or provide the site's target URL. The SharePoint Url section displays.
Navigate to the folder in your SharePoint site you would like Tonkean to access and copy the URL.
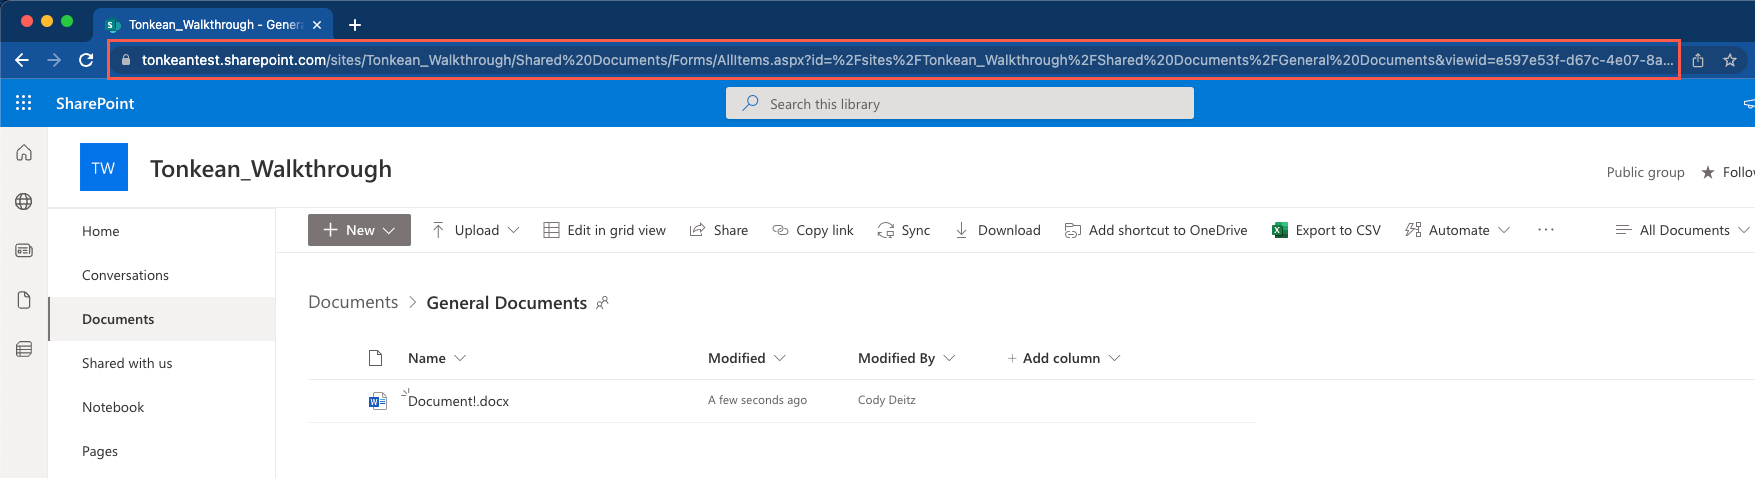
In Tonkean, paste that URL into the field and select Verify Url.

If an error occurs during the URL verification, an error message displays at the top of the window:
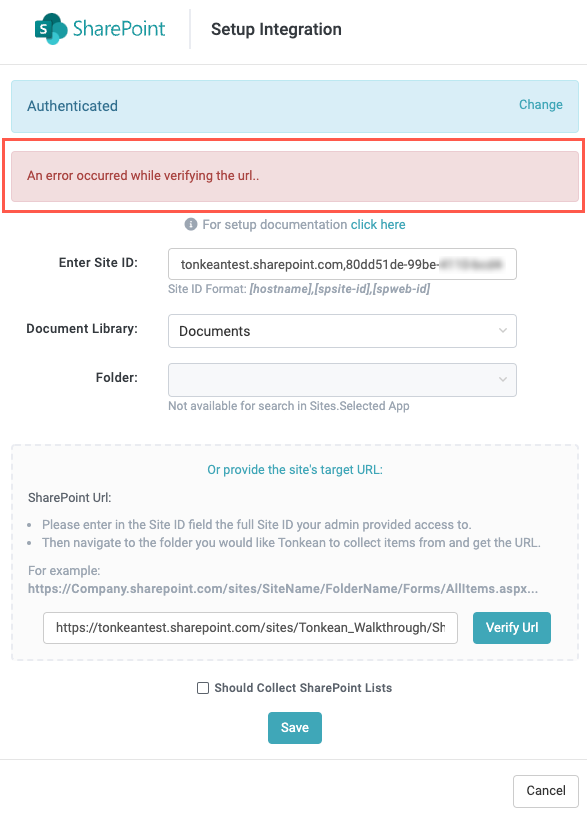
This error is caused by a lack of permissions on the root site of the SharePoint tenant. There's an open issue for this problem; however, there is a workaround. A SharePoint Online admin must follow the steps below:
Navigate to your root SharePoint site (that is,
https://YOUR_ORG.sharepoint.com).Select Site contents. The Site contents tab displays.
Select Site settings. The Site Settings screen displays.
Locate the Users and Permissions section and select Site permissions. The PERMISSIONS tab displays.
Select {Root site} Visitors. The People and Groups | {Root site} Visitors page displays.
Select New in the upper left. Enter the name or email address for the user creating the SharePoint data source. Available users auto-populate. After selecting a user, select Share. The window closes.
The user can then resume step 3 in the process above and re-verify the URL of the SharePoint folder.
After the URL is verified, select Save.
SharePoint Online is now connected using application authentication and the Tonkean for SharePoint - Selected Sites application. Tonkean users with the appropriate Microsoft credentials can create a data source connection to specified sites in your SharePoint environment.