Connect an Okta Directory (SCIM)
To connect an Okta directory to Tonkean using SCIM, follow the steps below.
You must already have an existing Okta directory to follow this process. If you don't already have an Okta account, visit Okta to create one.
Create an Application in Okta
To connect to Okta from an external service, you must configure an application in Okta.
Navigate to Okta and log in to your account.
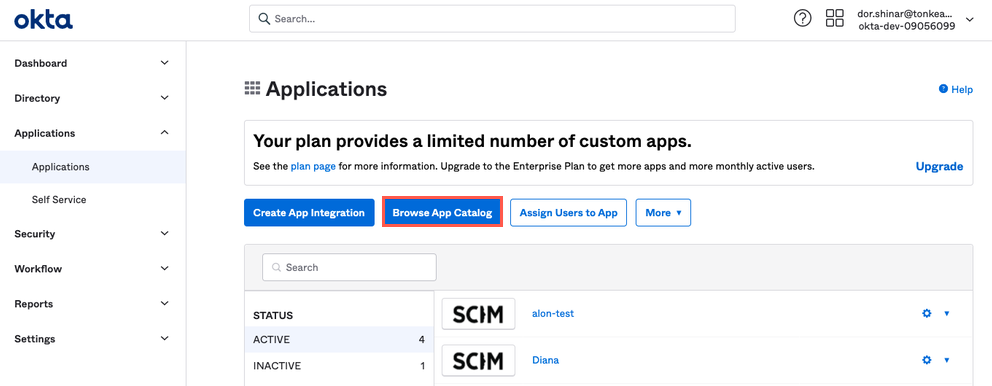
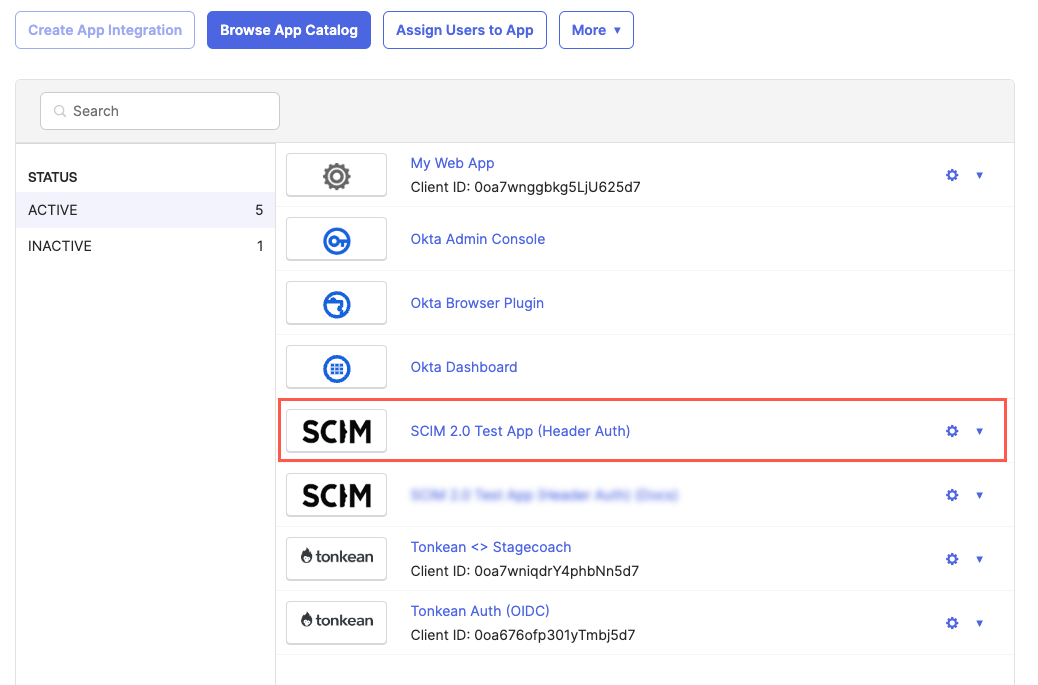
Select Applications > Applications. The Applications screen displays.
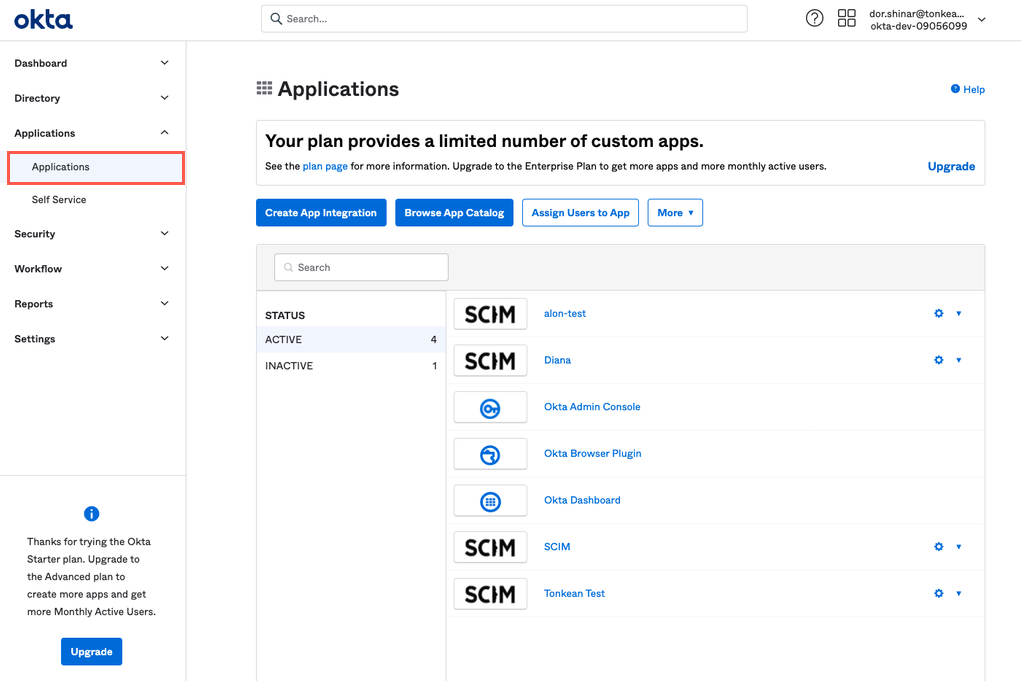
Select Browse App Catalog. The Browse App Integration Catalog screen displays.
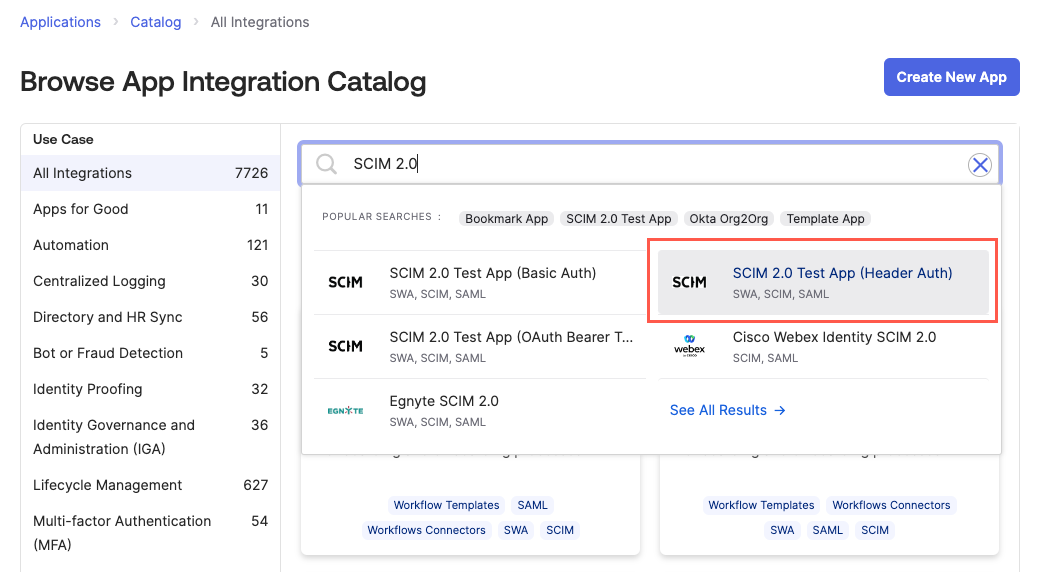
Enter "SCIM 2.0 Test App (Header Auth)" in the search field and select SCIM 2.0 Test app (Header Auth) in the Suggestions dropdown. The SCIM 2.0 Test App screen displays.
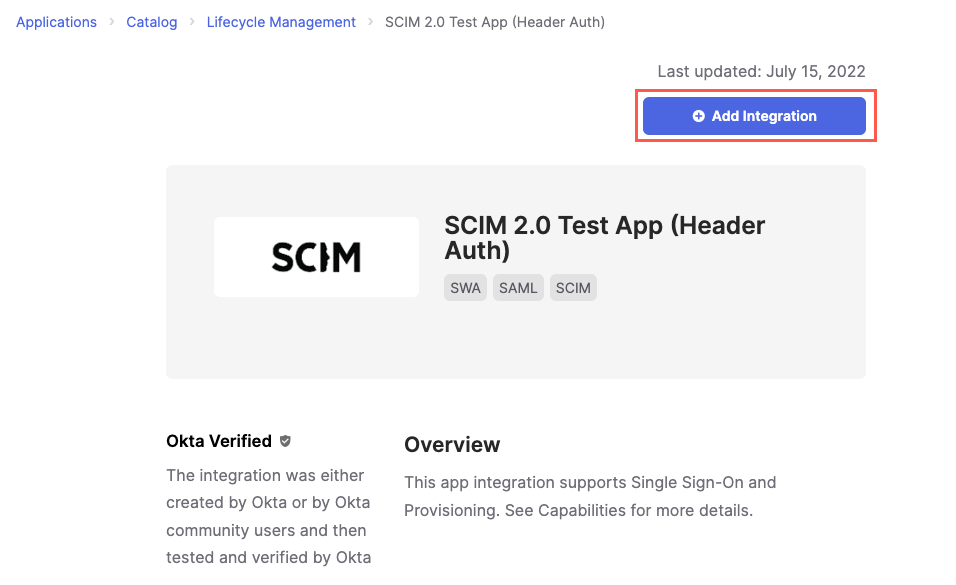
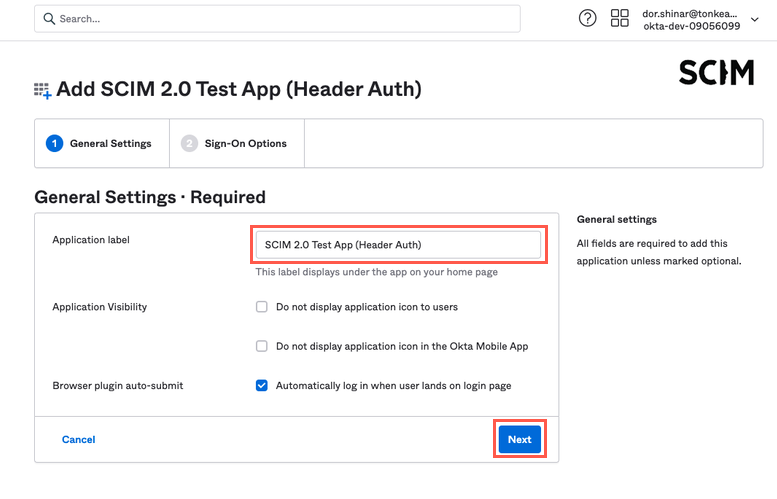
Select Add Integration. The Add SCIM 2.0 Test App (Header Auth) screen displays.
If desired, you can enter a name for the application in the Application label field. If you choose to add a custom name, we recommend using the name of the board you plan to connect to the application. Leave all other fields set to their default values. Then, select Next. The Sign-On Options tab displays.
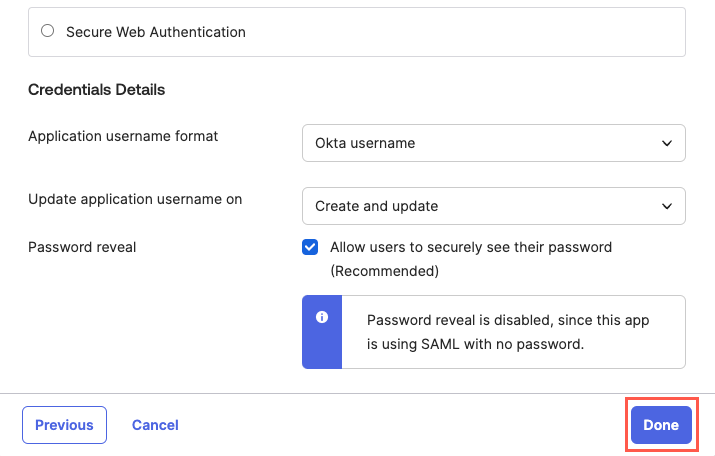
The Sign-On Option tab allows you to configure how users log in to your application, but this isn't necessary for provisioning. Scroll to the bottom and select Done.
Your application is connected.
Configure API Integration
Once your Okta application is connected, you must configure the API integration.
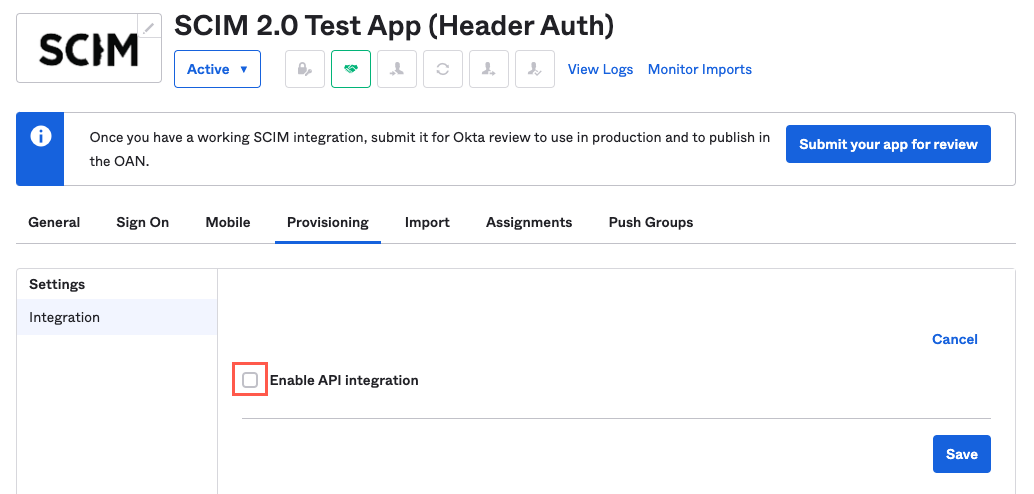
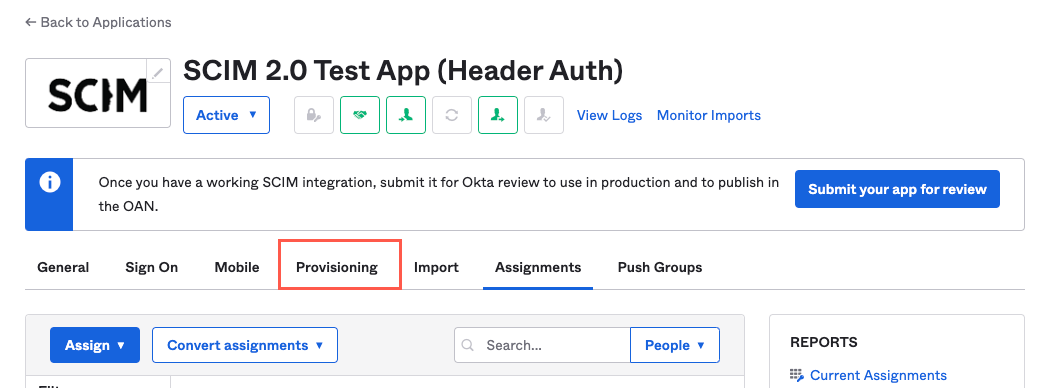
On the SCIM 2.0 Test App (Header Auth) screen, select the Provisioning tab. The Provisioning tab displays.
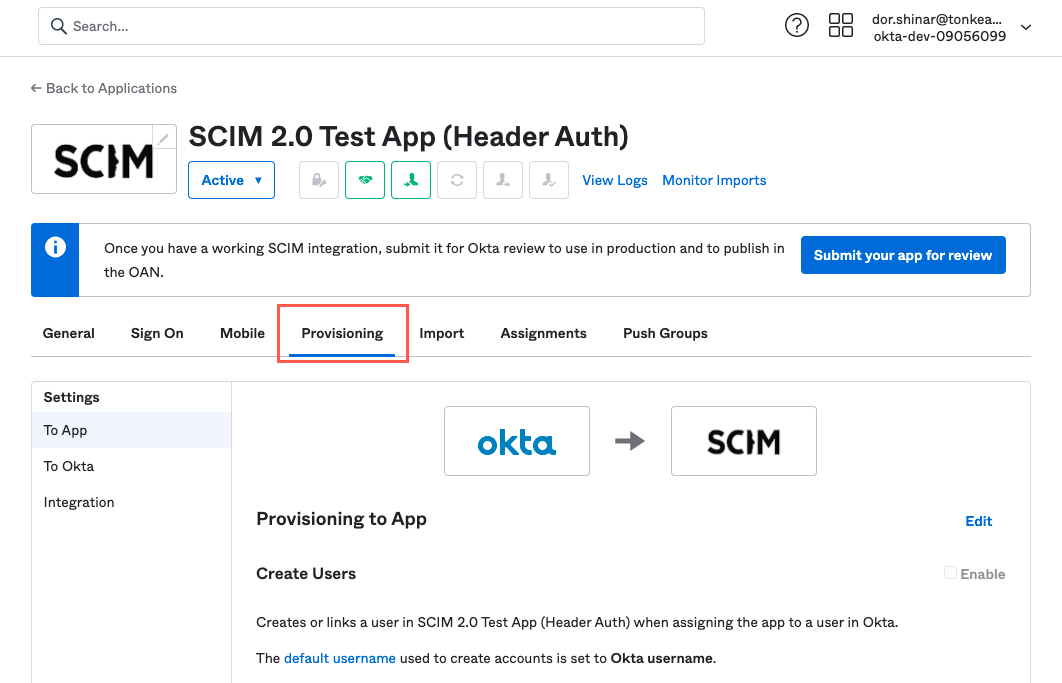
Select Configure API Integration.
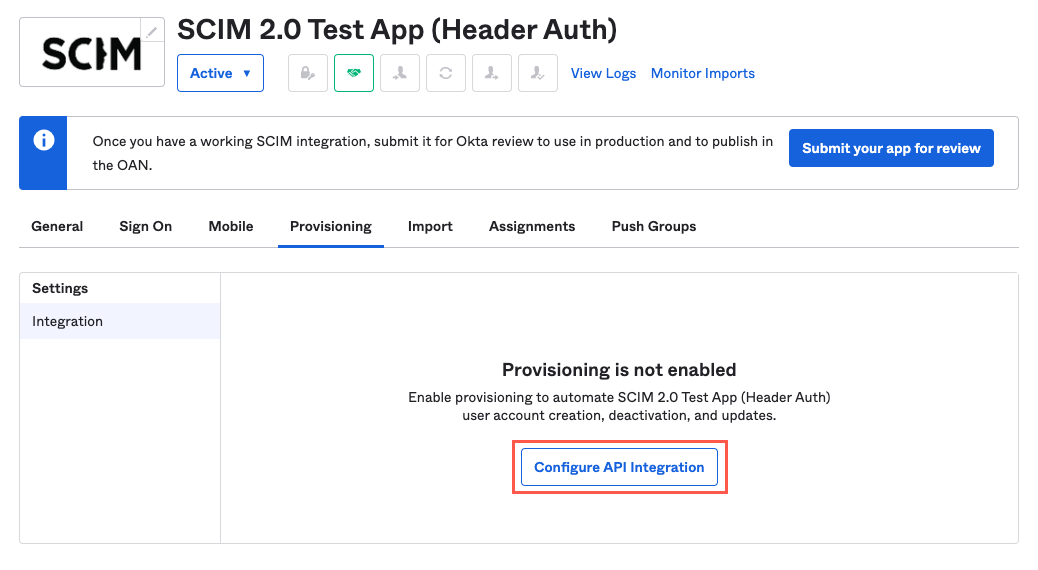
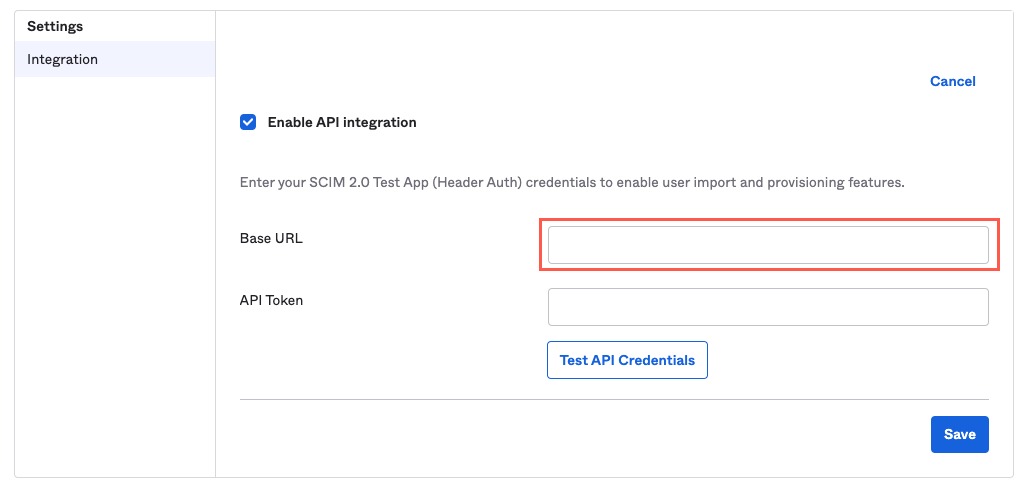
Select the Enable API Integration checkbox. The Base URL and API Token fields display.
In the Base URL field, enter the server you want to use with the suffix
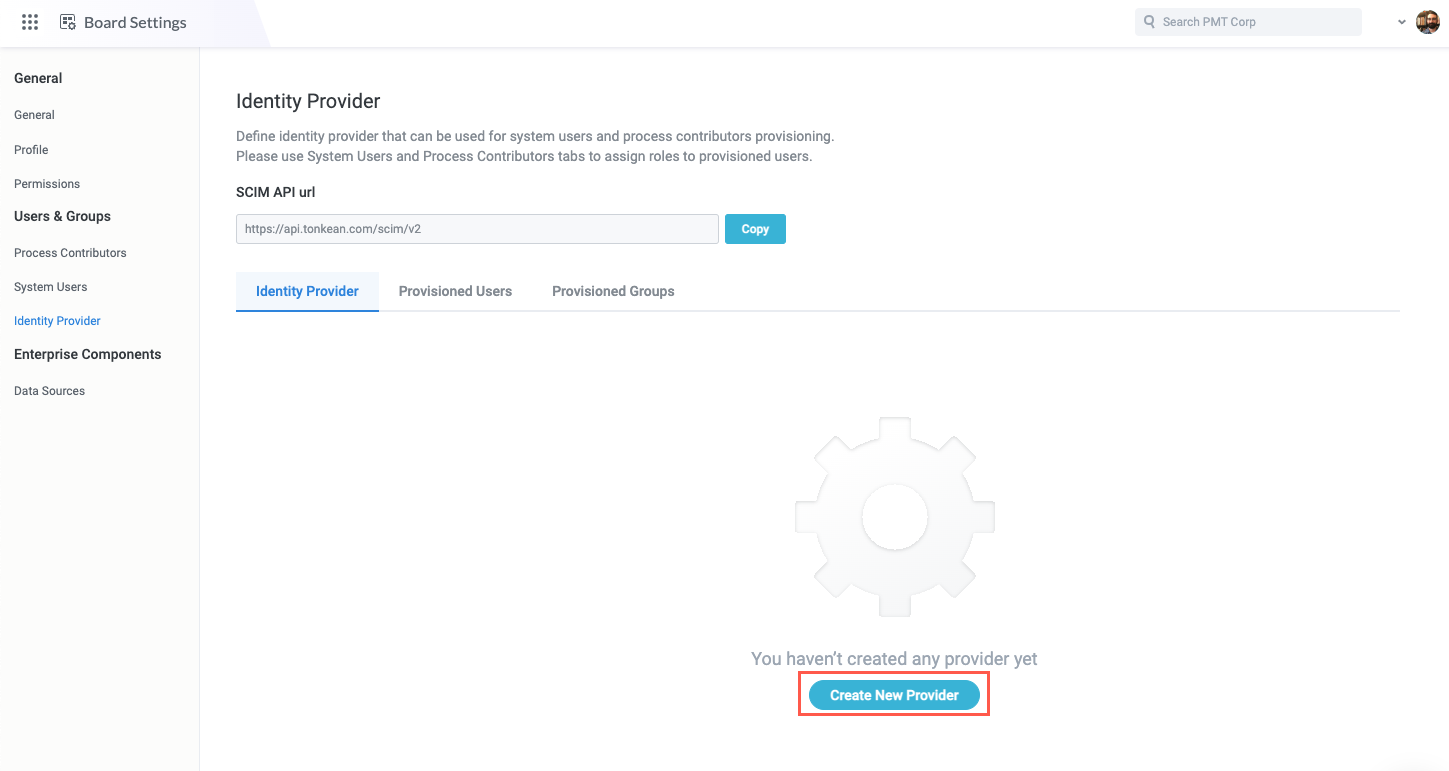
/scim/v2.You can find the Tonkean SCIM API URL by selecting your profile icon in the upper right and navigating to Board Settings > Identity Provider.
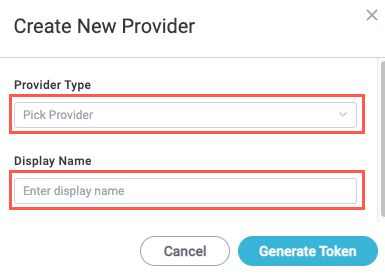
Next, you must generate an API token. To generate this token, open your Tonkean board, select your profile icon in the upper right, and navigate to Board Settings > Identity Provider. Select Create New Provider. The Create New Provider window displays.
Select the Provider Type dropdown and choose OKTA. Then, enter a Display Name for the provider. When finished, select Generate Token. The Access Token displays.
Select Copy to copy the access token. Paste the token in a separate file.
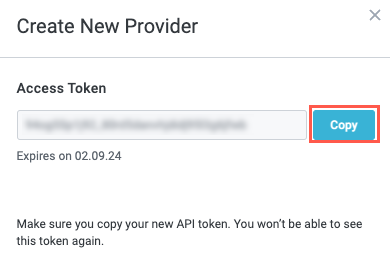
This is the last time you'll be able to view the decrypted token, so make sure you save it somewhere safe in case you need to reference it later.
Return to Okta. In the API Token field, enter
token, insert a space, and then paste in the API token.Remember to include the string
tokenand a space before entering your API token, or Okta will generate an error when testing the credentials.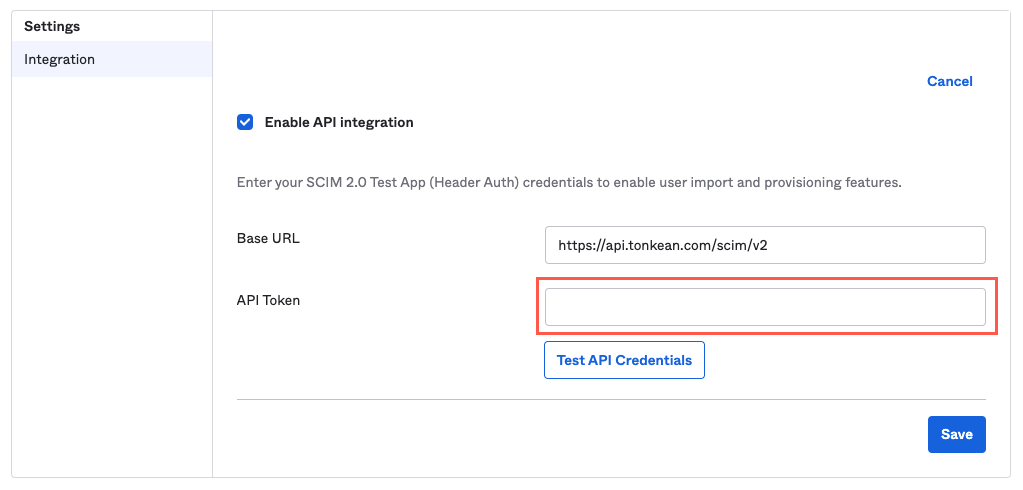
Select Test API Credentials. If the test is successful, a success message displays. If the test is not successful, an error message displays. The content of the error message should help you troubleshoot potential causes for the error.
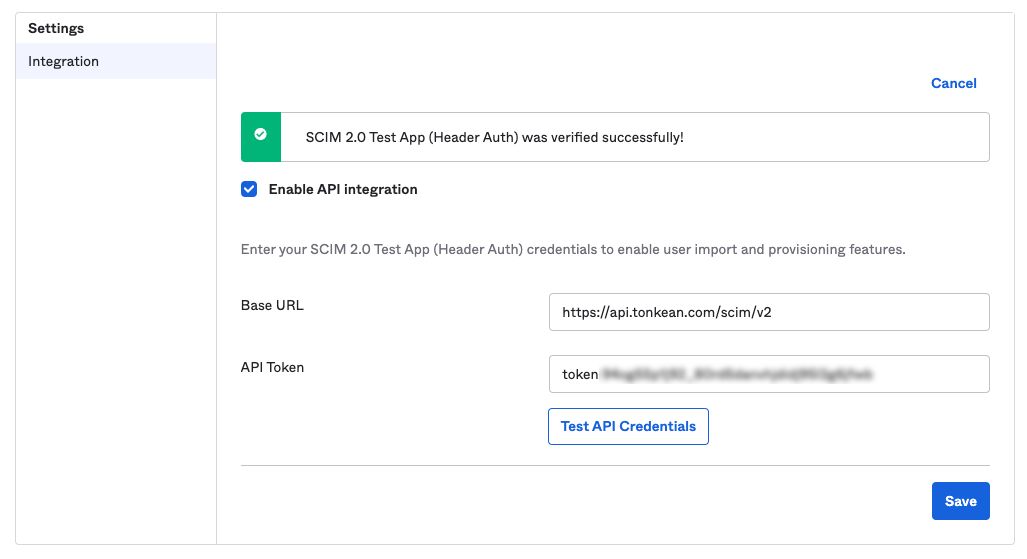
Once you receive a success message, select Save.
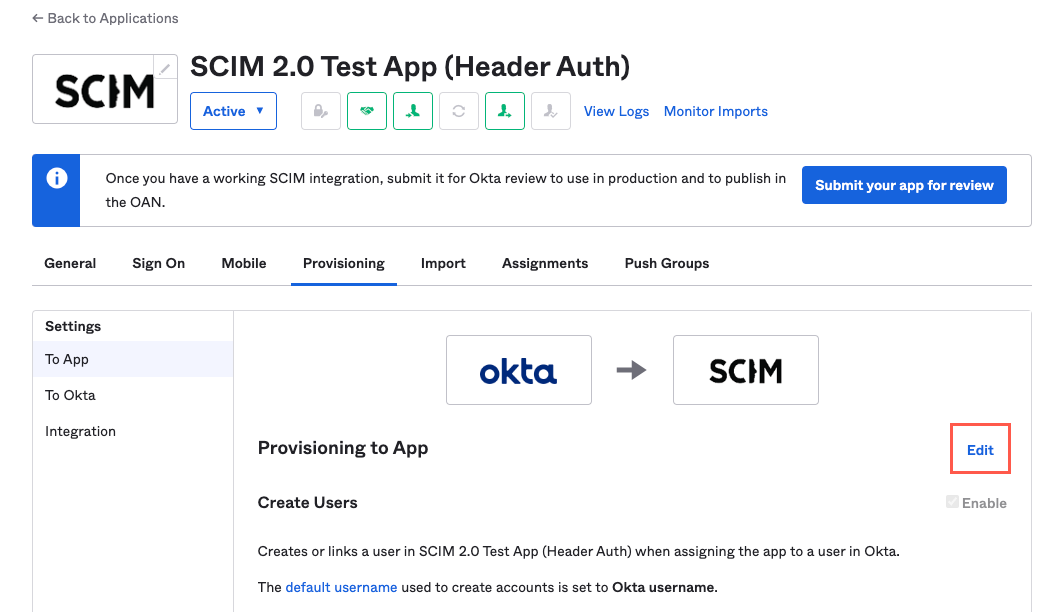
Select the Provisioning tab. The Provisioning tab displays.
Select Edit. The Provisioning to App settings become editable.
Select the Enable checkboxes that correspond with the following settings:
Create Users
Update User Attributes
Deactivate Users
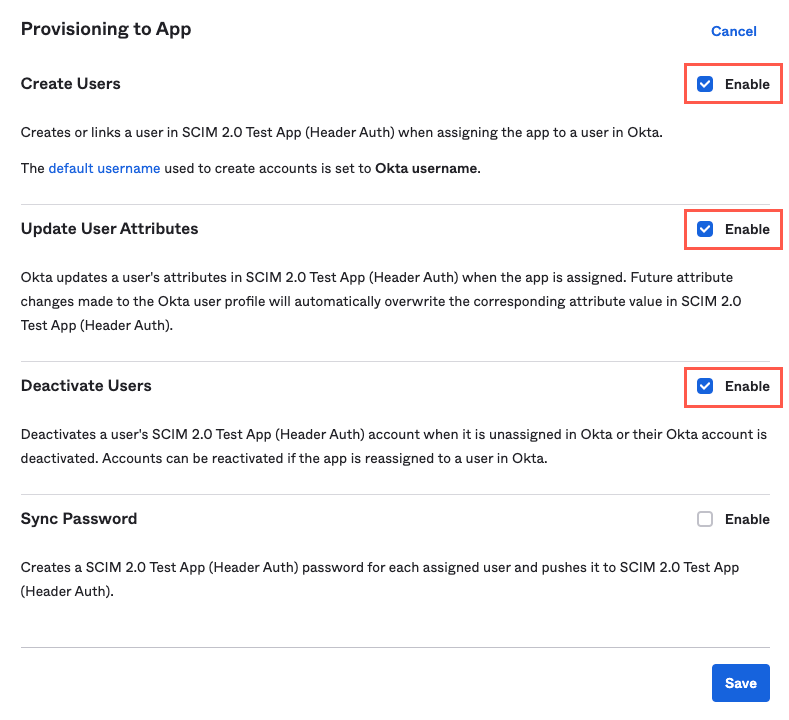
When finished, select Save.
The Okta application is successfully integrated with Tonkean.
Add Tonkean Roles to the SCIM Application
Now that the API integration is set up, you can add Tonkean roles to the SCIM application.
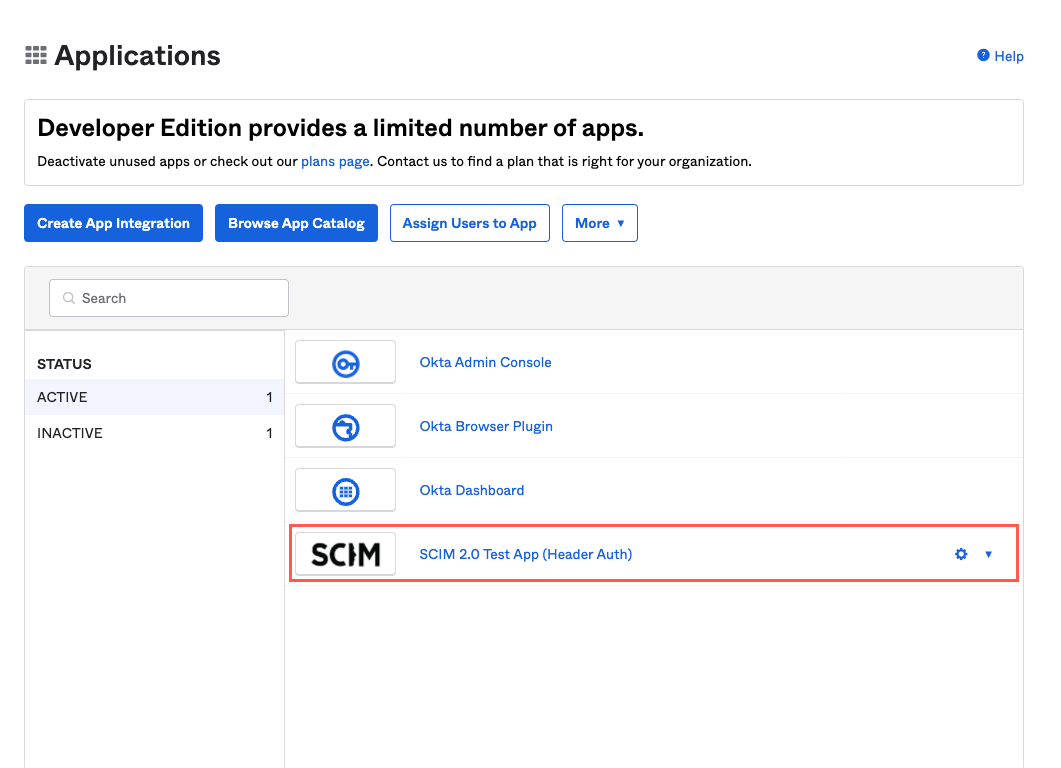
In Okta, select Applications > Applications. The Applications screen displays.
Select SCIM 2.0 Test App (Header Auth) from the list of applications. The SCIM 2.0 Test App (Header Auth) screen displays.
On the SCIM 2.0 Test App (Header Auth) screen, select the Provisioning tab. The Provisioning tab displays
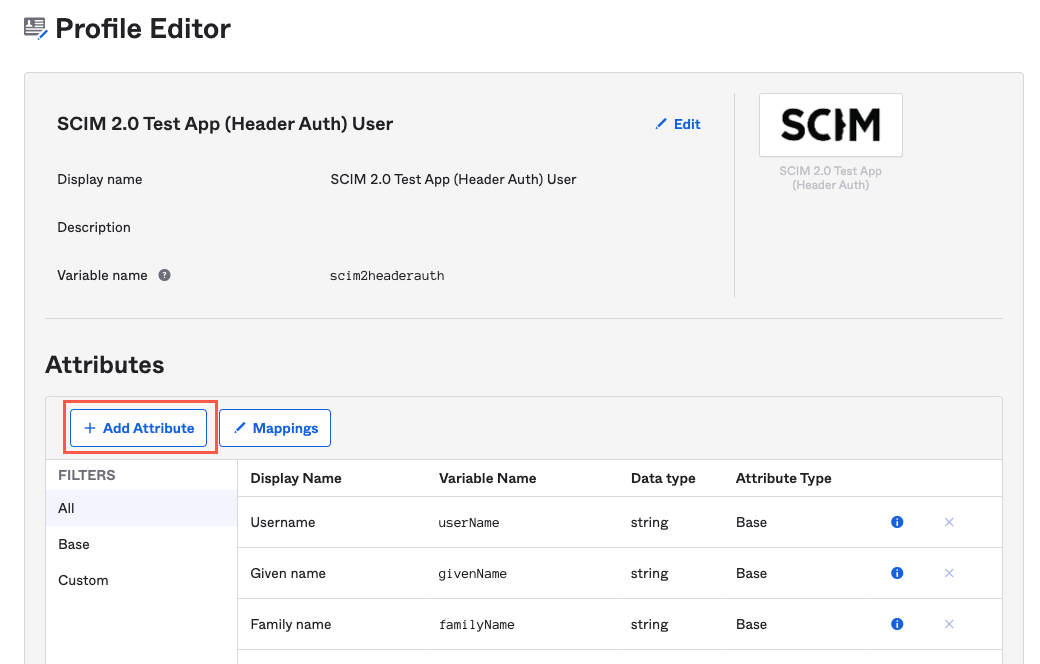
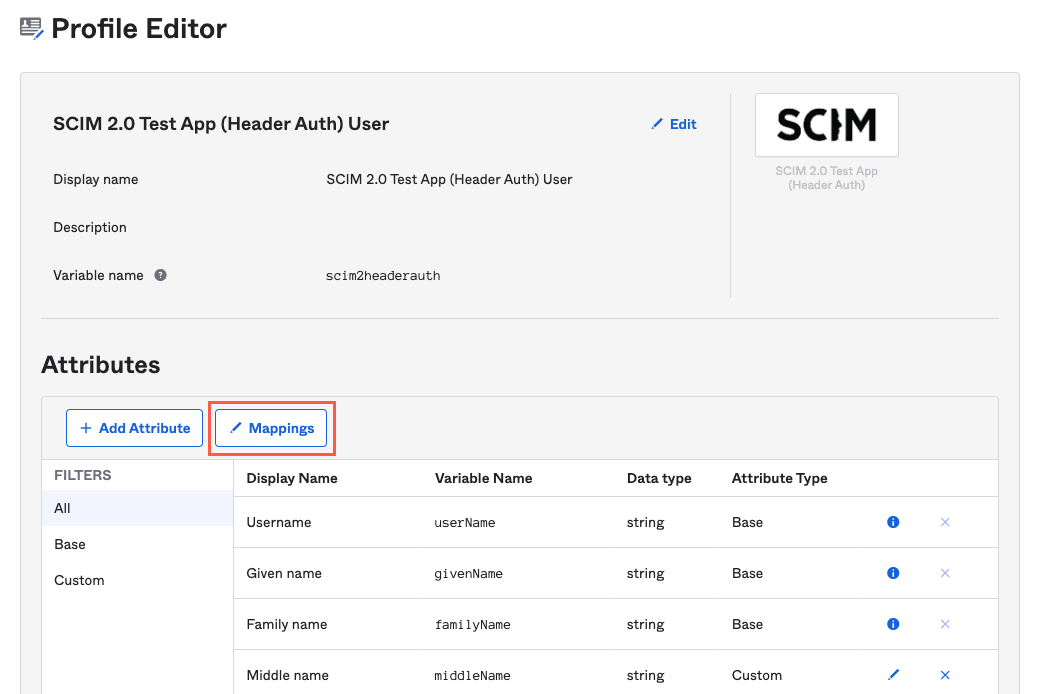
Scroll down to the SCIM 2.0 Test App (Header Auth) Attribute Mappings heading. Below this heading, select Go to Profile Editor. The Profile Editor screen displays.

Select Add Attribute. The Add Attribute window displays.
Enter the following values:
These are the same values you added in step #4 when adding roles to users.
Data type -
string arrayDisplay name -
Tonkean RolesVariable name -
tonkeanRolesExternal name -
tonkeanRolesExternal namespace -
urn:scim:tonkeanEnum - Select the Define enumerated list of values checkbox.
Attribute members:
Process Contributor-PROCESS_CONTRIBUTORSystem User-SYSTEM_USER
If the Scope field displays, leave the User personal checkbox unselected.
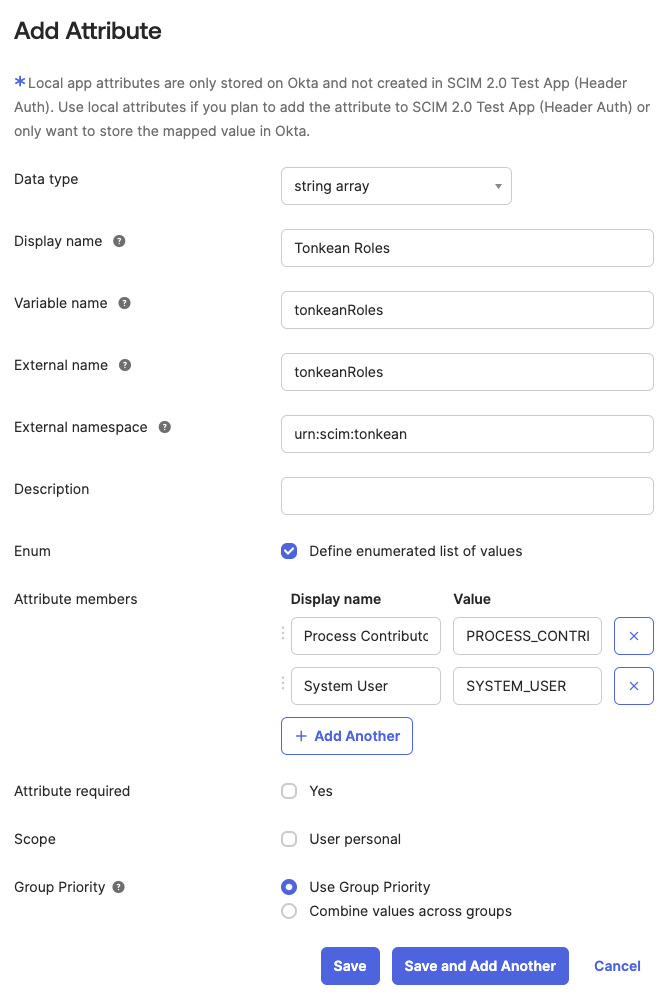
Confirm the values are correct and select Save.
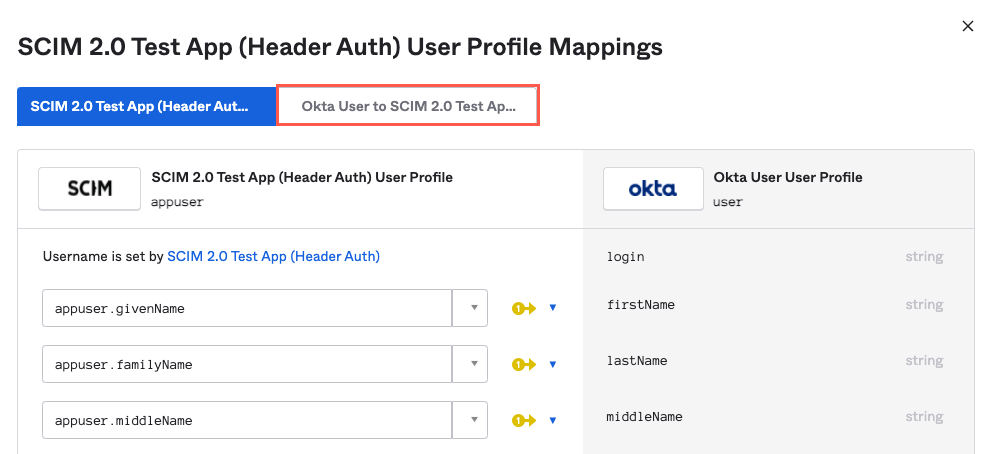
On the Profile Editor screen, select Mappings. The Application User Profile Mappings window displays.
Select Okta User to {Application Name}.
Scroll to the down to the bottom of the window and select the dropdown beside the tonkeanRoles. From that dropdown, select user.tonkeanRoles.
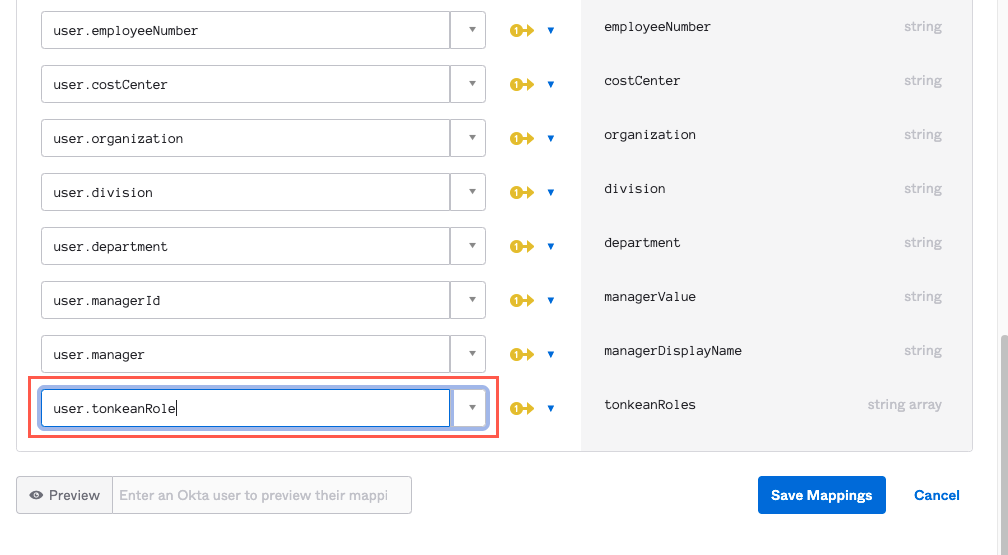
When finished, select Save Mappings.
The connection and configuration process is complete. You can now provision Tonkean users and groups in Okta.
Assign Users
With Tonkean user roles configured in your SCIM application, you can assign users and user groups to the application, granting users those roles.
Assign User Groups to the Application
Assigning user groups to your SCIM application is the most common way to add users and assign them the appropriate roles.
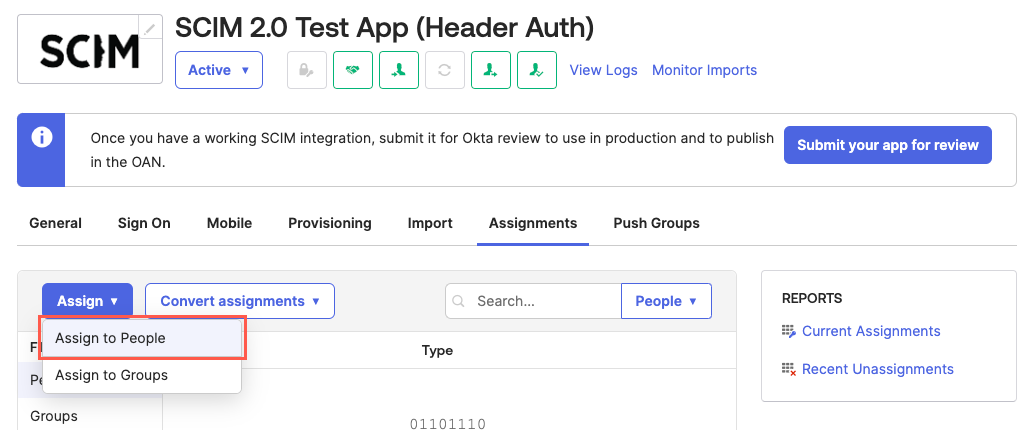
In the Okta sidenav, select Applications > Applications. The Applications screen displays.
Select the SCIM application you want to individually add users to. The SCIM 2.0 Test App (Header Auth) screen displays.
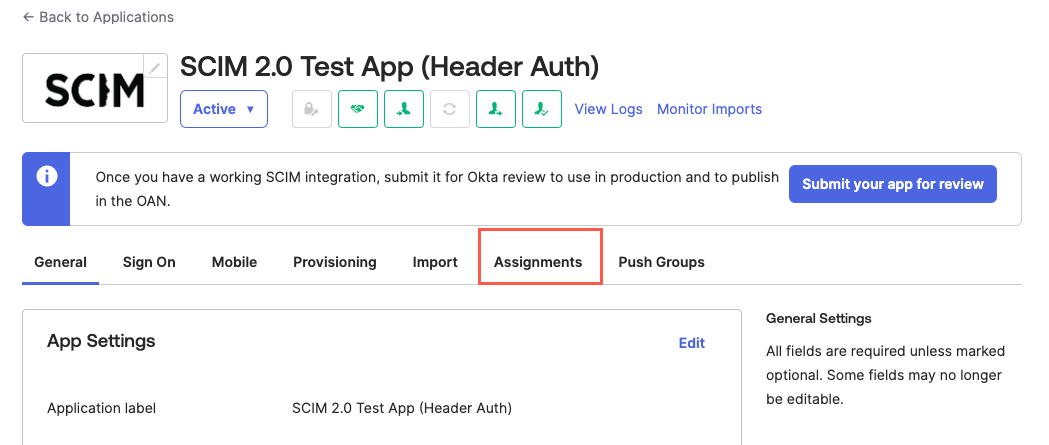
Select the Assignments tab. The Assignments tab displays.
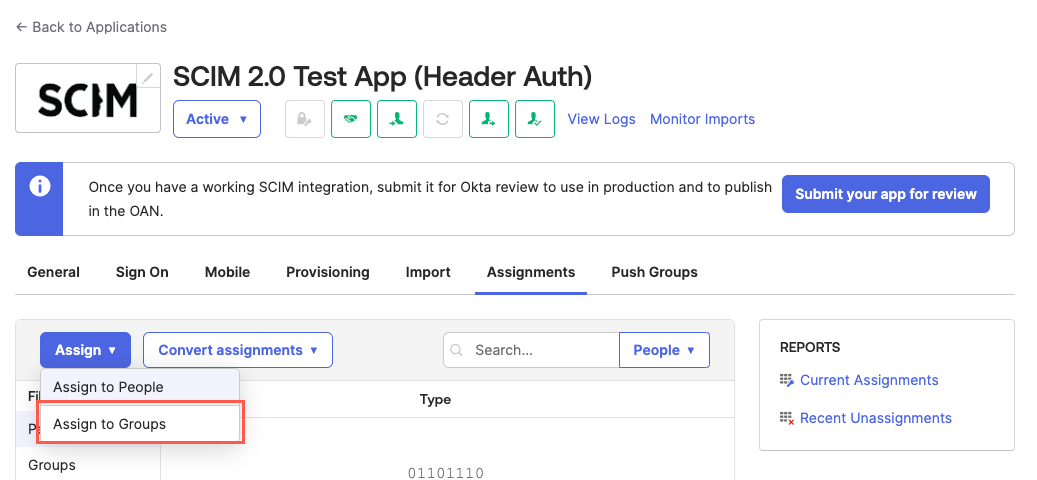
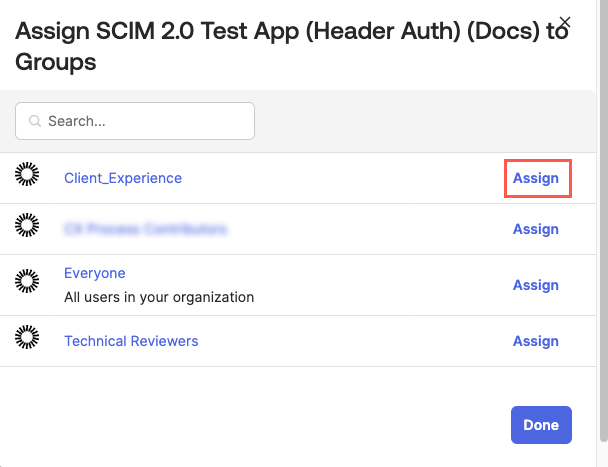
Select Assign > Assign to Group. The Assign {SCIM App} to Groups window displays.
Select the group you want to assign to the application. The group configuration fields display.
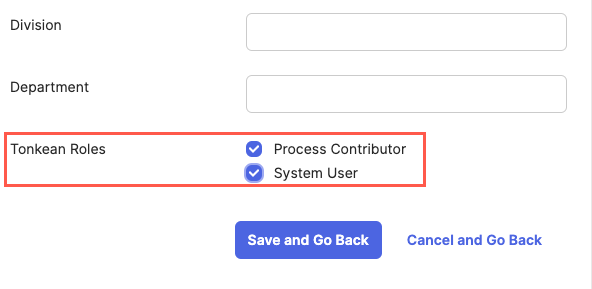
Scroll to the bottom of the window and locate the Tonkean Roles field. Select the role(s) you want to assign the group, then select Save and Go Back.
Repeat steps #5-6 for any additional groups you want to provision in Tonkean.
Assign Individual Users to the Application
While less common than assigning groups to an application, you can add individual users to your SCIM application.
In the Okta sidenav, select Applications > Applications. The Applications screen displays.
Select the SCIM application you want to individually add users to. The SCIM 2.0 Test App (Header Auth) screen displays.
Select the Assignments tab. The Assignments tab displays.
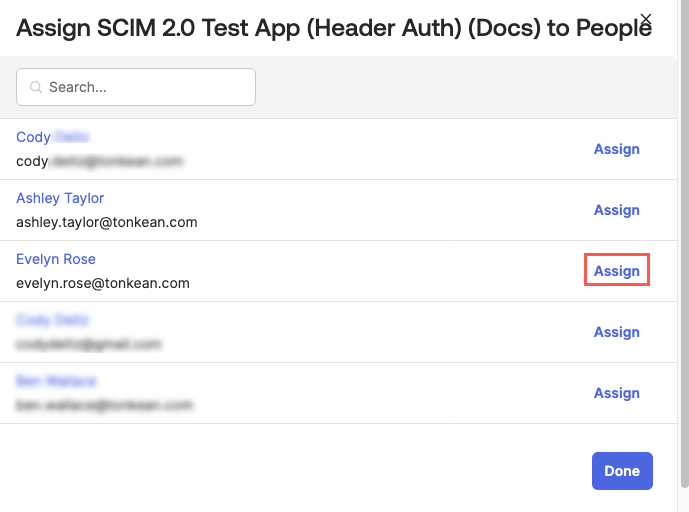
Select Assign > Assign to People. The Assign {SCIM App} to People window displays.
Select the user you want to assign to the application. The user configuration fields display.
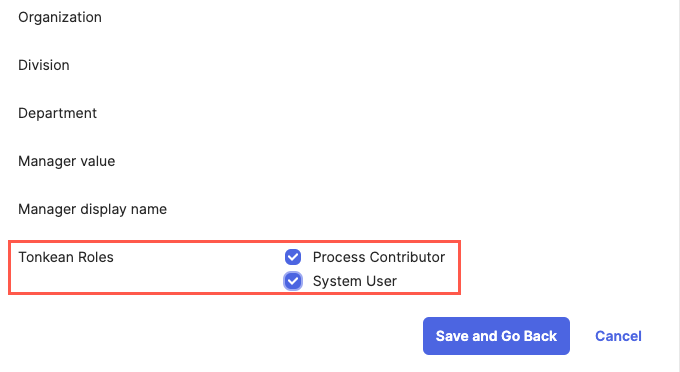
Scroll to the bottom of the window and locate the Tonkean Roles field. Select the role(s) you want to assign the user, then select Save and Go Back.
Repeat steps #4-5 for each user you want to add. Each user added this way is assigned to the SCIM application with the relevant roles you selected.