Google Chat
Google Chat is a web-based messaging application offered as part of the Google Workspace suite. Chat allows you to send direct messages and hold group conversations to power collaboration across your team.
Like Slack and Teams, you can connect Google Chat both as a communication tool, enabling you to send messages and interact with your process contributors, and as a data source, enabling you to monitor your Google Chat instance and collect user, space, and message entities—as well as invite users to spaces. However, unlike other messaging applications, Google Chat requires additional configuration in the Google Workspace and Google Admin Console. An admin must create the relevant apps in the Google Cloud Console to enable Tonkean to communicate with Google Chat.
Creating, configuring, and publishing the required apps in the Google Cloud Console requires API knowledge and Google Cloud Admin privileges. Only admins should perform the Google Cloud project setup and configuration processes.
Prerequisites
To perform the setup and configuration steps to enable using Google Chat as a communication tool and data source, you must be an administrator with the relevant permissions in your organization's Google Cloud instance.
Set Up the Google Chat App to Connect Google Chat as a Communication Tool
To set up Google Chat as a communication tool in Tonkean, you must create an app and connect the Google Chat API in the Google Cloud Console.
Enable and Configure the Google Chat API
The Google Chat API enables your workspace instance to connect to Tonkean.
Create a Project and Enable APIs
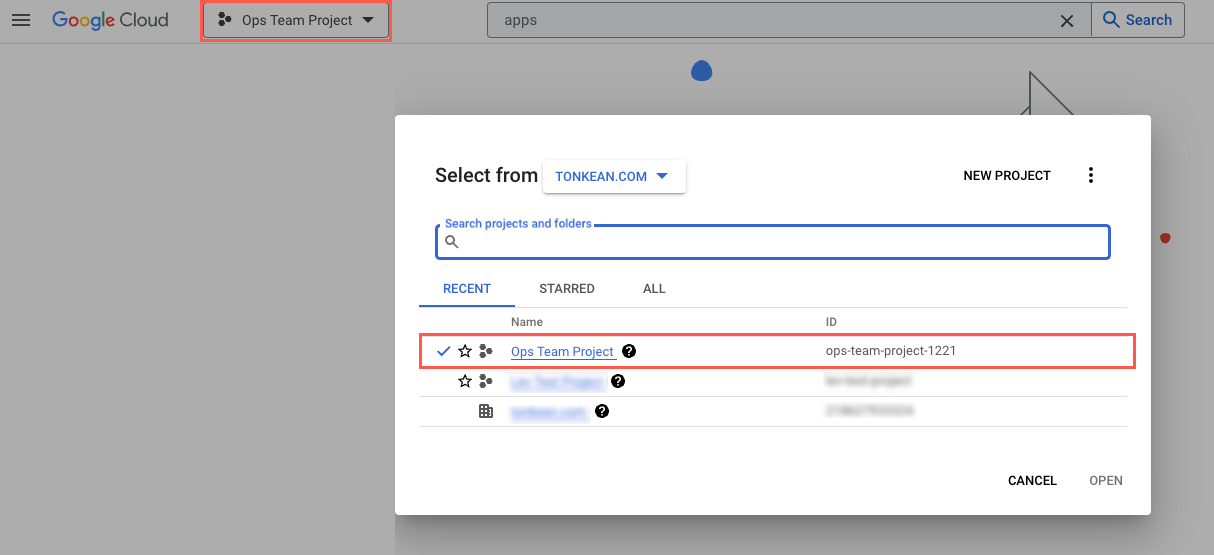
Navigate to Google Cloud Console.
Select the project dropdown in the top navigation bar and select your newly created project.
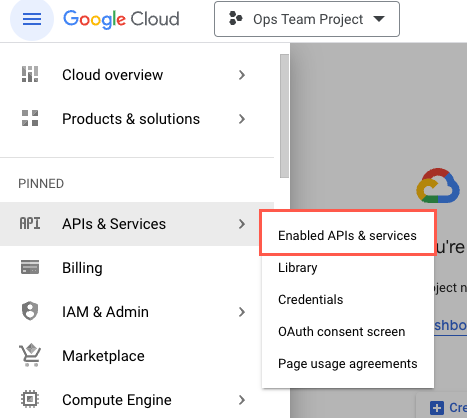
In the sidenav, select APIs & Services > Enabled APIs and services. The APIs & Services screen displays.
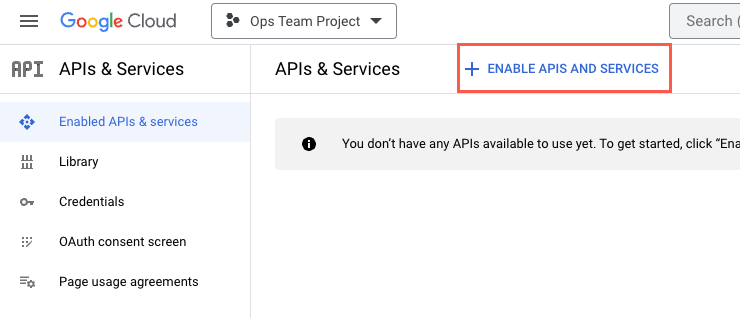
Select + ENABLE APIS AND SERVICES. The API Library screen displays.
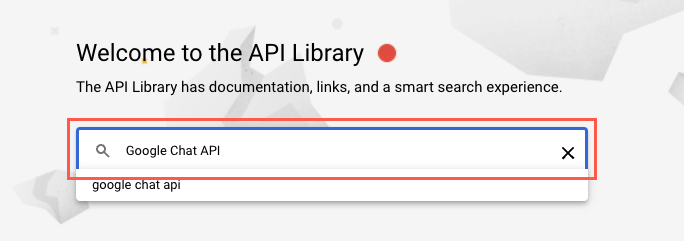
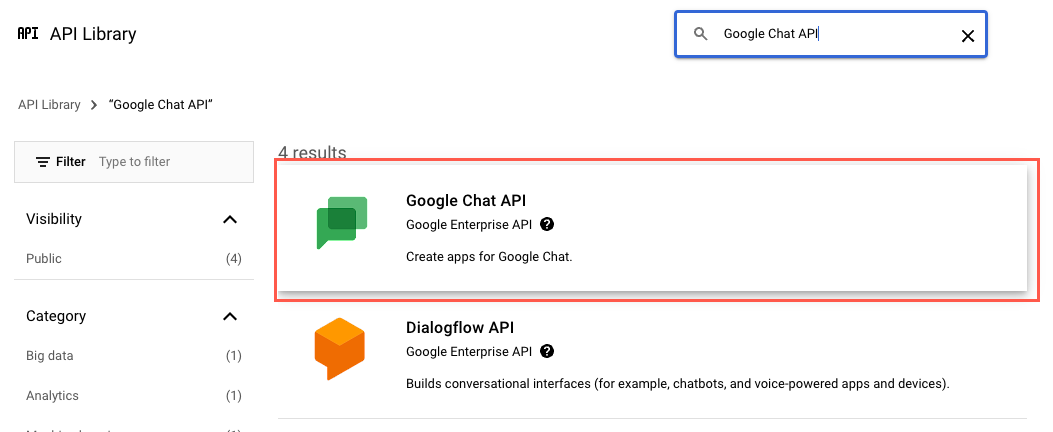
In the API Library search bar, enter "Google Chat API" and select Enter. Search results display.
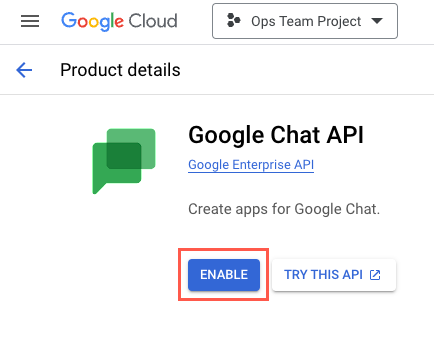
Select the Google Chat API result. The Google Chat API product details screen displays.
Select ENABLE. The Google Chat API Service Details screen displays.
Configure the Google Chat App
Configure your Google Chat app, powered by the Google Chat API.
On the Google Chat API Service Details screen, select the CONFIGURATION tab. The Configuration tab displays.

Enter values for the following fields:
App name (required) - A descriptive name for your app. Using a unique name ensures you can locate your app in the app selection menu. We recommend {Your org} Google Chat.
Avatar URL (required) - Tonkean logo:
https://tonkean-images.s3.amazonaws.com/assets/logo-square-logo-5-gchat.pngDescription (required) - A brief description of the app.

In the Interactive features section, perform the following steps:
Ensure the Enable Interactive features toggle is turned on. This option is enabled by default.
In the Functionality subsection, select both Receive 1:1 messages and Join spaces and group conversations checkboxes.
In the App URL field, enter
http://api.tonkean.com/webhooks/gchat/events.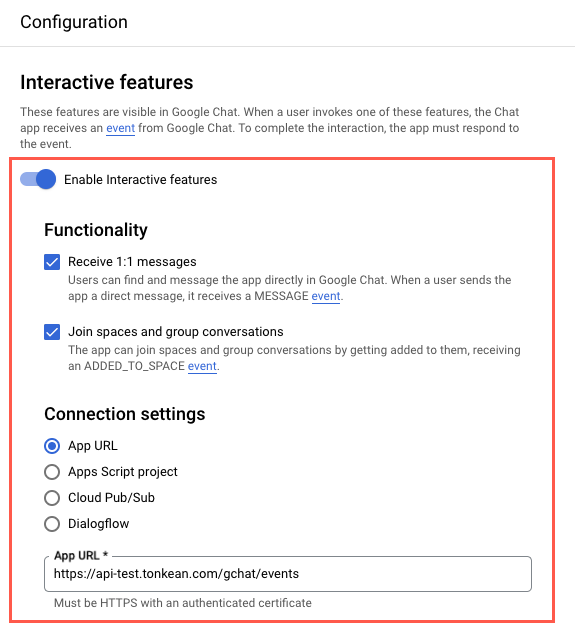
In the Visibility section, deselect the Make this Chat app available to specific people and groups in {org} checkbox.
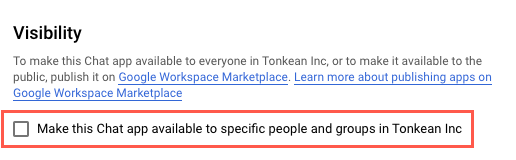
To test the Google Chat API app as an admin, select this checkbox and enter your email address or relevant domain. This makes the app available to add to your workspace and test in a Tonkean module.
When finished configuring these options, select SAVE in the lower left. A success message displays: Configuration saved.
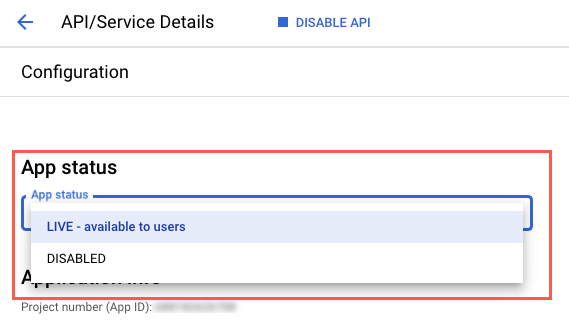
Refresh the page and scroll to the top of the screen. A new field, App status, displays at the top of the Configure screen. Select the App status dropdown to set the status to LIVE - available to all users.
Create a Service Account and Create API Key
With the Google Chat app created and basic configuration complete, you can create a service account and set up the credentials for the account.
Create a Service Account
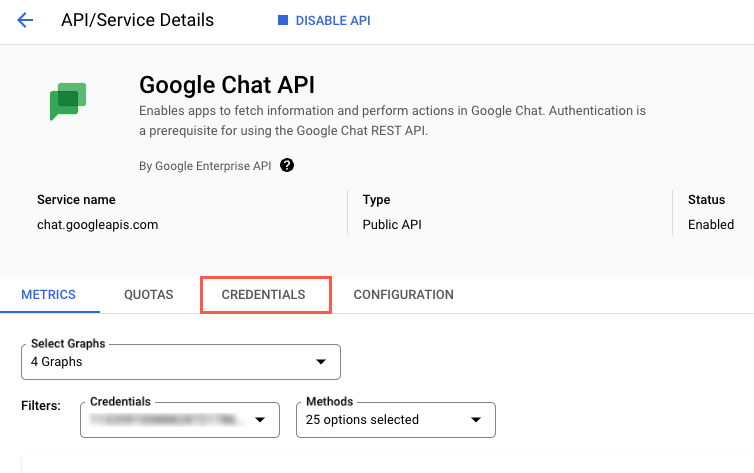
In the API Service Details screen, select the CREDENTIALS tab. The Credentials tab displays.
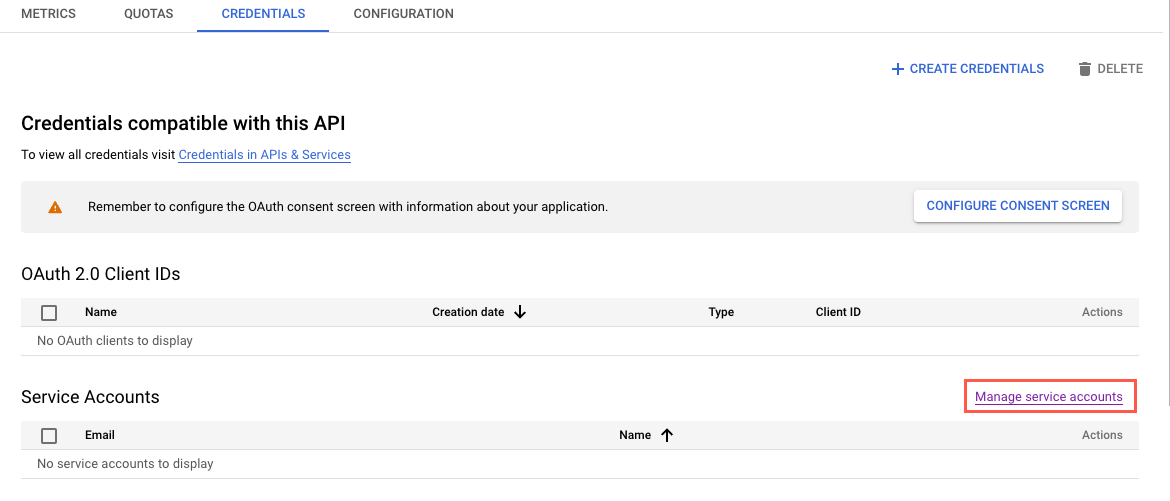
Select Manage service accounts in the lower right. The Service accounts screen displays.
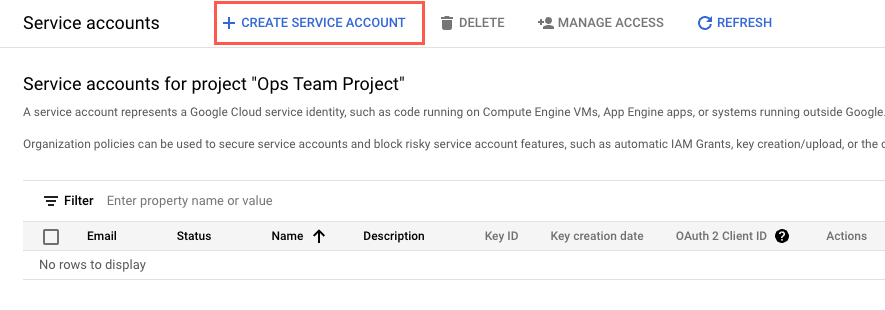
In the top navigation bar, select + CREATE SERVICE ACCOUNT. The Create service account screen displays.
Enter the required information in the Service account details step. For more information on Google service accounts, see Create service accounts.
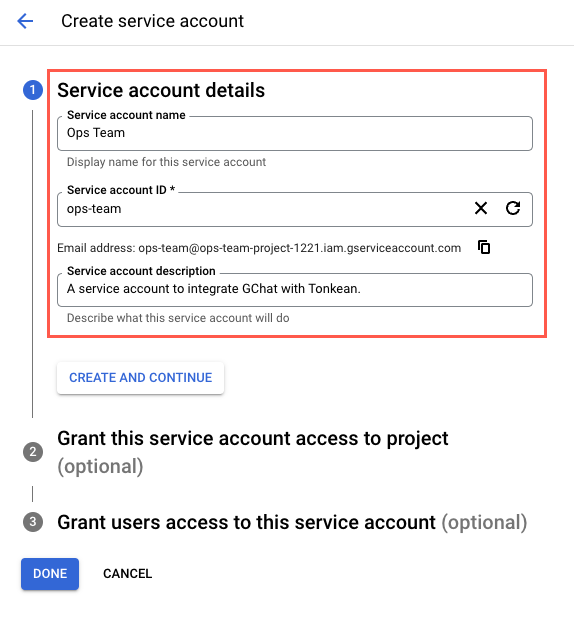
When finished entering the service account details, select CREATE AND CONTINUE.
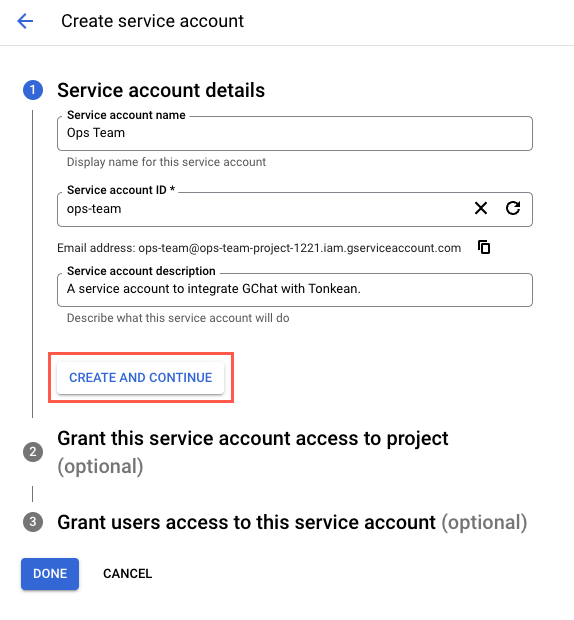
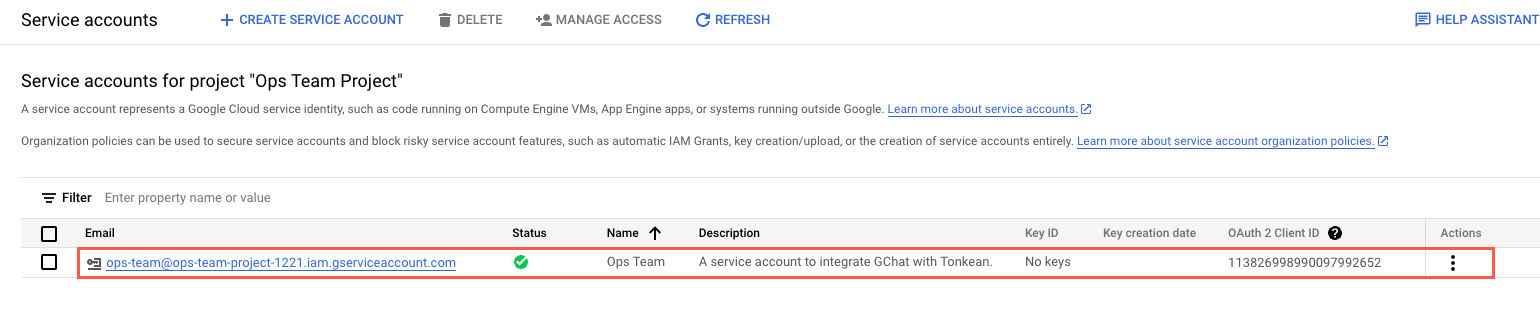
Skip optional steps #2 and #3 below and select DONE. The Service accounts screen displays, featuring your newly created service account.
Create an API Key
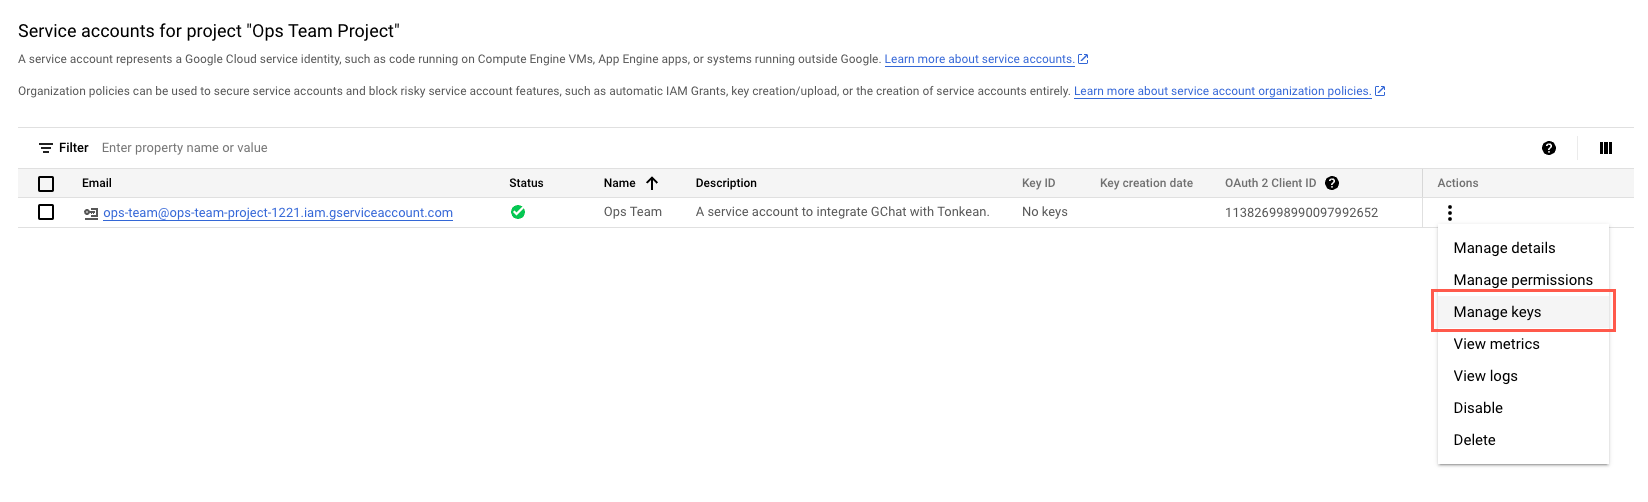
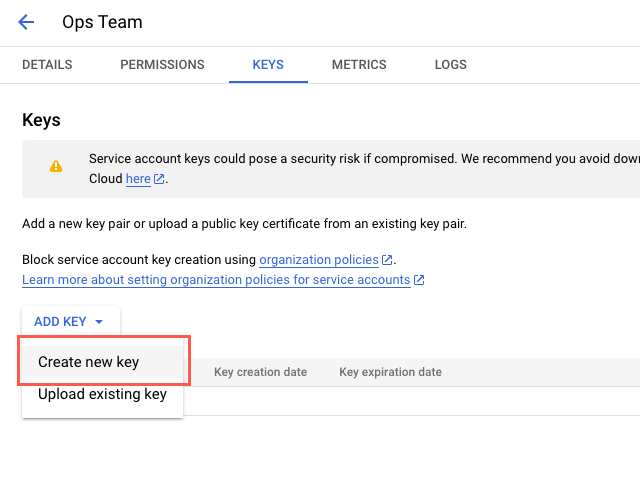
On the Service accounts screen, select the kebab (three-dots) icon in the Actions column of your newly created service account, then select Manage keys. The Keys screen displays.
Select ADD KEY > Create new key. The Create private key window displays.
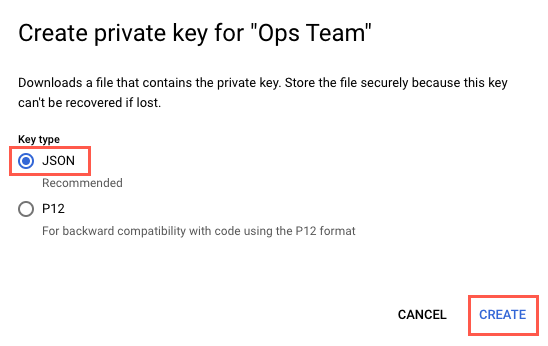
Select the Key type JSON and select CREATE. The private key downloads to your computer as a JSON file.
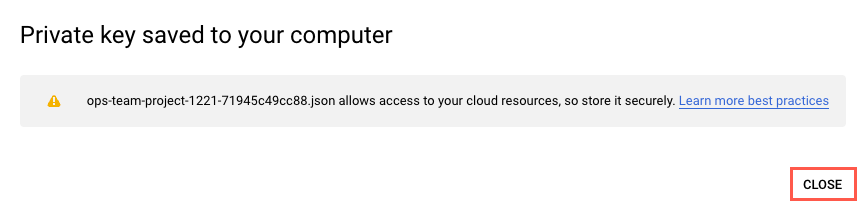
The downloaded key allows access to your Google Cloud resources, so make sure it's stored securely.
Select CLOSE to close the window.
With the API key generated for your service account, you can set up a new Google Chat communication tool in Tonkean.
Add Google Chat as a Communication Tool in Tonkean
With your Google Chat app and service account set up, you can add Google Chat as a communication tool in Tonkean.
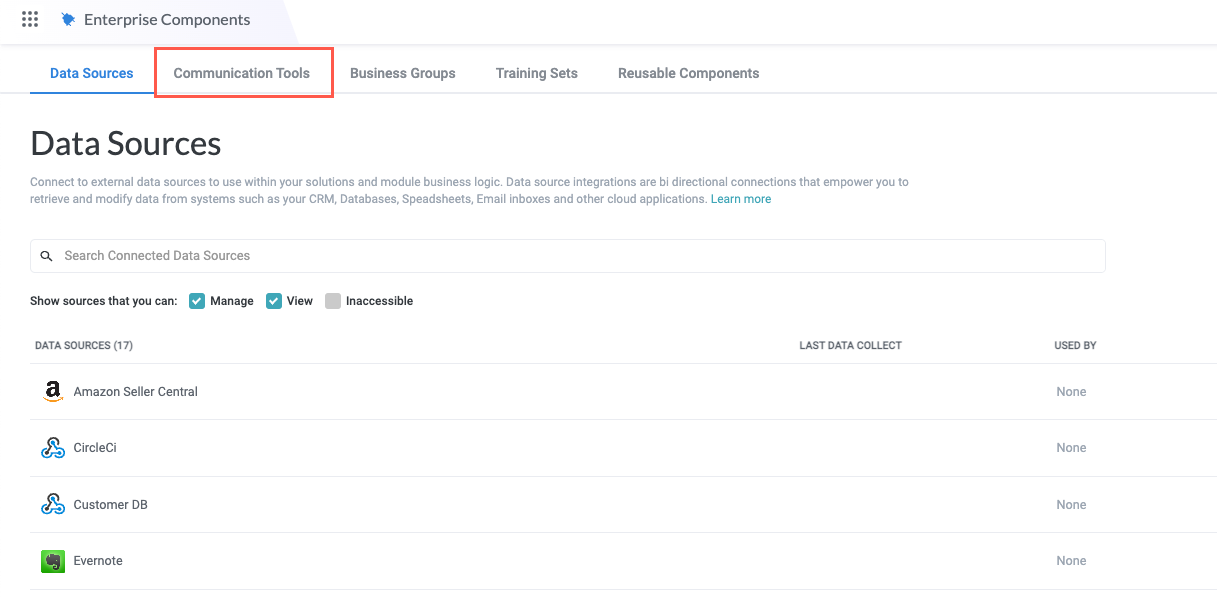
In Tonkean, select the main nav icon,
 , in the upper left and select Enterprise Components. The Enterprise Components screen displays.
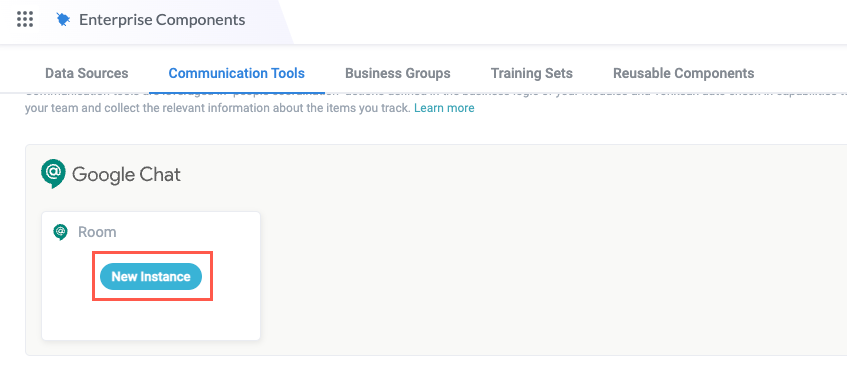
Select the Communication Tools tab. The Communication Tools screen displays.
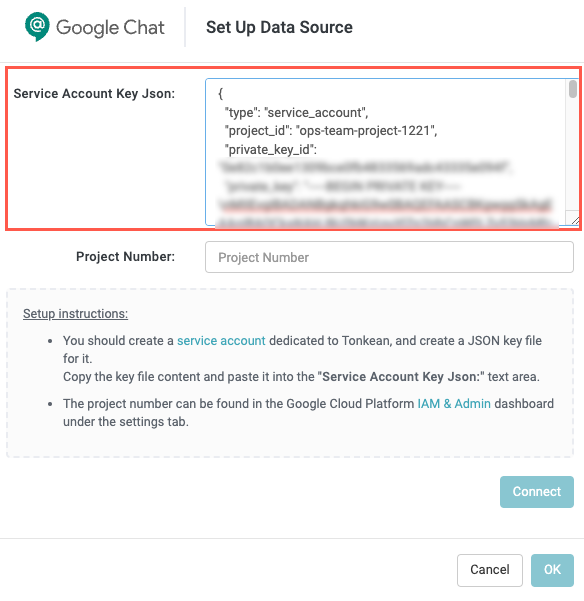
In the Google Chat section, select New Instance. The Set Up Data Source window displays.
Navigate to the service account private key JSON file you downloaded in Create an API Key and copy the entire contents of the file into the Service Account Key Json field.
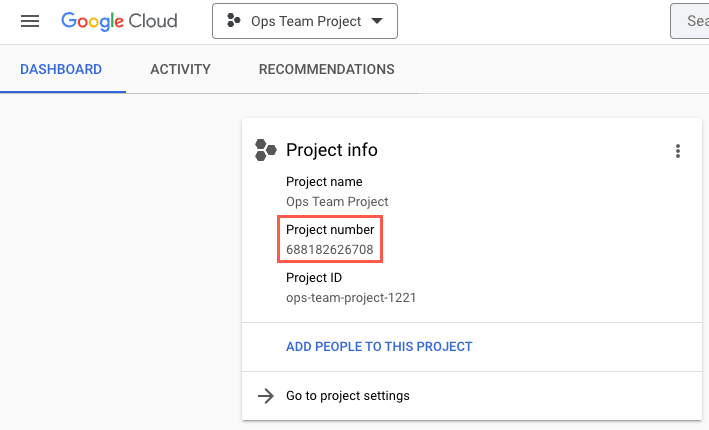
Enter the Project Number of your Google Cloud Console project.
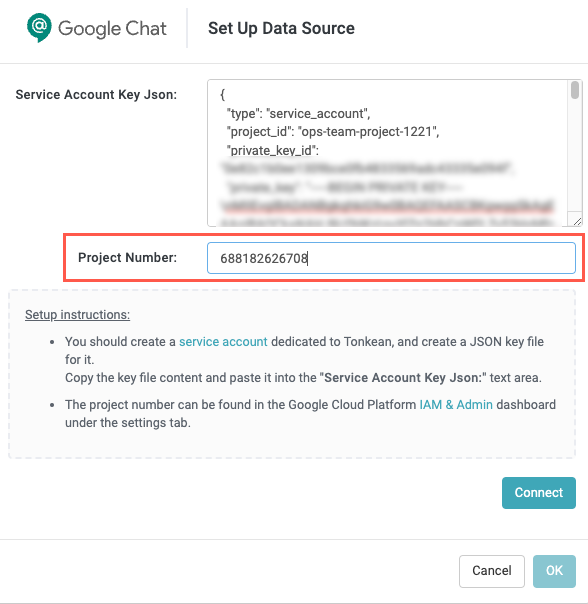
To locate this value in the Google Cloud Console, follow the steps below:
In the Google Cloud Console, select the main nav (hamburger) icon in the upper left.
Select Cloud overview > Dashboard. The Dashboard screen displays.
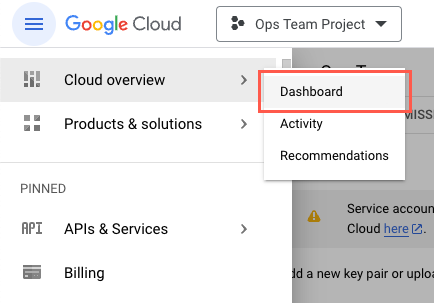
The Project number displays in the Project info section in the upper left.
The project number also displays on the Welcome screen. Select the Google Cloud logo in the upper left to navigate to the Welcome screen and ensure you select the desired project in the project dropdown.
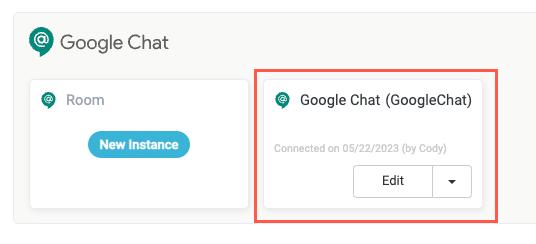
When finished, select Connect. A new Google Chat instance displays.
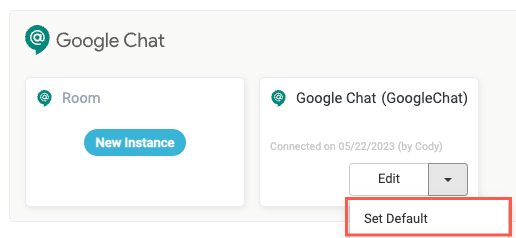
Select the more arrow beside the Edit button and select Set Default.
Due to a known issue, Google Chat must be set as your default communication tool in order to work properly.
Sync Process Contributors from Google Chat
After you configure the Google Chat app in the Google Cloud Console and connect it as a communication tool, you can sync users from your Google Workspace and add them as process contributors in Tonkean. This ensures your Google Workspace users can receive Google Chat messages through Tonkean workflows.
To sync Google Chat users to Tonkean as process contributors, see Add Process Contributors through a Communication Tool.
You must sync users from Google Chat before you install the Google Workspace Marketplace app for your org.
Add the App to your Google Chat Workspace
Add your app to your workspace to allow your Tonkean workflows to send messages to that workspace.
An admin must publish and install the app internally for it to be available to add to your workspace.
Add the App to your Chat Section
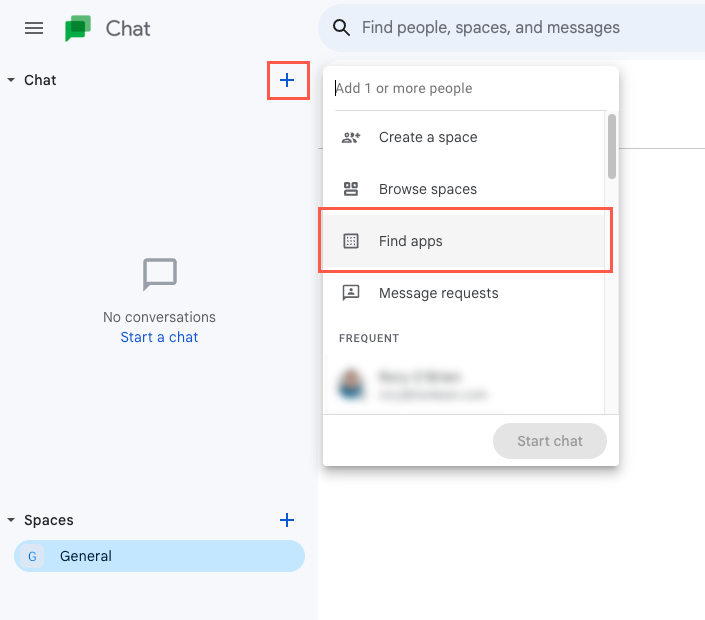
Navigate to your Google Chat workspace.
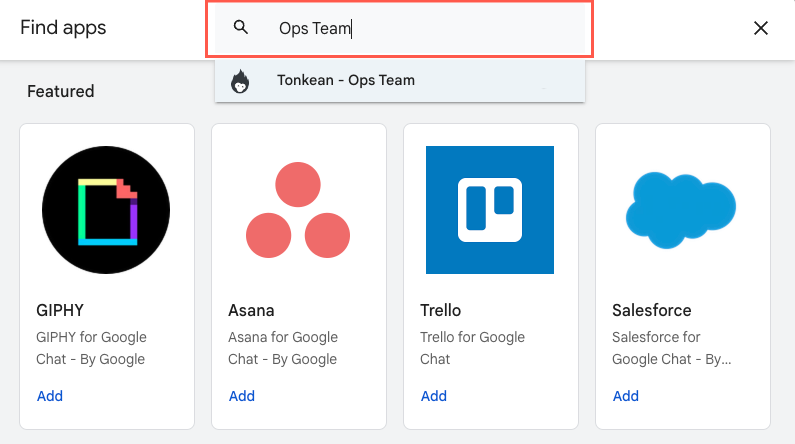
In the sidenav, select the plus icon, +, and select Find apps. The Find apps window displays.
In the provided field, search for your app name and select your app. The app displays.
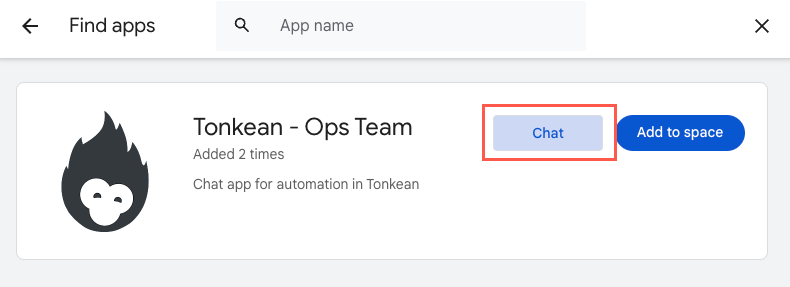
Select Chat. The app is added to the Chat section in the sidenav.
Add the App to your Spaces
You must have an existing space to add the app to.
Navigate to your Google Chat workspace.
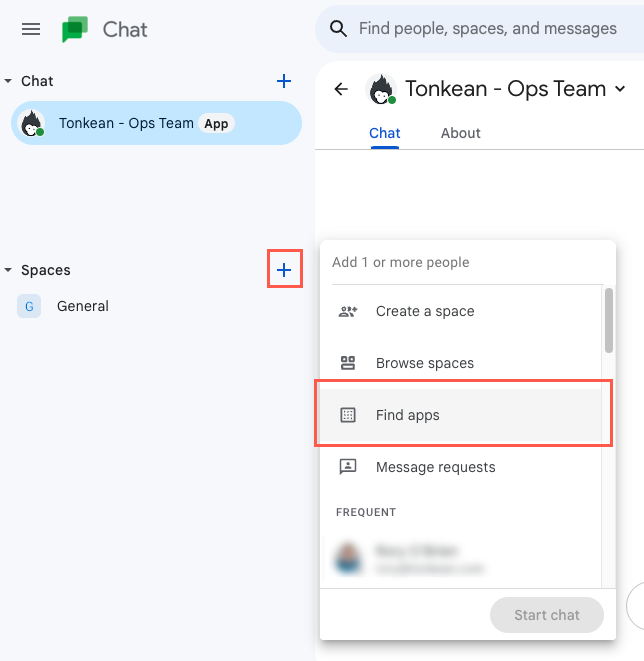
In the sidenav, select the plus icon, +, and select Find apps. The Find apps window displays.
In the provided field, search for your app name and select your app. The app displays.
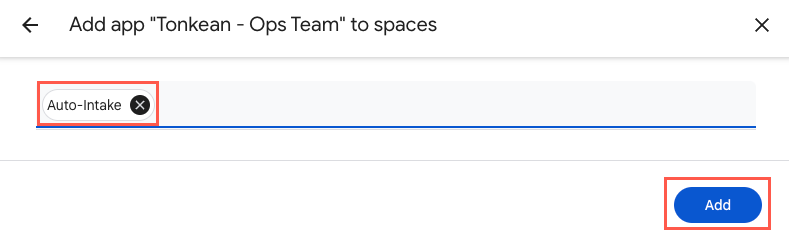
Select Add to space. Your available spaces display.
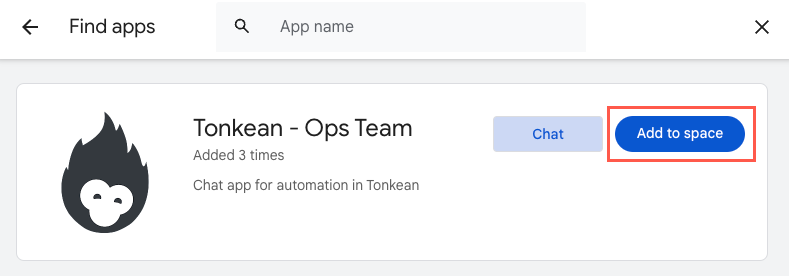
Select the space you want to add the app to, then select Add. The app is added to your space.
Set Up Google Admin App to Connect Google Chat as a Data Source
In addition to adding Google Chat as a communication tool, you can add it as a data source, enabling you to collect users, space, and messages—as well as create spaces.
To set up Google Chat as a data source in Tonkean, you must create an app and connect the Admin SDK API in the Google Cloud Console. This app enables Tonkean to connect to your Google Chat Workspace and collect the necessary entities.
You must complete the setup process for the Google Chat app before creating the Admin SDK app.
Enable and Configure the Admin SDK API
Set up the Google Admin SDK app.
Navigate to Google Cloud Console.
Create a new Google Cloud project or, if you already have a project in which you created and configured an app to add Google Chat as a communication tool, open that same project.
If you want to enable the use of Google Chat as both a communication tool and a data source, you must create and configure the respective APIs in the same project.
In the sidenav, select APIs & Services > Enabled APIs and services. The APIs & Services screen displays.
Select + ENABLE APIS AND SERVICES. The API Library screen displays.
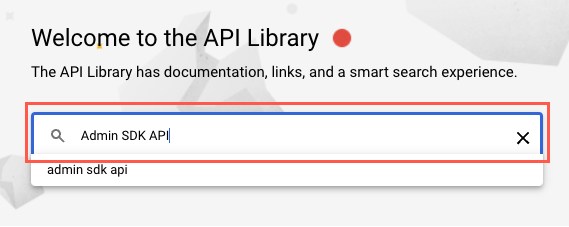
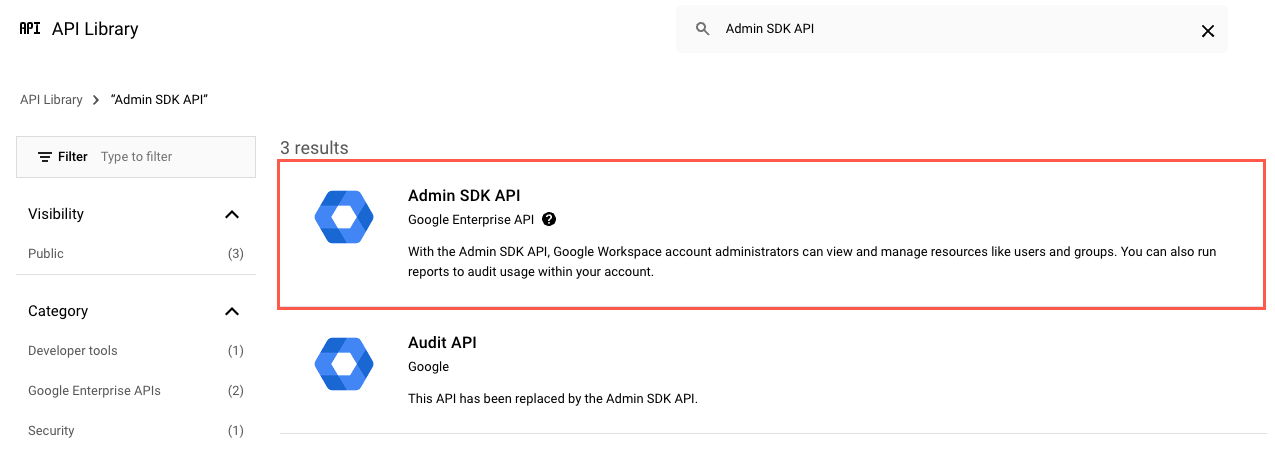
In the API Library search bar, enter "Admin SDK API" and select Enter. Search results display.
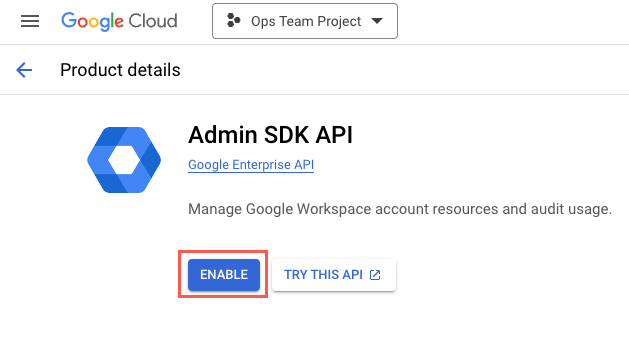
Select the Admin SDK API result. The Admin SDK API product details screen displays.
Select ENABLE. The Admin SDK API Service Details screen displays.
Configure the Admin SDK App Credentials and Scopes
Configure your Admin SDK app, powered by the Admin SDK API.
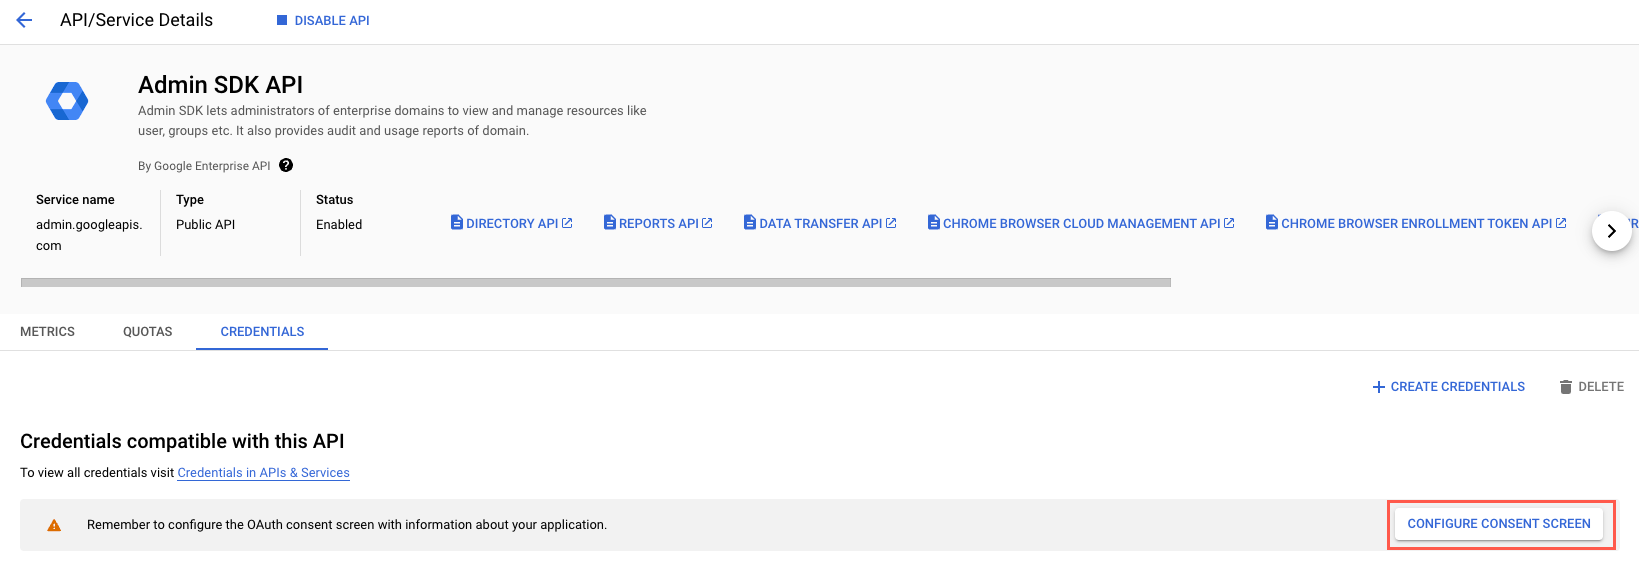
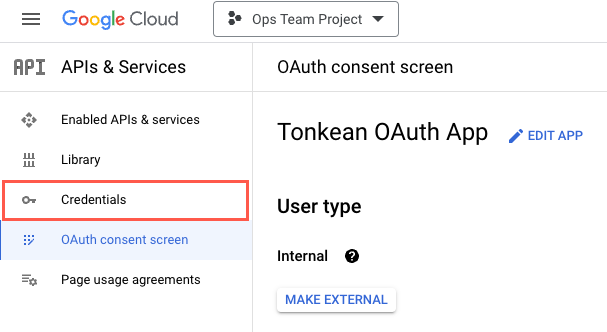
In the API Service Details screen, select the CREDENTIALS tab. The Credentials tab displays.
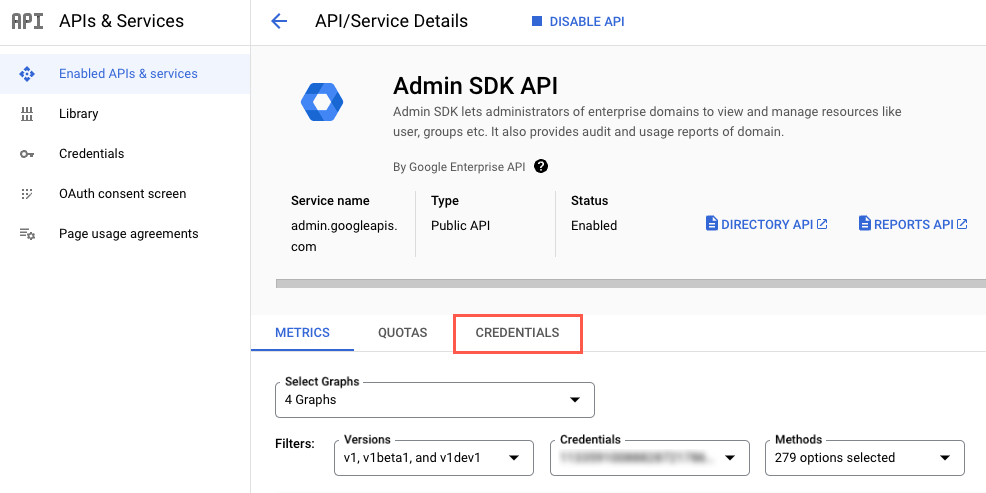
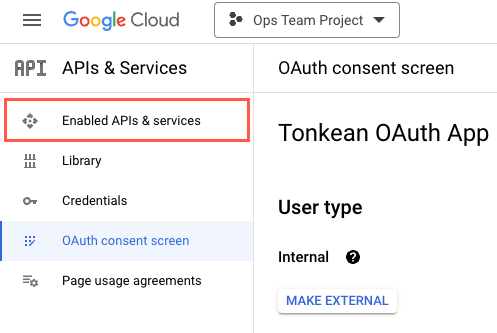
Select CONFIGURE CONSENT SCREEN. The OAuth consent screen displays.
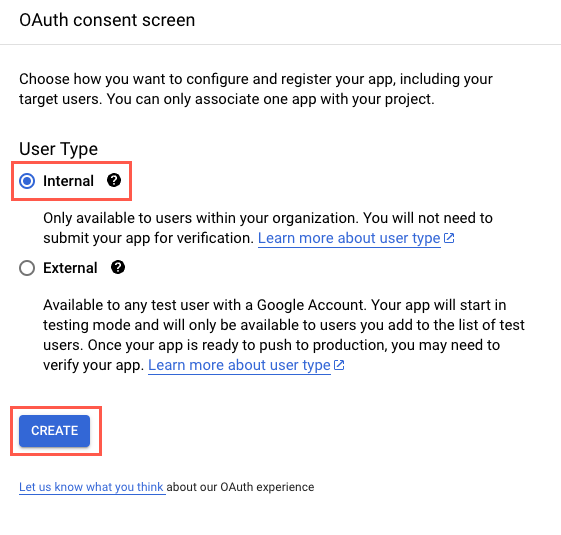
Set the User Type to Internal and select CREATE. The Edit app registration screen displays, beginning on Step #1 of the app registration process: OAuth consent screen.
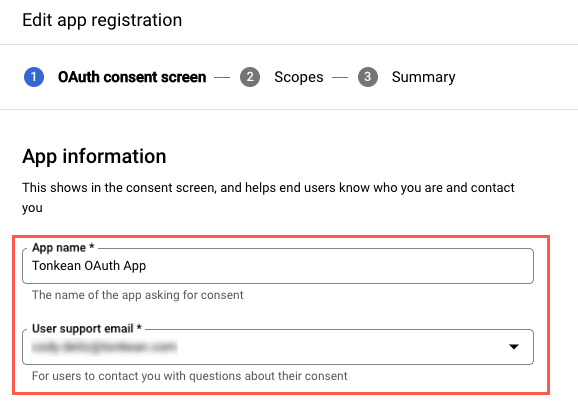
Complete the required App information fields:
App name - The name of the app asking for consent.
User support email - The address where users can contact you with questions regarding their consent.
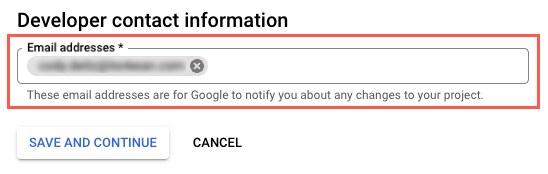
Enter one or more Email addresses in the Developer contact information section.
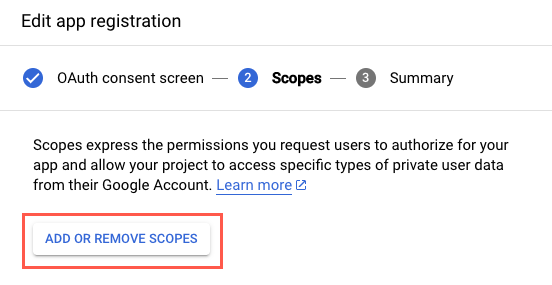
When finished, select SAVE AND CONTINUE. The app registration process moves to Step #2: Scopes.
Select ADD OR REMOVE SCOPES. The Update selected scopes panel displays.
Select the following scopes, to include all Google Chat and available user directory scopes.
We recommend adding scopes that are not currently required for setting up Tonkean as a data source in order to support future Tonkean data actions.
chat.messages
chat.messages.readonly
chat.spaces
chat.spaces.readonly
chat.memberships
chat.memberships.readonly
chat.messages.reactions
chat.messages.reactions.readonly
chat.messages.create
chat.spaces.create
chat.delete
chat.memberships.app
chat.messages.reactions.create
chat.admin.spaces.readonly
admin.directory.user.security
admin.directory.user
admin.directory.user.readonly
When finished, select UPDATE. The added scopes display on the Edit app registration screen.
When finished adding scopes, select SAVE AND CONTINUE. The app registration process moves to Step #3: Summary.
Confirm the information is correct, then scroll to the bottom of the screen and select BACK TO DASHBOARD. The OAuth consent screen displays.
In the sidenav, select Credentials. The Credentials screen displays.
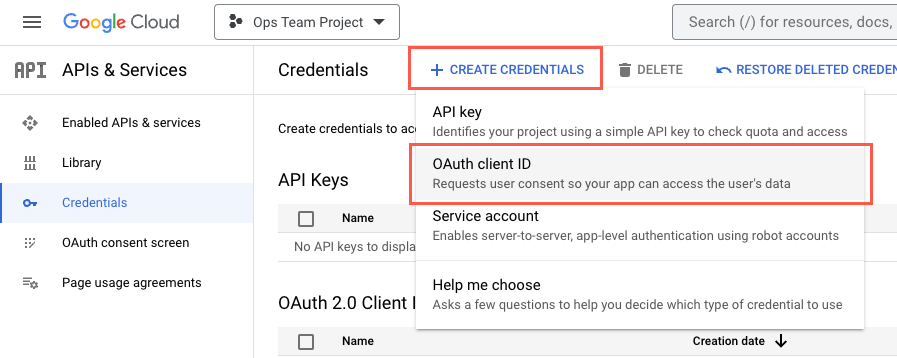
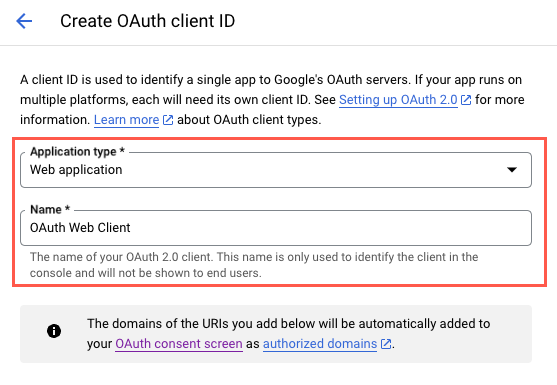
Select + CREATE CREDENTIALS > OAuth client ID. The Create OAuth client ID screen displays.
Set Application type to Web application and enter a Name for your OAuth 2.0 client.
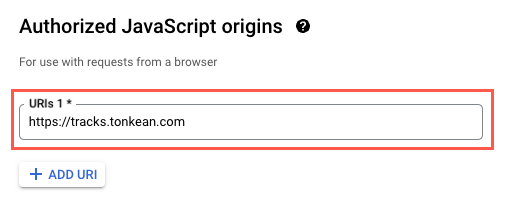
In the Authorized JavaScript origins section, select + ADD URI and enter the relevant URI. For most users, this is
https://tracks.tonkean.com.This URI may vary for users on a private deployment of Tonkean. Contact customer support for more information if you're unsure.
In the Authorized redirect URIs section, select + ADD URI and enter
https://tracks.tonkean.com/oauth.html.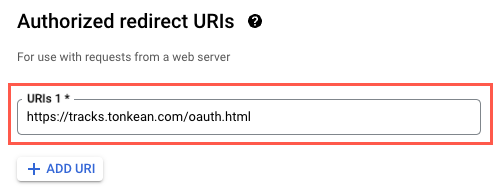
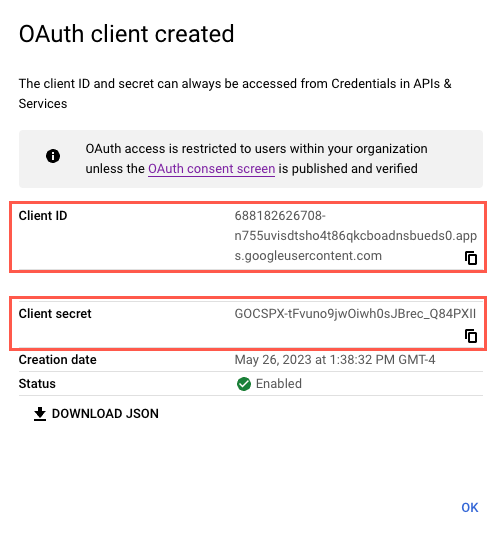
When finished, select CREATE. The OAuth client created window displays.
Copy the Client ID and Client secret and paste these into a separate document. When finished, select OK.
Retrieve your Customer ID:
Navigate to the Google Admin Console.
Select the Menu > @ Account > Account settings > Profile. The Profile screen displays.
Your organization's unique ID displays beside the Customer ID field.
Your Google Chat admin app is created and configured. You're ready to add Google Chat as a data source in Tonkean.
Add Google Chat as a Data Source in Tonkean
To add Google Chat as a data source, follow the steps below:
Select the main nav icon,
, in the upper left and select Enterprise Components. The Enterprise Components screen displays.Select + New Data Source in the upper right.
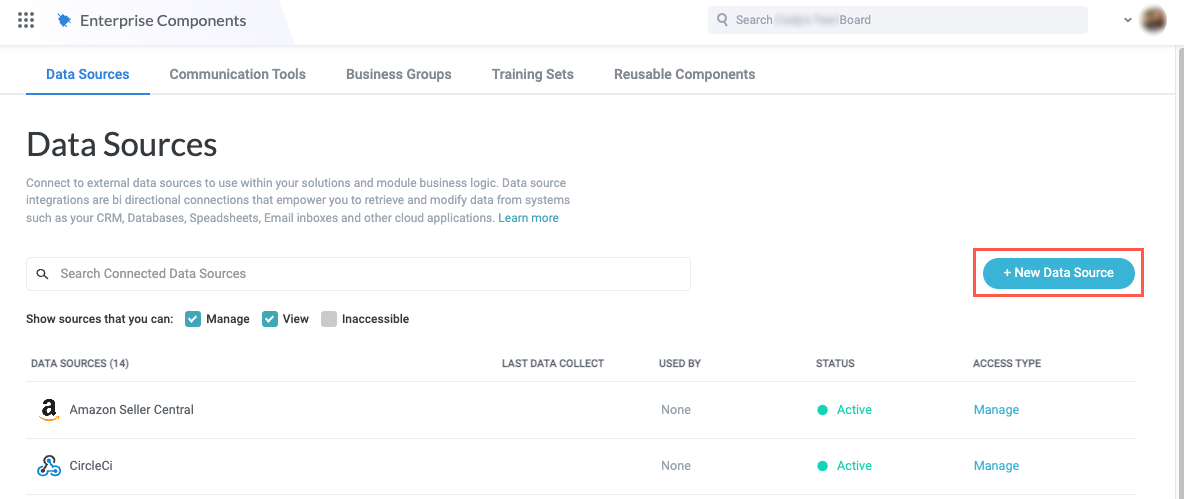
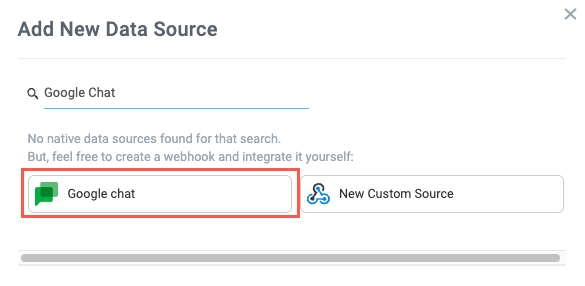
Select Cloud Application from the dropdown. The Add New Data Source window displays.

Enter "Google Chat" in the search field, then select Google Chat. The Set Up Integration window displays.
Enter the Connection Parameters, retrieving the values you retrieved in Step #17 and #18 of the Configure the Admin SDK API App section:
Client ID
Client Secret
Customer ID
Space ID (Optional) - The space ID enables users to collect the Message entity. To locate the space ID, navigate to your Google Chat instance and select a space. The space ID is the last string in the URL, after
space/.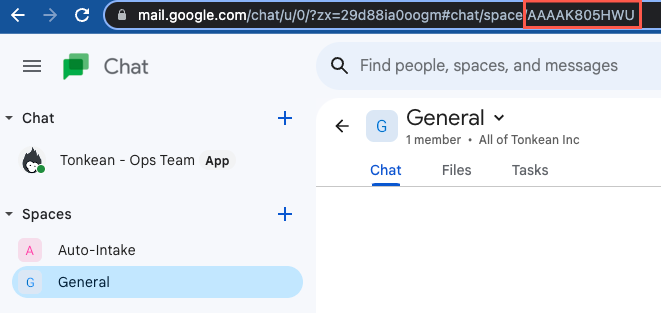
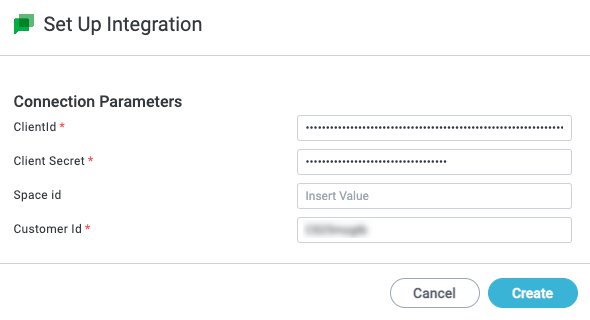
When finished, select Create. The Google authentication window displays.
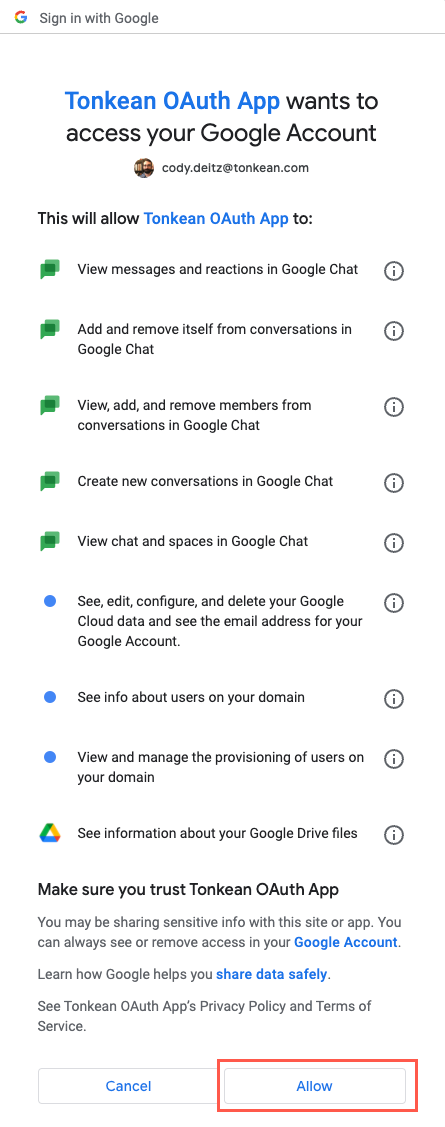
Sign in using the appropriate Google account with admin privileges. The permissions window for your Admin OAuth app displays.
Review the permissions and select Allow. The window closes and the Google Chat data source screen displays.
{Must be Google Cloud Console admin}
Create and Publish Workspace Marketplace App
To enable users in your org to find and add your Tonkean app to their workspace, you must create and publish the app for all workspace users in the Google Workspace Marketplace.
You must have created and configured your Google Chat API app before beginning this process.
Enable the Workspace Marketplace SDK API
Navigate to Google Cloud Console.
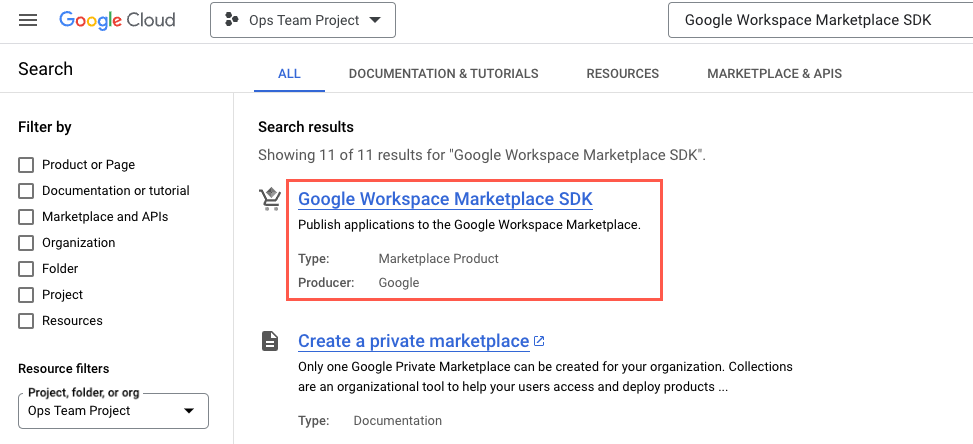
In the search bar, enter "Google Workspace Marketplace SDK" and select Search. Search results display.
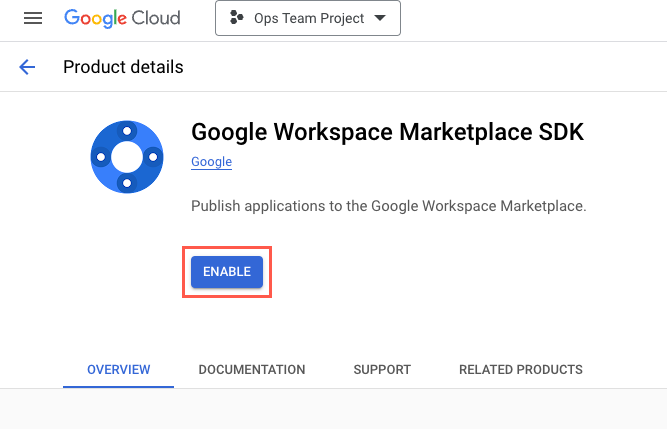
Select Google Workspace Marketplace SDK. The Google Workspace Marketplace SDK product details screen displays.
Select ENABLE. The service is enabled and the Google Workspace Marketplace SDK Service Details screen displays.
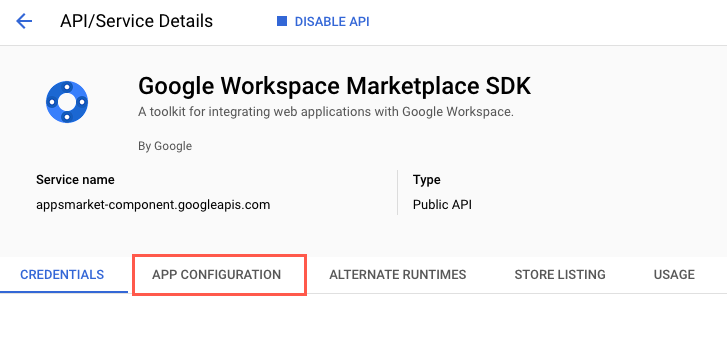
Configure the Workspace Marketplace SDK App
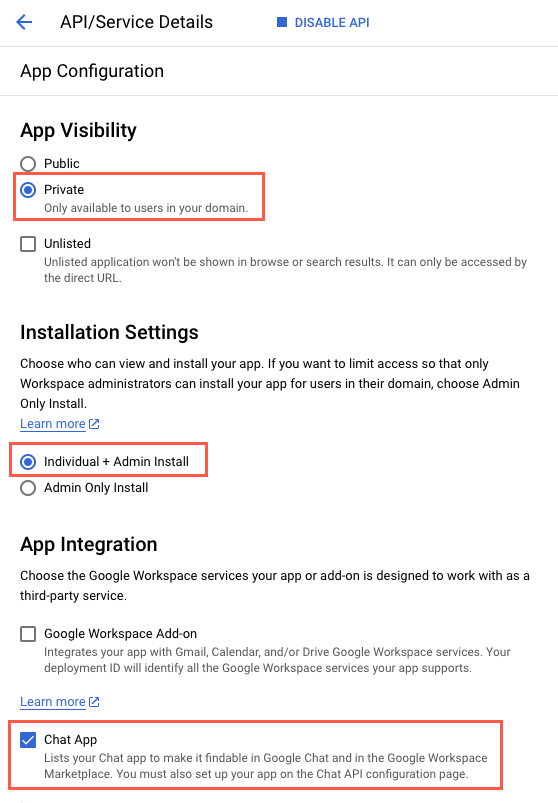
On the Google Workspace Marketplace SDK Service Details screen, select the APP CONFIGURATION tab. The App Configuration tab displays.
Enter the relevant information for your app:
App Visibility - Private.
Installation Settings - Individual + Admin Install
App Integration - Chat App
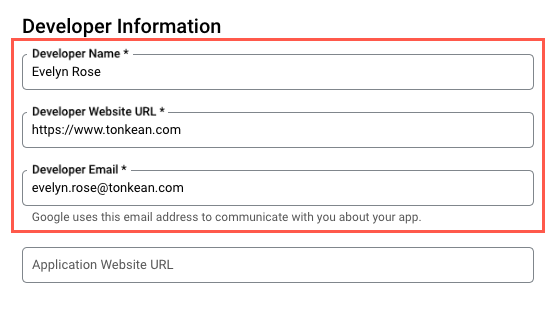
Enter your developer information:
Developer Name - Enter your name so users know who to contact if they encounter problems with the app.
Developer Website URL - Enter your organization's website or other relevant URL.
Developer Email - Enter the email Google can use to contact you about your app.
When finished, select SAVE.
Set Up OAuth and Scopes
If you already set up the OAuth consent as part of configuring the Admin SDK app, some parts of this process are already complete, such as the App Visibility being set to Private.
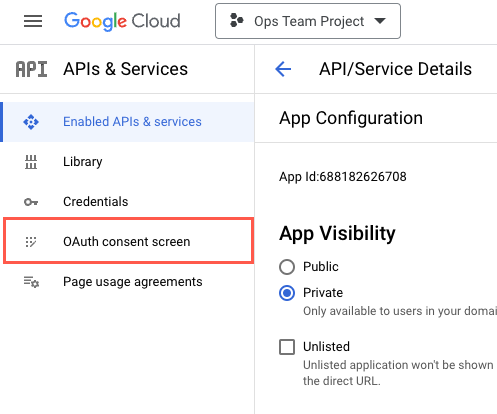
In the sidenav, select OAuth consent screen. The OAuth consent screen screen displays.
Set the User Type to Internal and select CREATE. The Edit app registration screen displays, beginning on Step #1 of the app registration process: OAuth consent screen.
Complete the required App information fields:
App name - The name of the app asking for consent.
User support email - The address where users can contact you with questions regarding their consent.
Enter one or more Email addresses in the Developer contact information section.
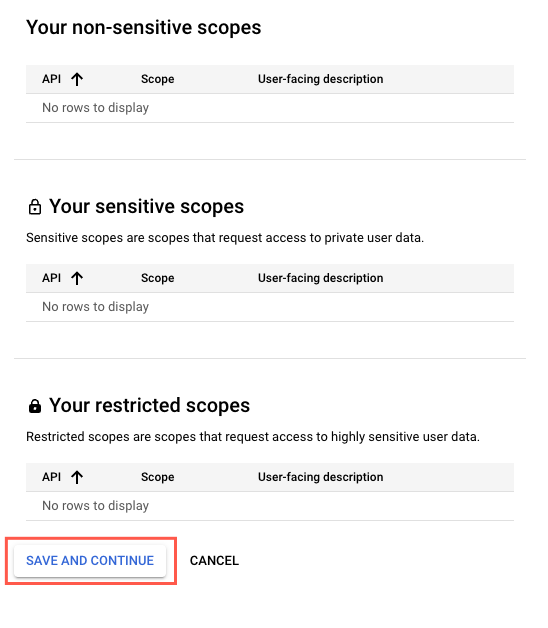
When finished, select SAVE AND CONTINUE. The app registration process moves to Step #2: Scopes.
Select SAVE AND CONTINUE.
Configure the App Store Listing
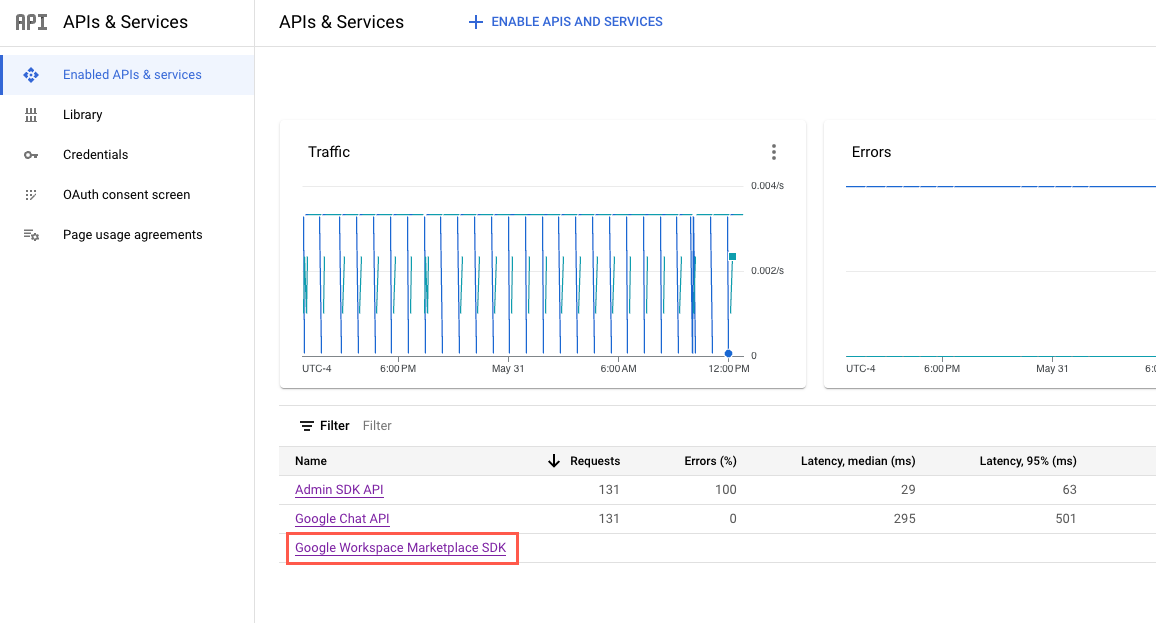
In the sidenav, select Enabled APIs & services. The Enables APIs & services screen displays.
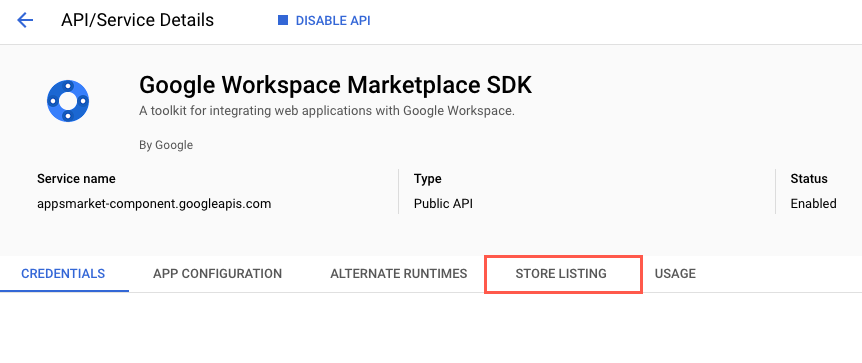
Select Google Workspace Marketplace SDK. The Google Workspace Marketplace SDK Service Details screen displays.
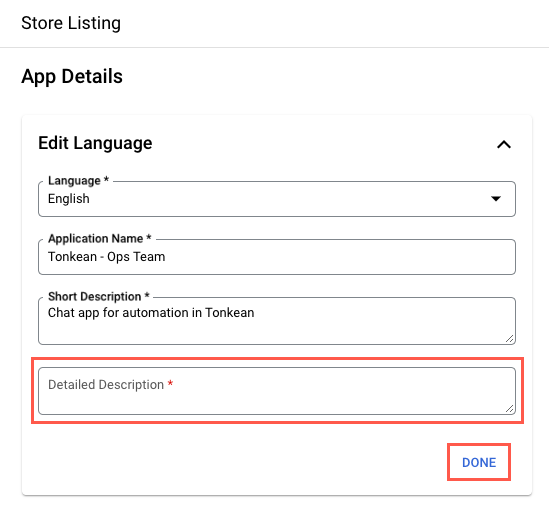
Select the STORE LISTING tab. The Store Listing tab displays.
Select the Edit Language dropdown. the Edit Language section displays.
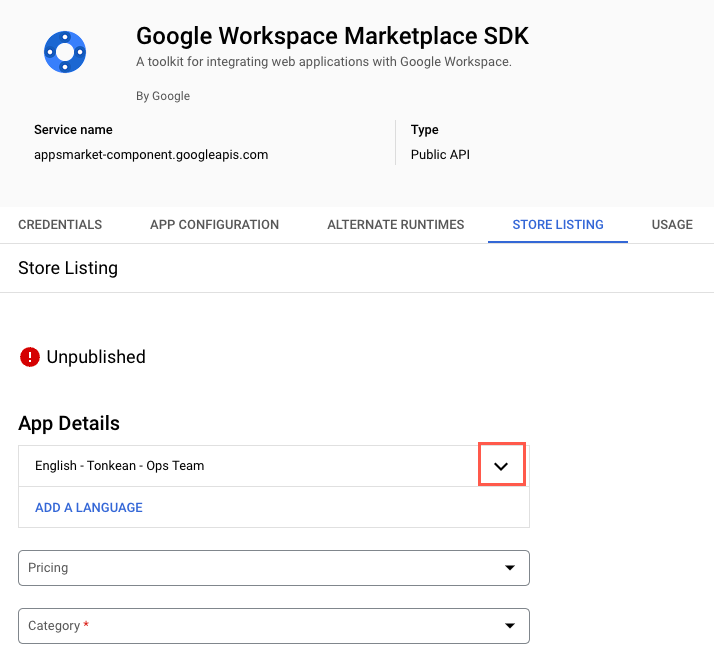
Enter a Detailed Description for your app, then select DONE.
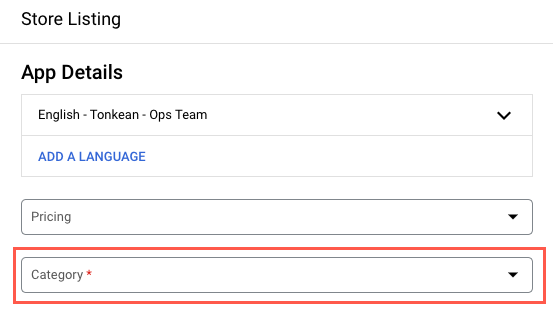
Select a Category.
The specific category you select is irrelevant when publishing the app internally, but Category is a required field.
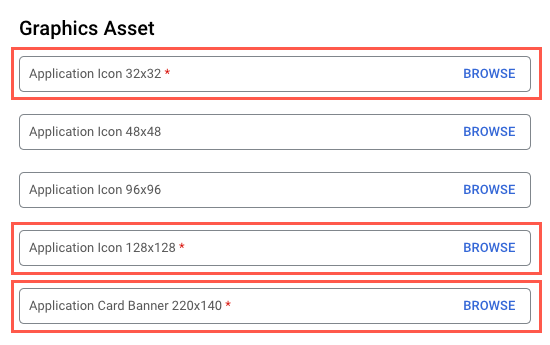
Add an Application Icon 32x32. We recommend this Tonkean logo.
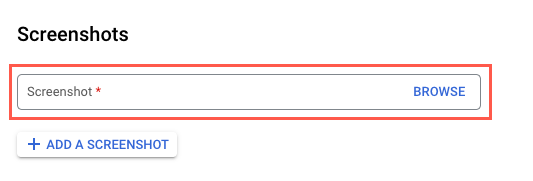
Upload a Screenshot.
Add the support links provided below:
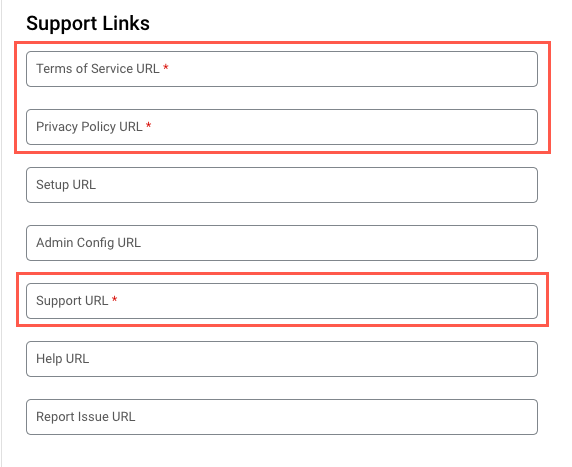
In the Distribution section, select the All Regions checkbox.

When finished, select SAVE, then select PUBLISH to publish your app. Your app is published.
When successfully published, the UNPUBLISH button displays.
Install the Workspace Marketplace SDK App for Internal Users
With your workspace marketplace app published, you can install it for users in your organization.
Users must log in to their Google Chat instance to complete the installation of the app and allow Tonkean to collect relevant events.
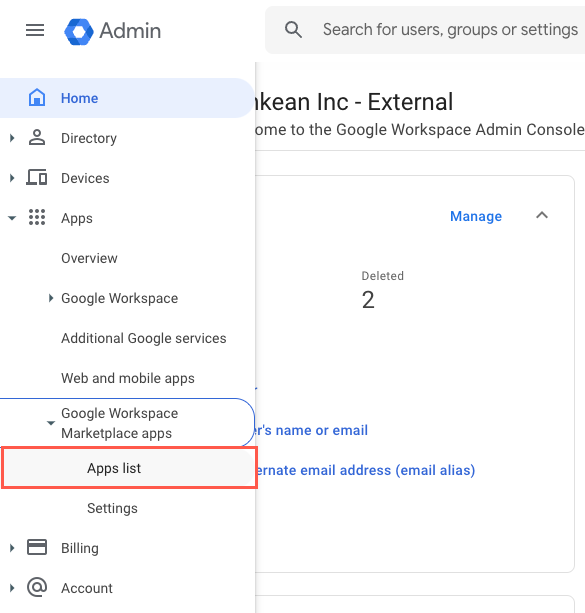
Navigate to the Google Workspace Admin Console and sign in using your admin account.
In the sidenav, select Apps > Google Workspace Marketplace apps > Apps list. Your installed Workspace Marketplace apps display.
Select INSTALL APP. The Google Workspace Marketplace displays.

In the provided field, search for your app by name or keyword and select your app from the results. The app detail screen displays.
Select ADMIN INSTALL. An installation confirmation window displays.
Select CONTINUE.
Select which users to install the app for:
Everyone at your organization - Install the app for all users.
Certain groups or organized units - Install the app for selected users.
When finished, a success message displays. Select DONE.
Your app is installed for users in your organization.