Docusign
Docusign is a popular e-signature and contract management platform used by internal teams across the enterprise, from legal and procurement to finance and HR. Docusign is an integral data source for many Tonkean workflows, providing a key service to successfully process purchases, complete contracts, and more.
Authenticate with Docusign
To use Docusign in Tonkean, you must first connect it as a data source:
Select the main nav icon,
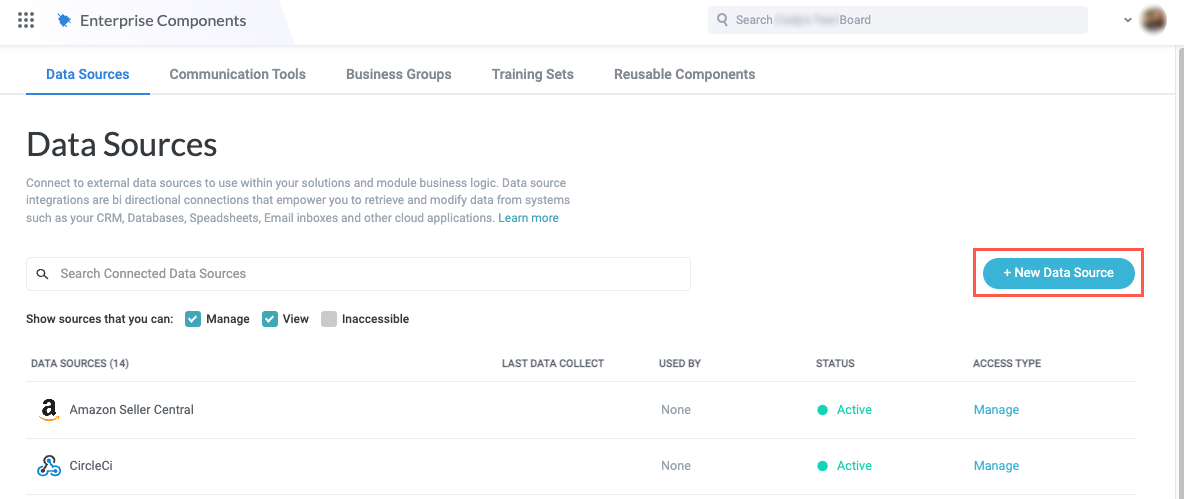
 , in the upper left and select Enterprise Components. The Enterprise Components screen displays.
Select + New Data Source in the upper right.
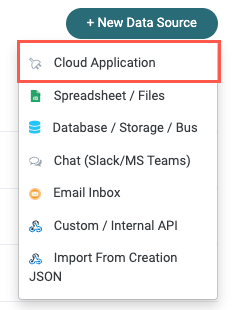
Select Cloud Application. The Add New Data Source window displays.
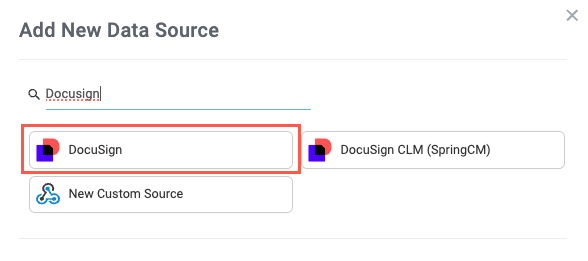
Enter "Docusign" in the search field, then select Docusign. The New Docusign Connection window displays.
Select Create a new connection. The Set Up Data Source window displays.

Select which Account Type to connect to, Sandbox or Production, then select Authenticate with Docusign. A Docusign permissions window displays.
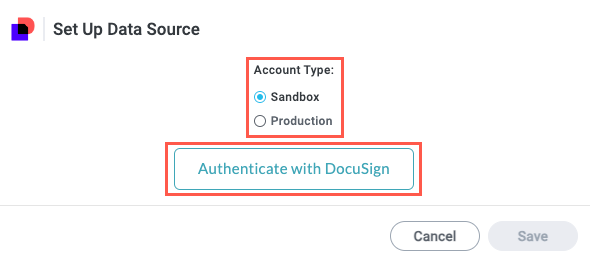
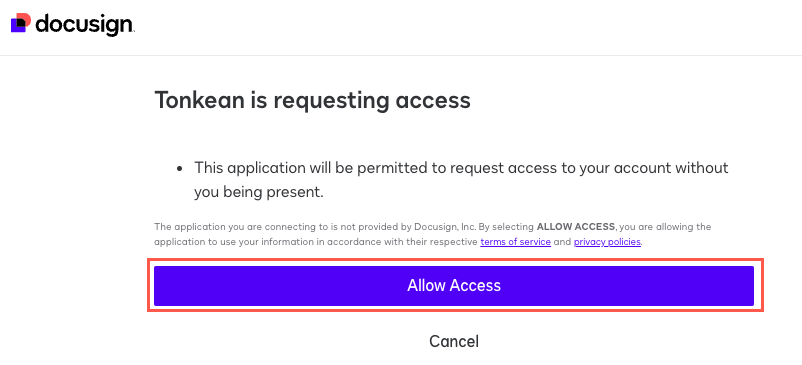
Select Allow Access. The permissions window closes and the Set Up Data Source window displays.
Select Account to connect to Tonkean.
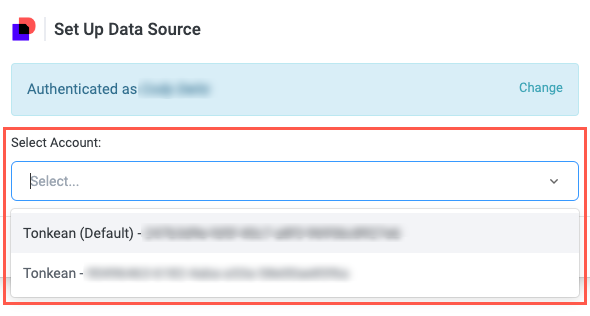
Your Docusign account is connected to Tonkean. Be sure to provide the relevant solutions access to this data source.
Perform Docusign Actions on Behalf of Another User
Tonkean's Docusign integration uses delegated user authentication, with most customers opting to use a dedicated service account for authentication. This configuration means that relevant Docusign data source actions, such as Create New Envelope or Send Envelope, display as being performed by the authenticated user or service account name (potentially a generic account name).
It's possible instead to perform some actions on behalf of a specific user—for example, sending an envelope on behalf of your dedicated account executive or signatory. Using this option means Tonkean and Docusign register the specified user as being the user who performed the action.
There are currently three Docusign actions that support acting on behalf of a specific user:
Create New Envelope
Send Envelope
Create Envelope with Tabs
To configure one of these actions to be performed on behalf of a specific user, follow the steps below:
Arrange for the user Tonkean will impersonate to give consent to Tonkean to perform the action on their behalf. There are two options for arranging this:
Grant consent administratively - To minimize the administrative burden on your users, DocuSign recommends that you grant the needed consent to your application administratively on behalf of your users. This technique is also called blanket consent.
You can use this option only if the Account Management with SSO feature is enabled (which requires an upgraded Docusign account).
Grant consent individually - Ask the users who will be impersonated by Tonkean to open a particular URL in their browser. You will supply them with the URL to be used during this one-time task:
Docusign Production -
https://account.docusign.com/oauth/auth?response_type=code&scope=signature%20impersonation&client_id=4a0ff793-c5be-4e36-b85d-7a0815fcbb22&redirect_uri=https%3A%2F%2Ftracks.tonkean.com%2Foauth.htmlDocusign Sandbox -
https://account-d.docusign.com/oauth/auth?response_type=code&scope=signature%20impersonation&client_id=4a0ff793-c5be-4e36-b85d-7a0815fcbb22&redirect_uri=https%3A%2F%2Ftracks.tonkean.com%2Foauth.html
For information about how to grant consent using these options, see the relevant section at OAuth JWT: Granting Consent.
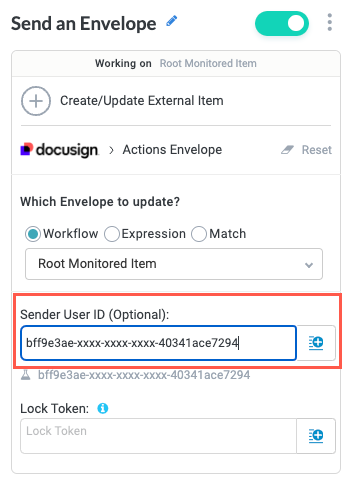
Create the desired Docusign data action in your module workflow and enter the Sender User ID for the user to impersonate.
The user ID can be added manually or as a matched entity.
