Enable AI Front Door Access to Your Content
To enable the AI Front Door to answer questions and initiate processes within the context of your process, you must give it access to the relevant resources. These resources include data sources, forms, and interfaces.
Enable AI Front Door Access to Data Sources
By default, access via the AI Front Door is turned off. To enable access, you must navigate to each resource and enable Tonkean AI to access it. For more information about enabling access, see Enable AI Front Door Access to Your Content.
From any screen, select the main nav icon,
 , in the upper left and select Enterprise Components. The Enterprise Components screen displays.
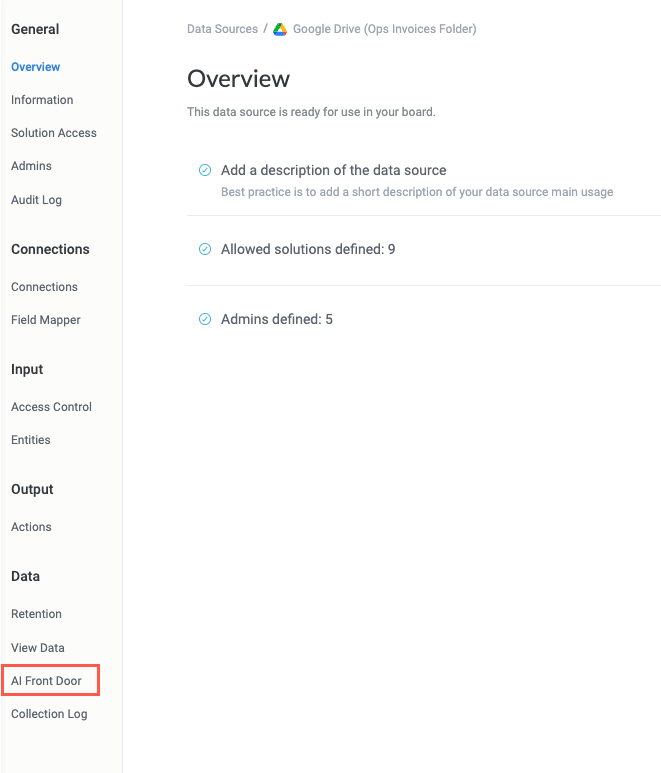
On the Data Sources tab, select the data source you want to give the AI Front Door access to. The data source configuration panel displays.
In the data source configuration panel, select AI Front Door. The AI Front Door - Data Access screen displays.
Turn on the Enable access via AI Front Door toggle.
Once AI Front Door access is enabled for a data source, anyone with access to the AI Front Door has access to the data contained in that data source, regardless of the permissions in the third-party application or system.
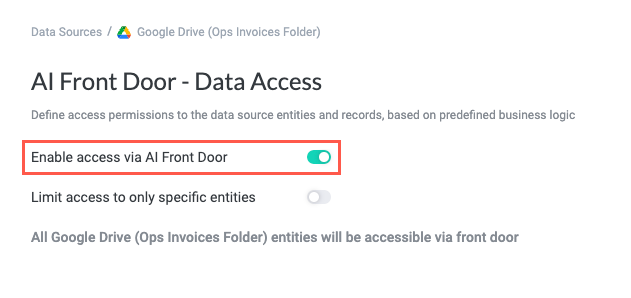
The AI Front Door now has access to the data source and can refer to its entities and records.
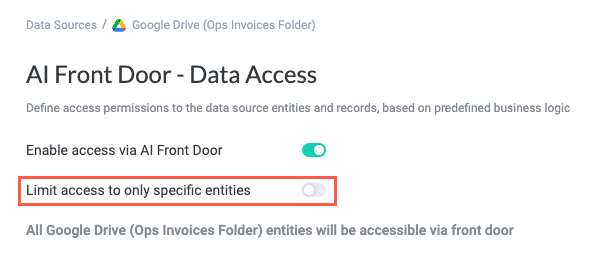
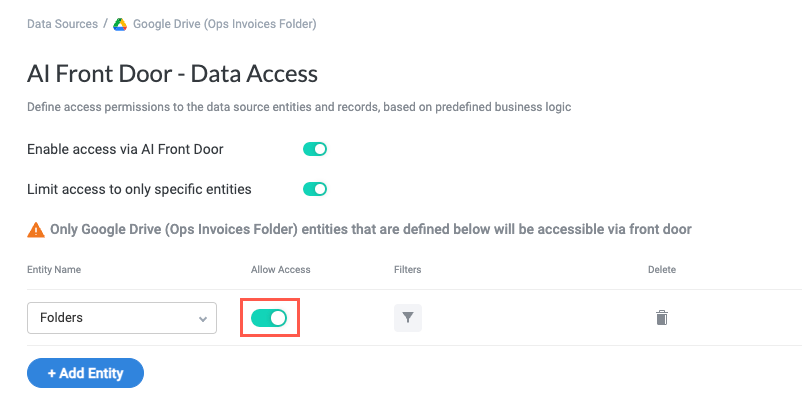
Limit AI Front Door Access to Only Specific Entities
By default, when a data source is connected to the AI Front Door, all entities from that data source are accessible by the Front Door. Alternatively, you can restrict Front Door access to specific entities in a data source, and even filter for specific data source records of that entity type. This option changes the default behavior to the Front Door not having access to an entity unless specifically allowed.
To limit AI Front Door access to only specific entities, follow the steps below:
Navigate to the relevant data source and, in the data source configuration panel, select AI Front Door. The AI Front Door - Data Access screen displays.
Turn on the Limit access to only specific entities toggle. The entity access configuration area displays.
Select + Add Entity. A new entity row is added.
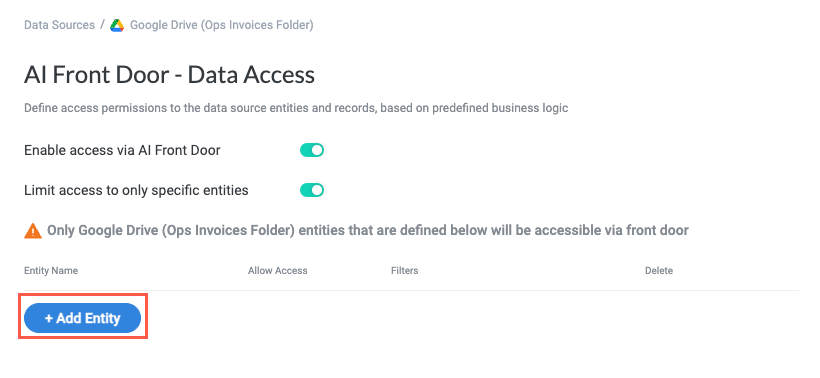
Select the Search entity dropdown and choose an entity. The entity is added in the configuration area.

To enable AI Front Door access to the selected entity, turn on the Allow Access toggle.
To add a filter condition to the entity, select the filter button,
 . The {Entity} - Filter Conditions window displays.
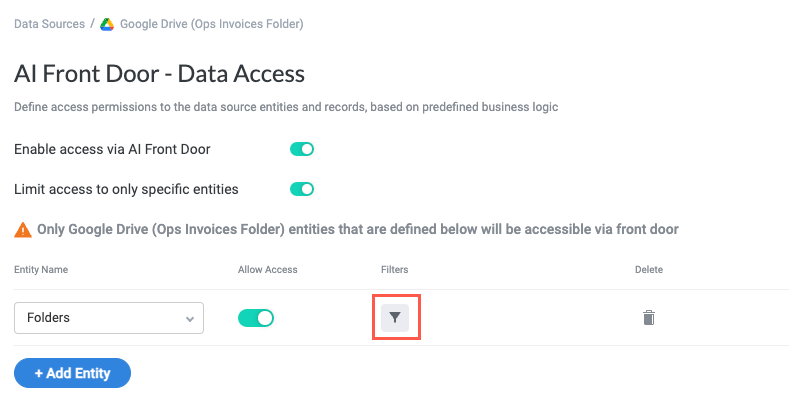
Configure the conditions group as desired, then select Save.
For more information about conditions and conditions groups, see Conditions.

Note that the filter button indicates the addition of a condition group when applied:
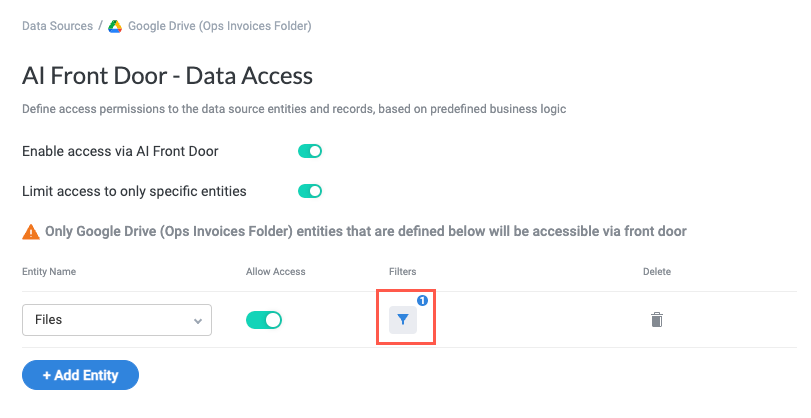
Repeat steps #3-7 to add more entities and filter data source records on those entities.
The AI Front Door now has access to your specified data source entities.
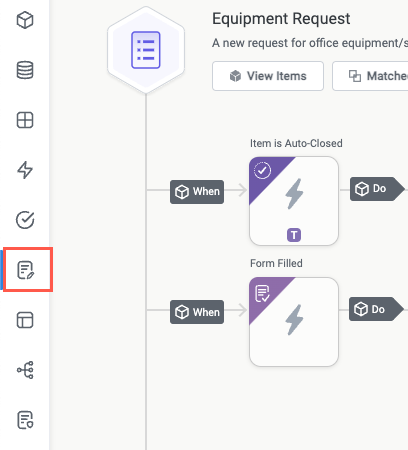
Enable AI Front Door Access to Intake Sequences
One of the most common use cases for the AI Front Door is to help users begin an intake process. To allow the AI Front Door to kick off these processes for requesters, you must give it access to the relevant intake sequences in your module:
Navigate to the module that contains the intake sequence that you want the AI Front Door to have access to.
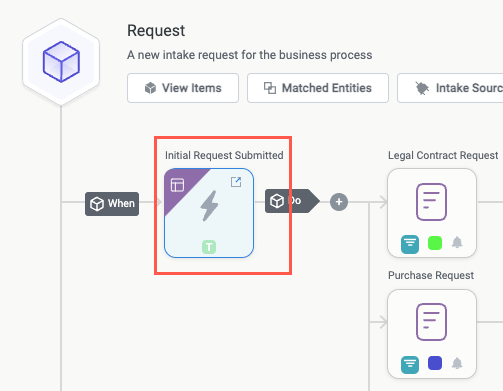
Select the Interface Submitted trigger that begins the relevant intake sequence. The Interface Submitted panel displays.
In the Run Settings section, turn on the AI front door toggle.

The AI Front Door has access to the intake sequence, enabling users to open it and begin the sequence.
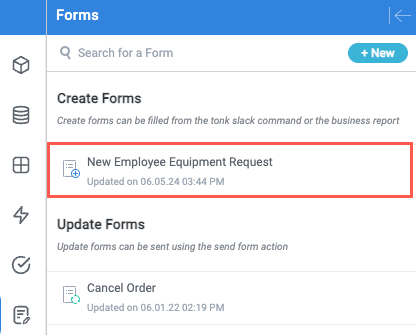
Enable AI Front Door Access to Forms
Forms are another common resource users may want to access with the help of the AI Front Door. If your process begins with a create form, for example, you may want the AI Front Door to provide users with that form, enabling them to self-serve. To allow the AI Front Door to provide forms to users, you must give it access to those forms:
Navigate to the module that contains the form you want the AI Front Door to have access to.
From the module builder screen, select the Forms button on the module builder toolbar. The Forms panel displays.
Select the create form you want the AI Front Door to have access to. The Create Form screen displays.
Currently, the AI Front Door can only access create forms.
Turn on the Enable access via AI Front Door toggle.
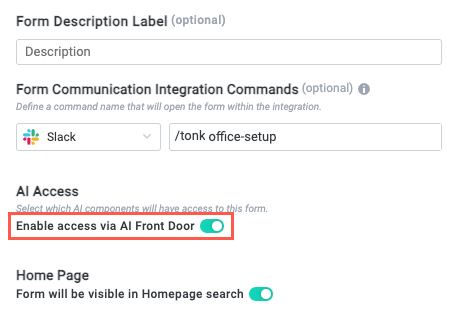
The AI Front Door has access to the create form, enabling users to open and fill the form.