SAP Ariba
Ariba, the popular spend management platform, is often integrated with Tonkean to power automated procurement workflows and internal buyer experiences. You can connect your Ariba instance to collect and manage buyer invoices, purchase requisitions, and numerous other entities. Out-of-the-box actions include Approve or Reject Requisition, Create or Update Requisition, and Create or Update Supplier—you can also create custom actions for specialized logic, provided the correct API permissions.
For a holistic purchase intake experience that leverages P2P systems like Ariba, check out ProcurementWorks.
Authenticate with Ariba
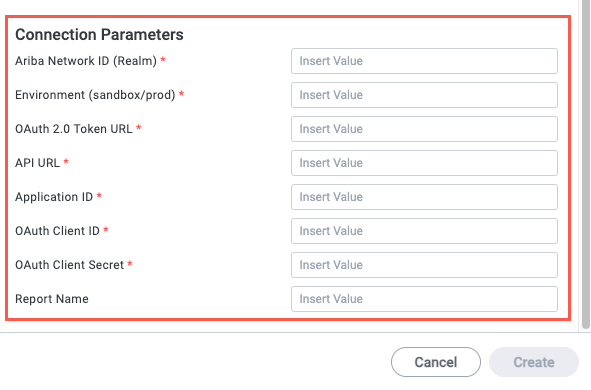
To authenticate and connect your Ariba instance to Tonkean, you must provide several ID and token values:
Ariba Network ID (Realm ID)
Environment (sandbox/prod)
OAuth 2.0 Token URL
API URL
Application ID
OAuth Client ID
OAuth Client Secret
As an Ariba administrator, you can locate these values in your instance. For information regarding the regional data center URLs and relevant OAuth URLs, see Setup for SAP Ariba and scroll down to Important URLs.
Before you authenticate with Ariba in Tonkean, you must create applications in Ariba to gain access to the appropriate APIs. For instructions on creating and configuring these applications, see Create Applications in the Ariba APIs Portal.
To connect Ariba as a data source, follow the steps below:
Select the main nav icon,
 , in the upper left and select Enterprise Components. The Enterprise Components screen displays.
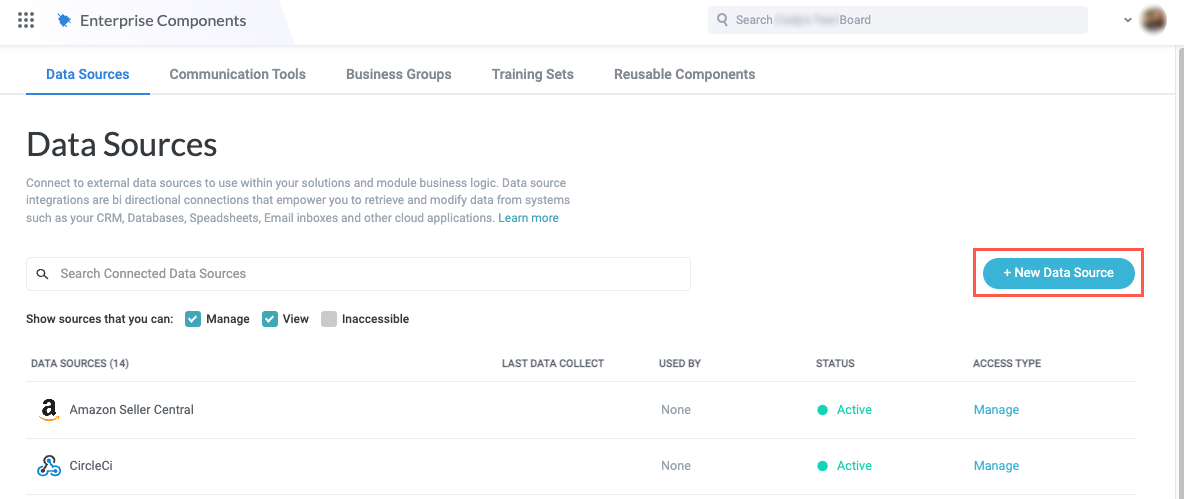
Select Cloud Application from the dropdown. The Add New Data Source window displays.

Enter "Ariba" in the search field, then select Ariba. The Set Up Integration window displays.

Following the setup instructions provided, enter the Connection Parameters. When finished, select Create.
Create Applications in the Ariba APIs Portal
To gain access to your data in your Ariba instance, you must create applications for the relevant APIs.
Tonkean currently supports integrations with the following APIs:
To create an application and gain access to an API, perform the following steps:
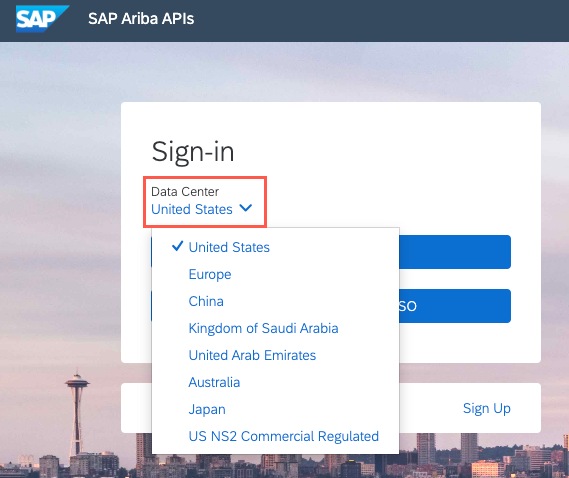
Navigate to the SAP Ariba APIs Portal for your regional data center.
Select the Data Center dropdown and choose the appropriate data center for your Ariba instance, then sign in using your organization's preferred method. The SAP Ariba APIs homepage displays.
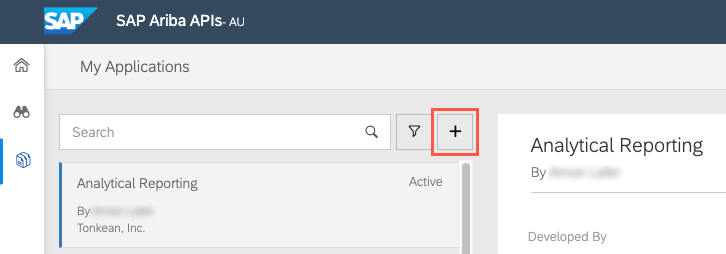
In the sidenav, select the Manage button. The My Applications screen displays.

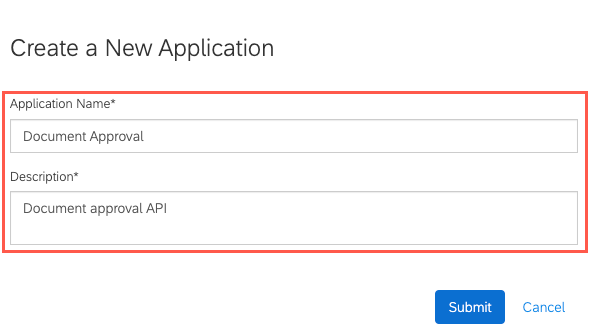
Select the Add button in the upper left. The Create a New Application window displays.
Enter an Application Name and Description, then select Submit. Your newly-created application displays on the My Applications screen.
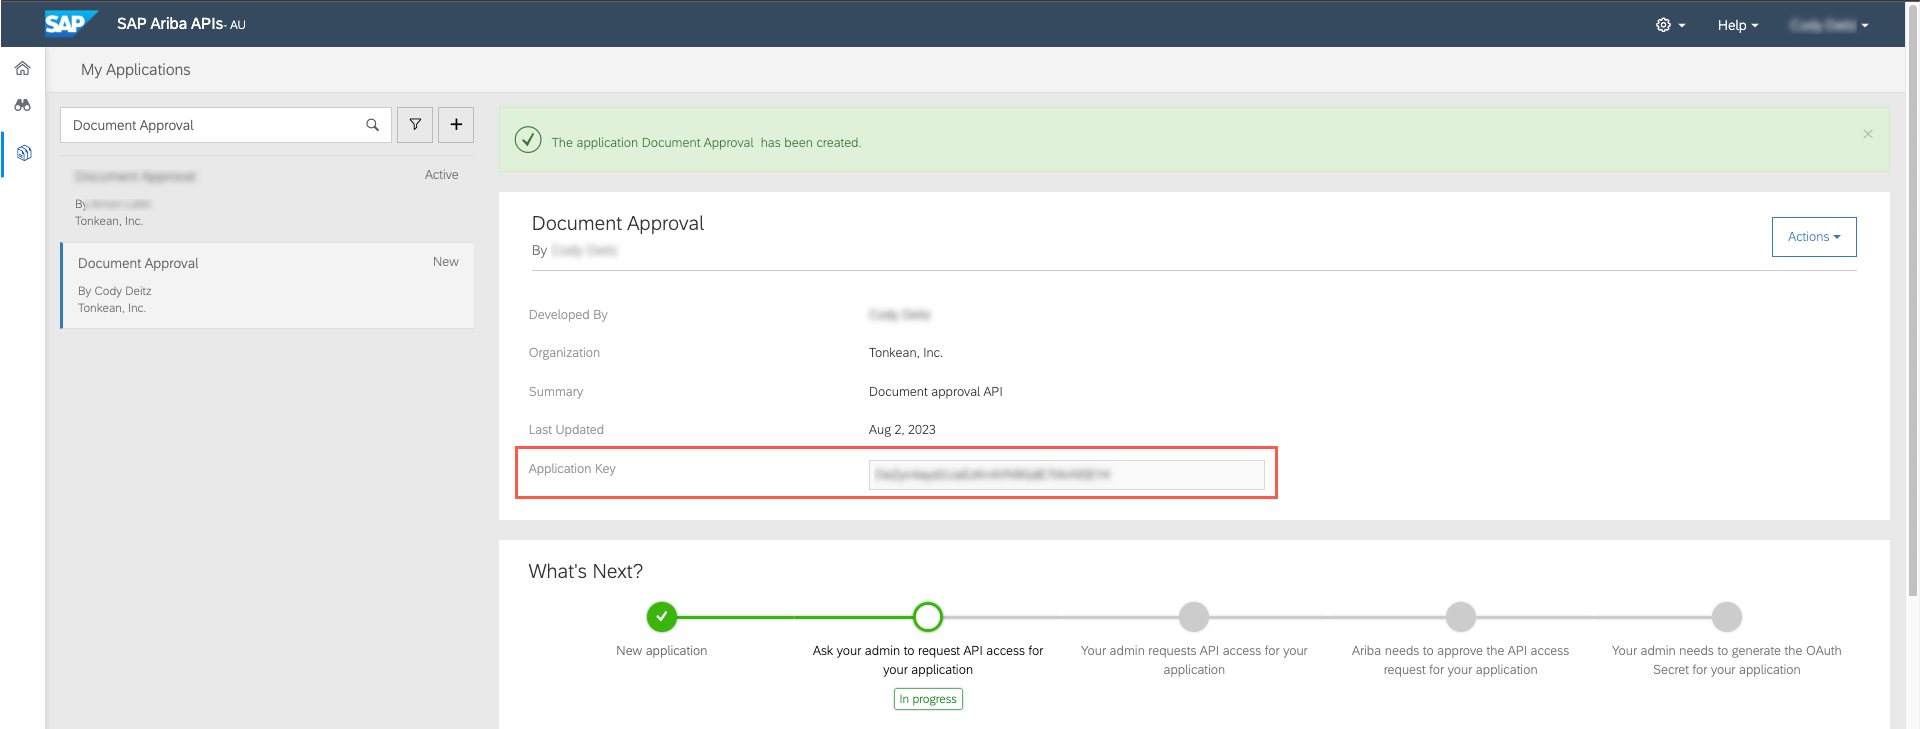
Copy the Application Key value and store it in a separate location. This value (Application ID in the Set Up Integration window) is required when connecting Ariba to Tonkean.
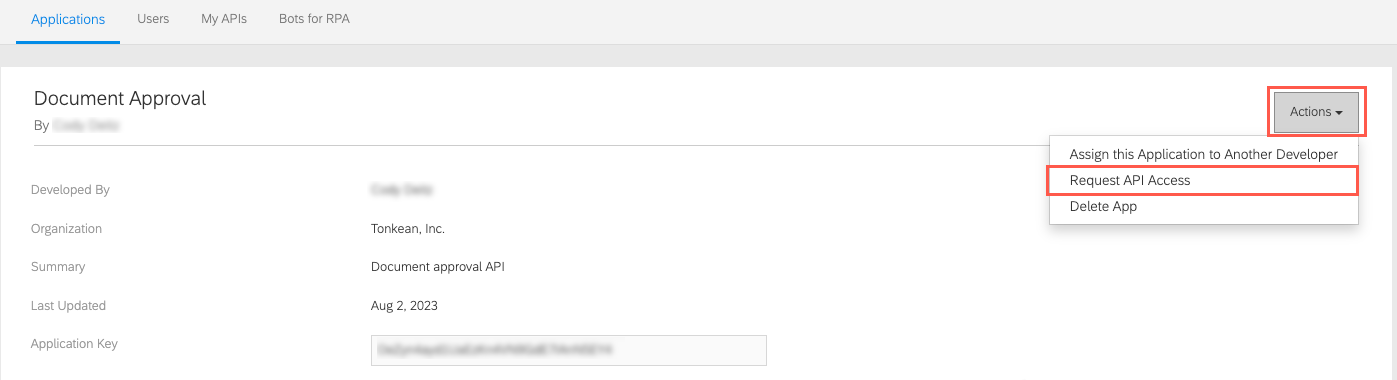
Select Actions in the upper right, then select Request API Access. The Request API Access for: {App Name} displays.
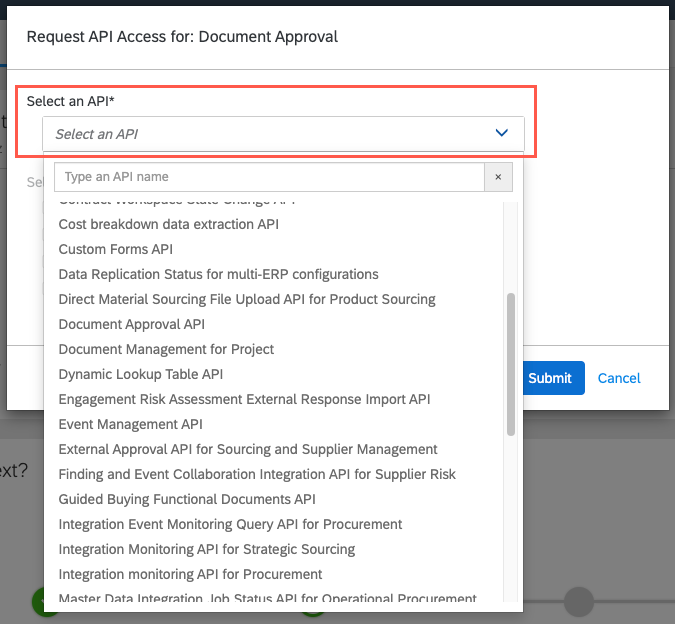
Select the API you want to access using this application. In our example, we select the Document Approval API.
For a complete list of SAP Ariba REST APIs, see SAP Ariba APIs.
Select the tenants where you want to access the API.
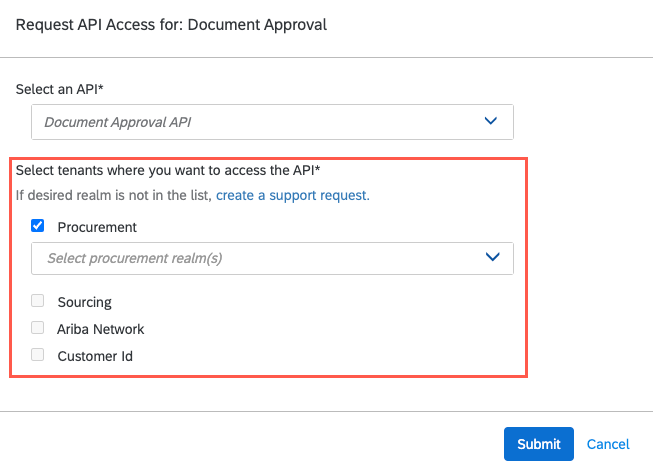
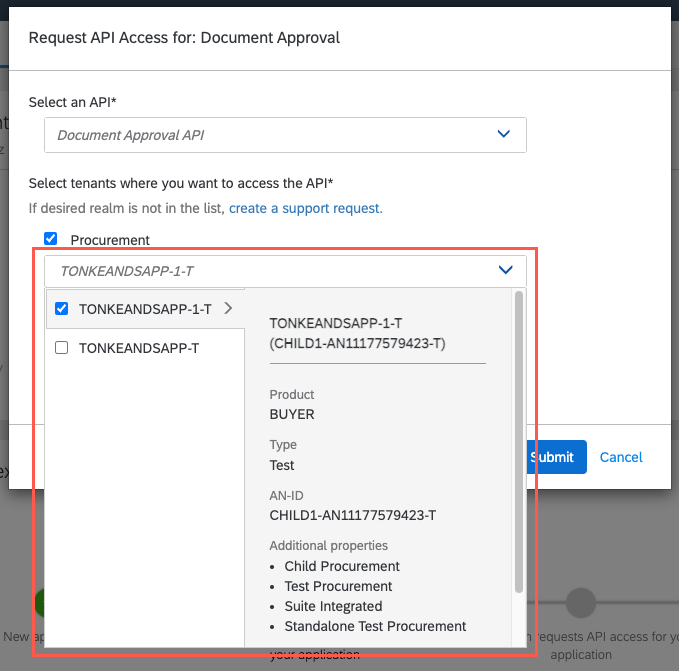
With the tenant selected, select the specific realm within that tenant. When finished, select Submit.
The Application creation tracker in the What's Next? section shows that your API access has been submitted to SAP for approval. In most cases, API access review takes between 12 and 24 hours. Once approved, you will receive an email informing you that you've been granted access to the request API.
Depending on your permissions in Ariba, an admin may be required to generate the OAuth Secret for your application.
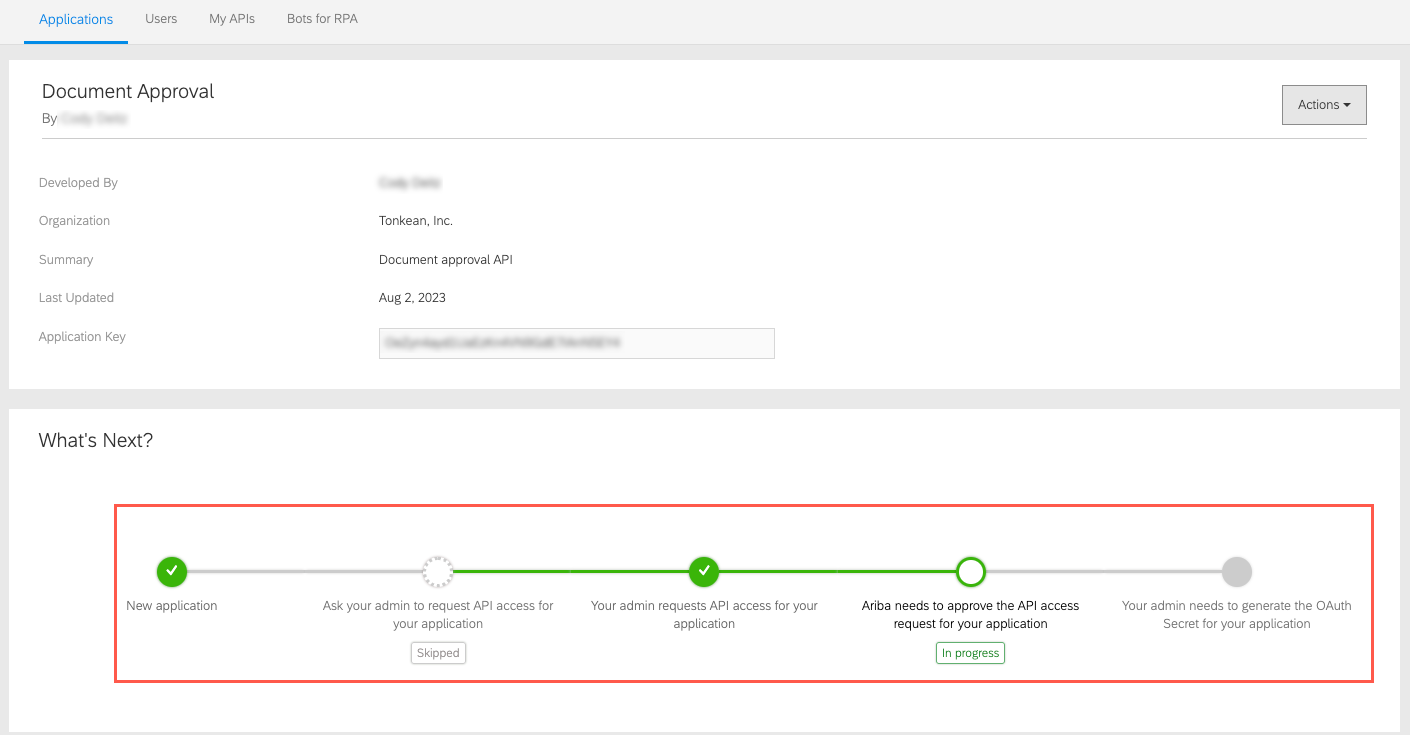
Once API access is approved, the status is updated in the What's Next section, and additional actions are available to you.
Once approved, select Actions in the upper right, then select Generate OAuth Secret. A warning message displays informing you that generating a new OAuth Secret overrides any previous values.
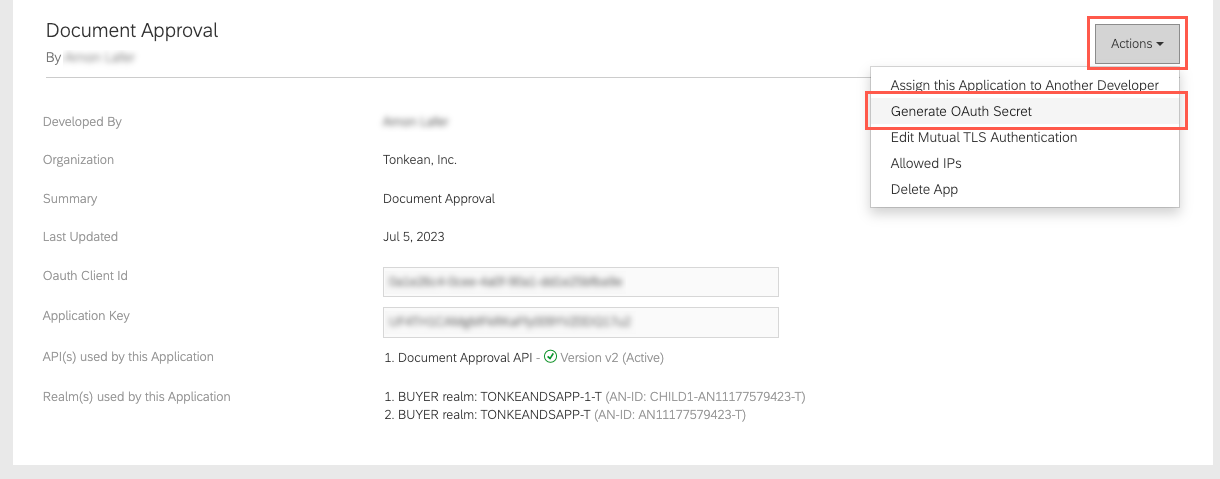
Select Submit.
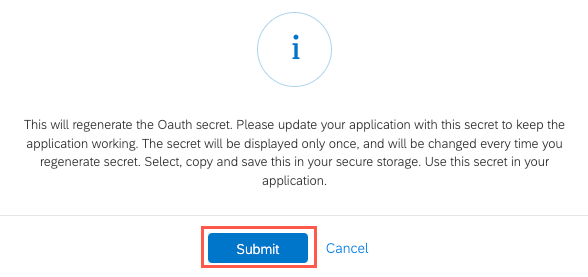
Values for the Application Key, OAuth Client Id, and OAuth Secret display. Copy and save the OAuth Client and OAuth Secret values in a separate location, alongside the Application Key saved in step #6, to use when connecting Ariba to Tonkean.
Enable Inbound Webhook for the Import Requisition(s) Web Service
To enable the data actions Approve/Reject Requisition, Create or Update Requisition, and Create Supplier you must enable webhooks that leverage two Ariba Import Requisition(s) web services: Import Requisition(s) and Import Suppliers.
Follow the steps below to set up the webhook and web service for the Import Requisition(s) web service, then repeat this process for the Import Suppliers web service.
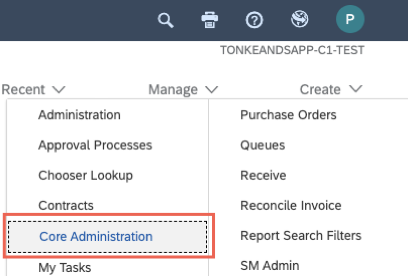
Navigate to the Ariba UI portal and log in as an administrator.
In the upper right, select Manage > Core Administration. The Administrator screen displays.
Create the Webhook Endpoint
Create and configure the endpoint for the webhook.
In the sidenav, select Integration Manager > End Point Configuration. The End Point Configuration screen displays.
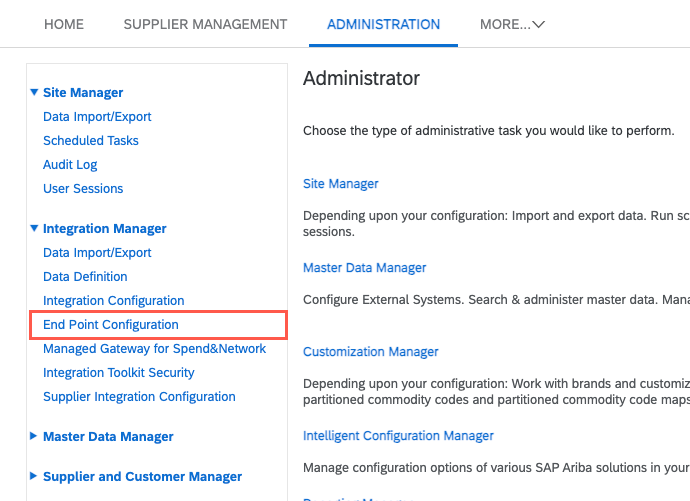
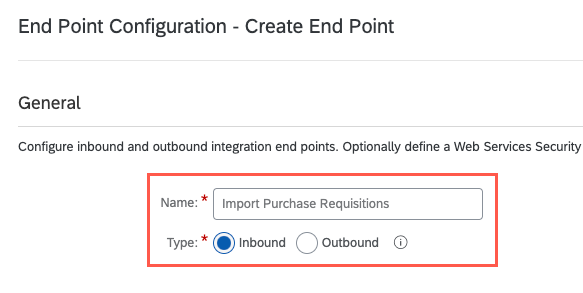
Select Create New. The End Point Configuration - Create End Point screen displays.
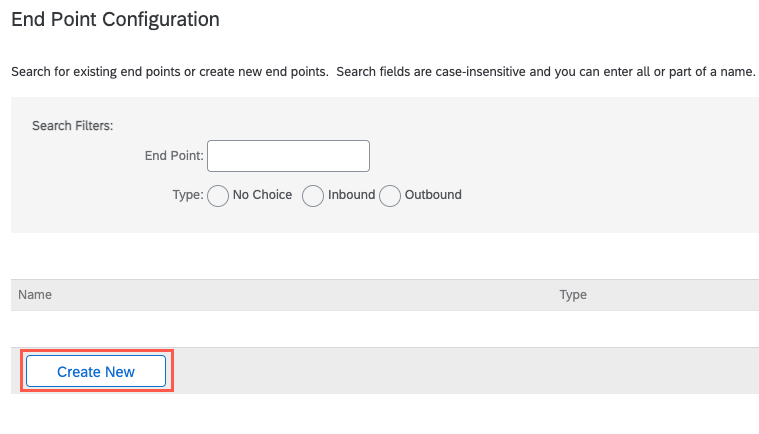
Enter a Name for the endpoint and set the webhook Type to Inbound (since you're sending data to Ariba).
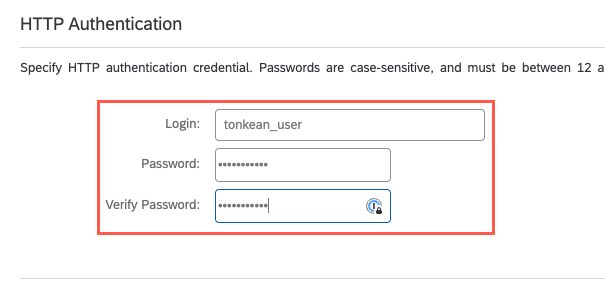
Provide a Login and Password for the webhook endpoint.
These credentials are unique to this endpoint.
We recommend using the same credentials for each webhook you create. This ensures you can leverage all actions with the same Ariba data source in Tonkean.
When finished, select Save. The webhook endpoint is created.
Enable Web Service and Associate with Webhook
Once your webhook endpoint is created, you can enable the Import Requisition(s) web service and associate it with your newly-created webhook.
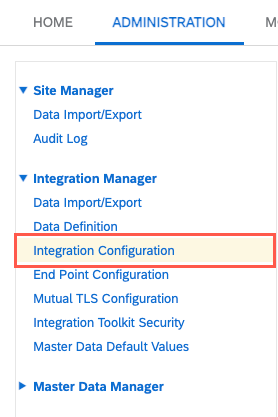
In the sidenav, select Integration Manager > Integration Configuration. The Integration Configuration screen displays.
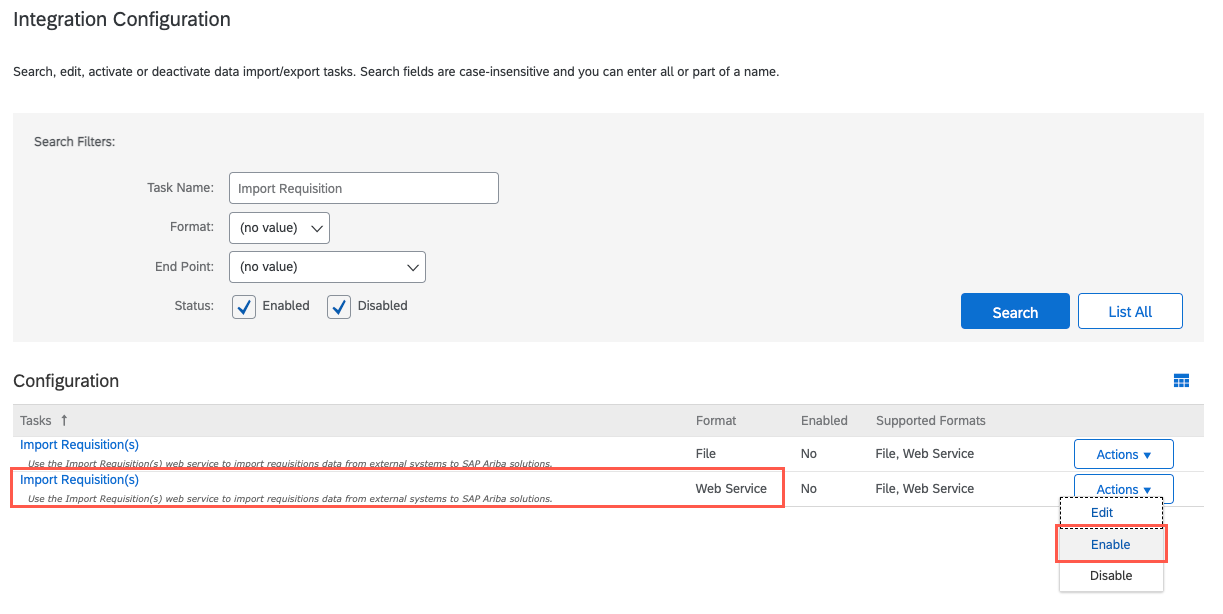
In the search field, enter "Import Requisitions" and select Search. The search results display.
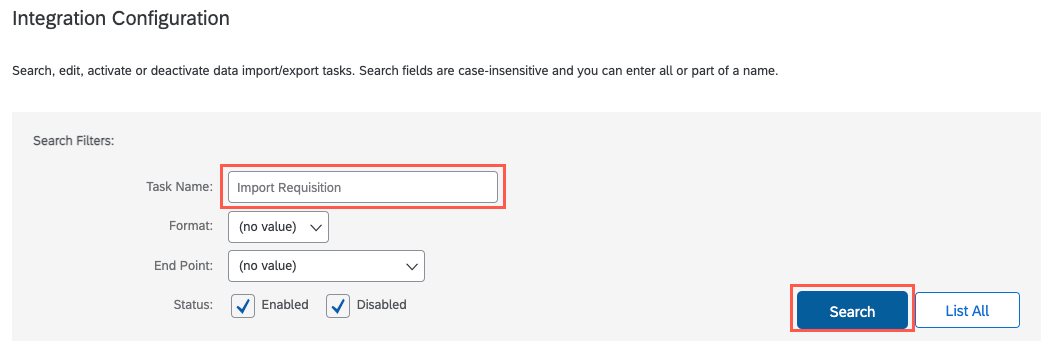
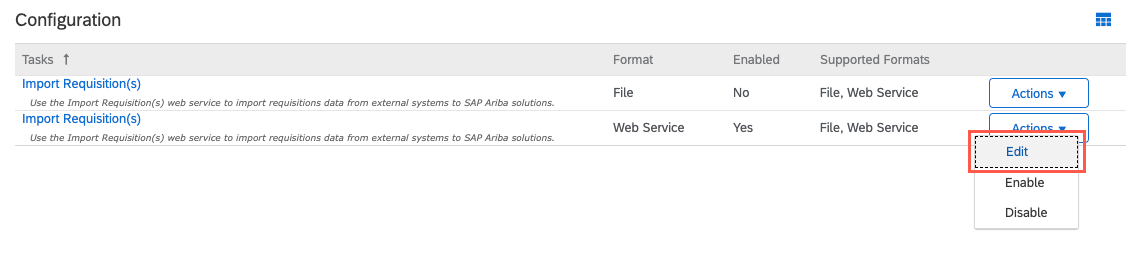
Locate the Import Requisition(s) web service from the search results. Select Actions > Enable. The Enabled column now displays Yes for the web service.
Make sure to select the Import Requisition(s) in Web Service format, not in File format.
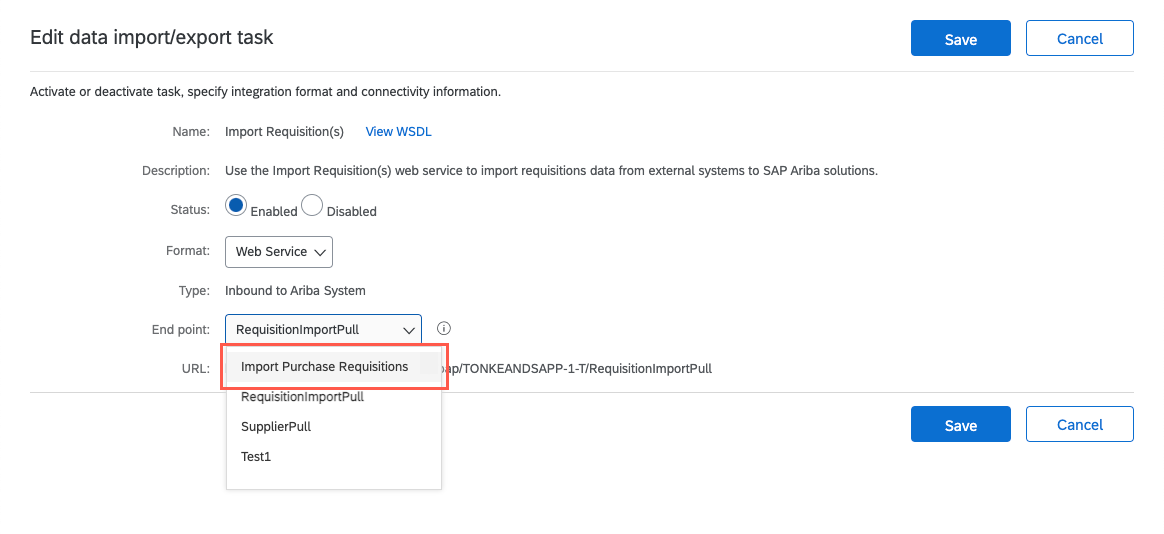
For the Import Requisition(s) web service, select Actions > Edit. The Edit data import/export task screen displays.
Select the End point dropdown and choose the webhook endpoint you created previously.
Copy the web service URL and save it in a separate location. This URL is required to configure the data actions in Tonkean that leverage the Import Requisition(s) web service.
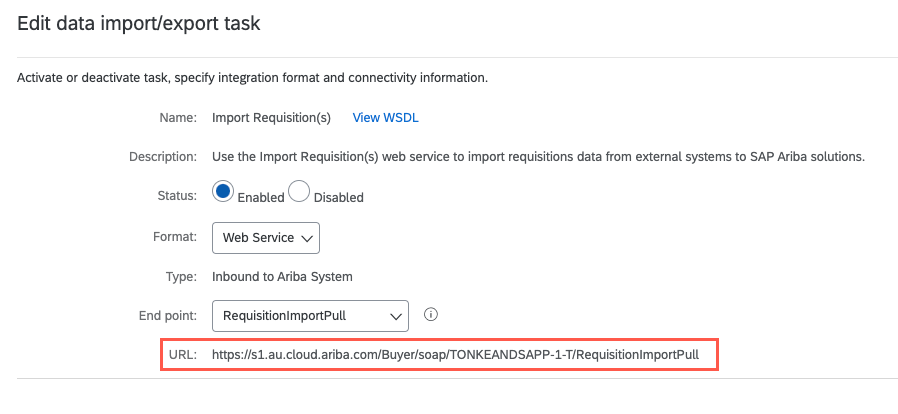
When finished, select Save.
Your webhook is configured and associated with the Import Requisition(s) web service.