Connect Microsoft Entra ID (SCIM)
Admins can leverage Microsoft Entra ID (formerly Azure AD) to provision users and assign roles in Tonkean using the Tonkean SCIM API. To connect and configure Entra ID for user provisioning, follow the process below.
You must already have an existing Entra ID tenant to follow this process. If you don't already have a tenant, visit Entra ID to create one.
This topic is currently in the process of being updated following the transition of Azure AD to Entra ID and some ongoing changes in the Azure/Entra user interface. If you have any questions about discrepancies here, please contact Support.
Prerequisites
To complete all parts of this walkthrough, you must be assigned the following roles:
Application Administrator
Attribute Assignment Administrator
Attribute Definition Administrator
Attribute Definition Reader
Global Administrator
Create an Identity Provider
Before configuring your Entra ID instance, you must create an identity provider in Tonkean.
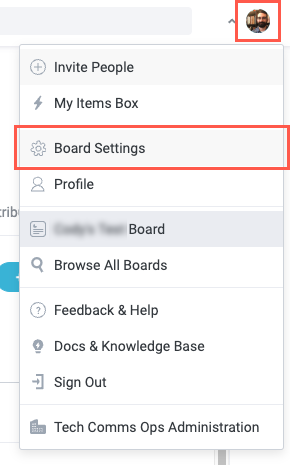
Select your profile icon in the upper right, then select Board Settings. The Board Settings screen displays.
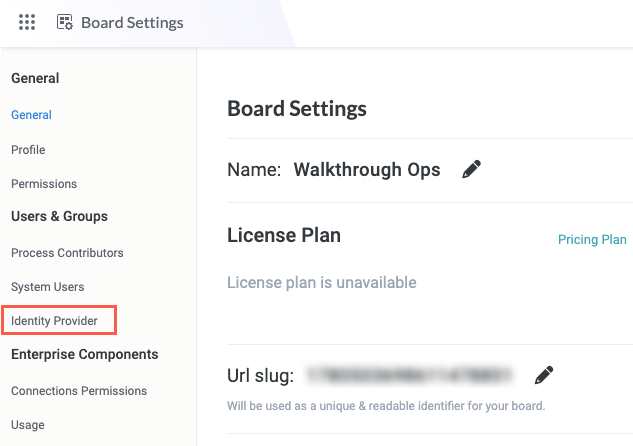
In the sidenav, select Identity Provider. The Identity Provider screen displays.
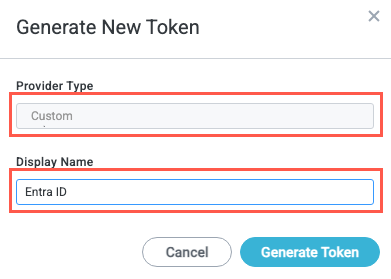
Select Create New Provider. The Create New Provider window displays.

Select the Provider Type dropdoown and choose Custom, then enter a Display Name for the identity provider. When finished, select Generate Token. The Access Token displays.
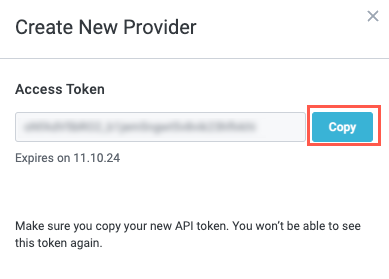
Select Copy to copy the access token. Paste the token in a separate file and close the Create New Provider window.
This is the last time you'll be able to view the decrypted token, so make sure you save it somewhere safe for later reference.
Leave Tonkean open in this tab. You will return to it later in the process to retrieve the SCIM API URL and confirm the addition of users using Azure.
Create an Enterprise Application in Entra ID
After creating a new identity provider in Tonkean, you can create an application in Entra ID.
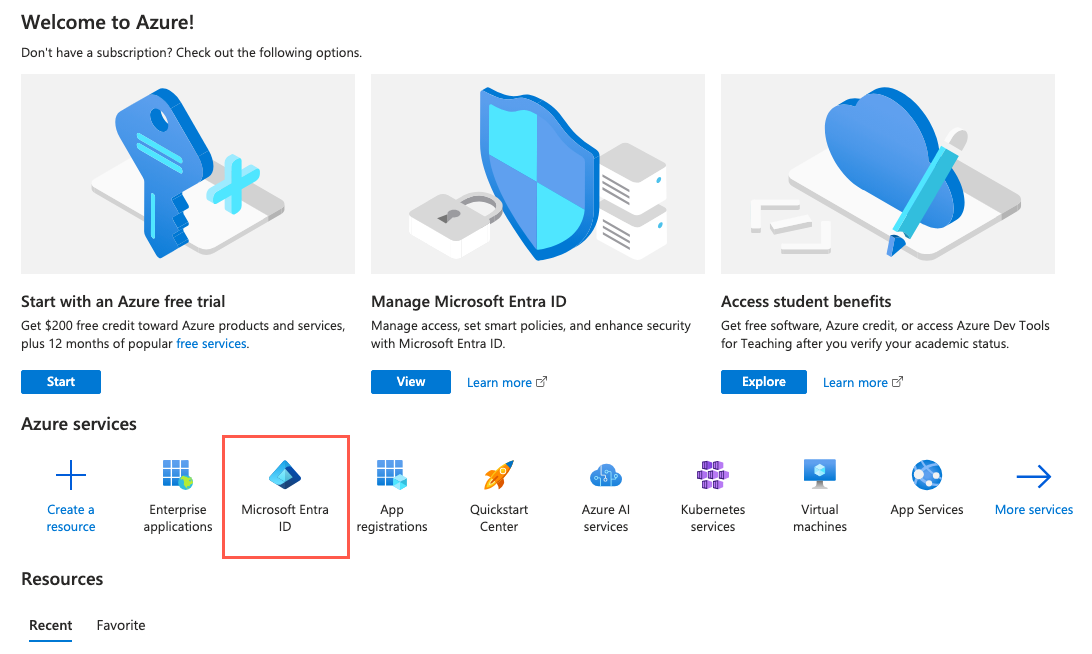
Open a new tab in your browser and sign in to your Azure tenant.
In Azure services, select Azure Active Directory. The tenant Overview screen displays.
If Azure AD doesn't appear in the Azure service section, use the global search to locate and navigate to Azure AD.
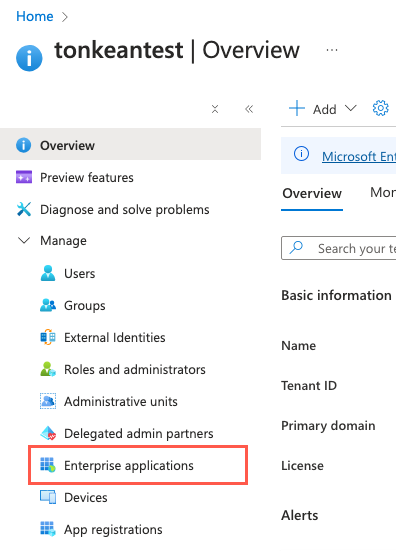
In the sidenav, select Manage > Enterprise applications. The Enterprise applications screen displays.
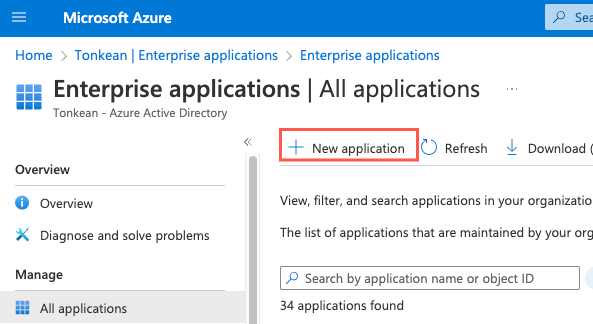
Select New application. The Browse Azure AD Gallery screen displays.
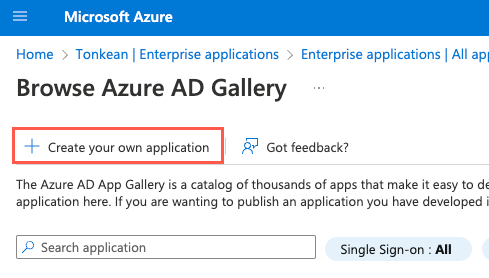
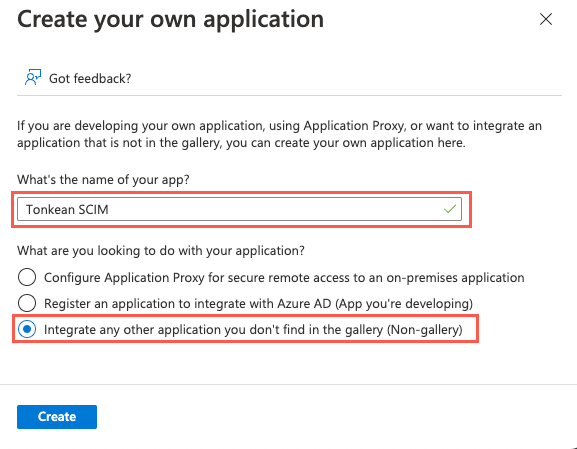
Select Create your own application. The Create your own application panel displays.
Enter a name for your application and ensure the third option, Integrate any other application you don't find in the gallery, is selected. Then, select Create.
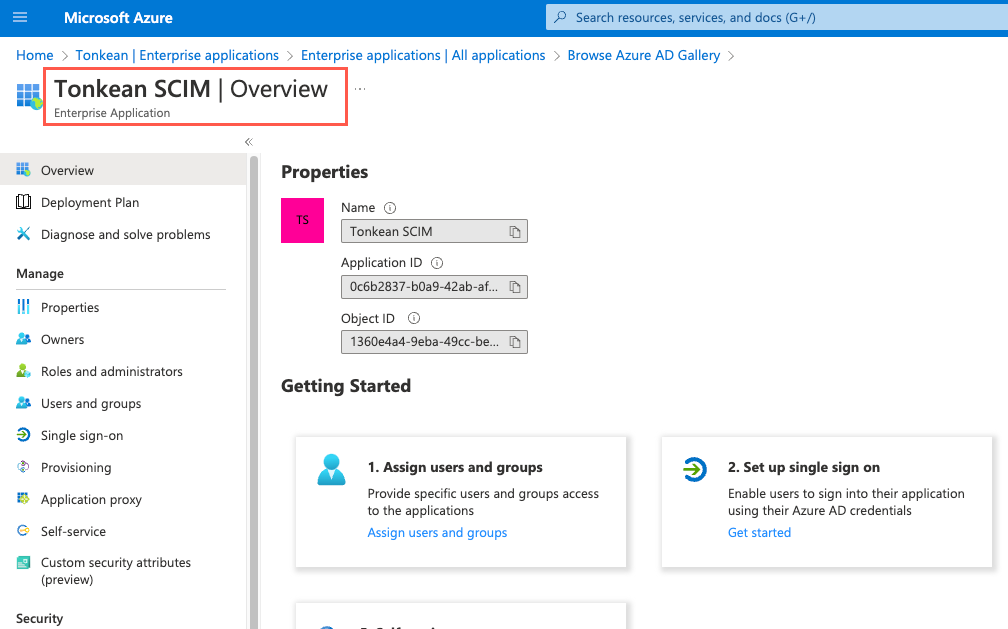
The Overview screen for your newly-created enterprise application displays:
Set Up Application Provisioning
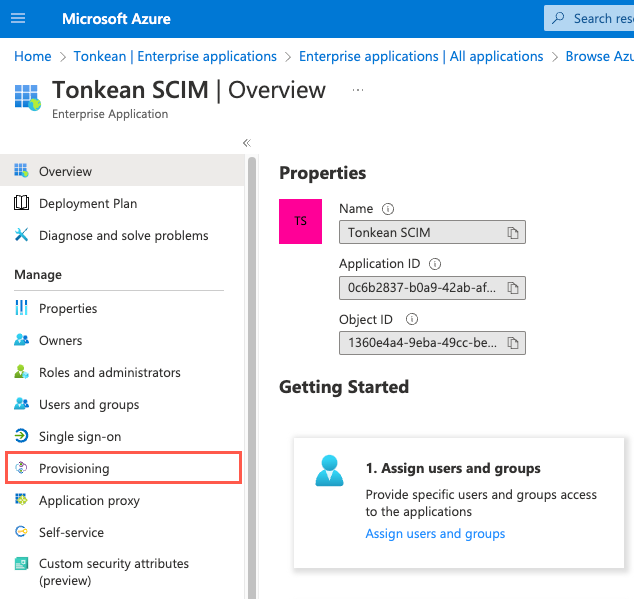
In the sidenav, select Provisioning. The {Enterprise app} | Provisioning screen displays.
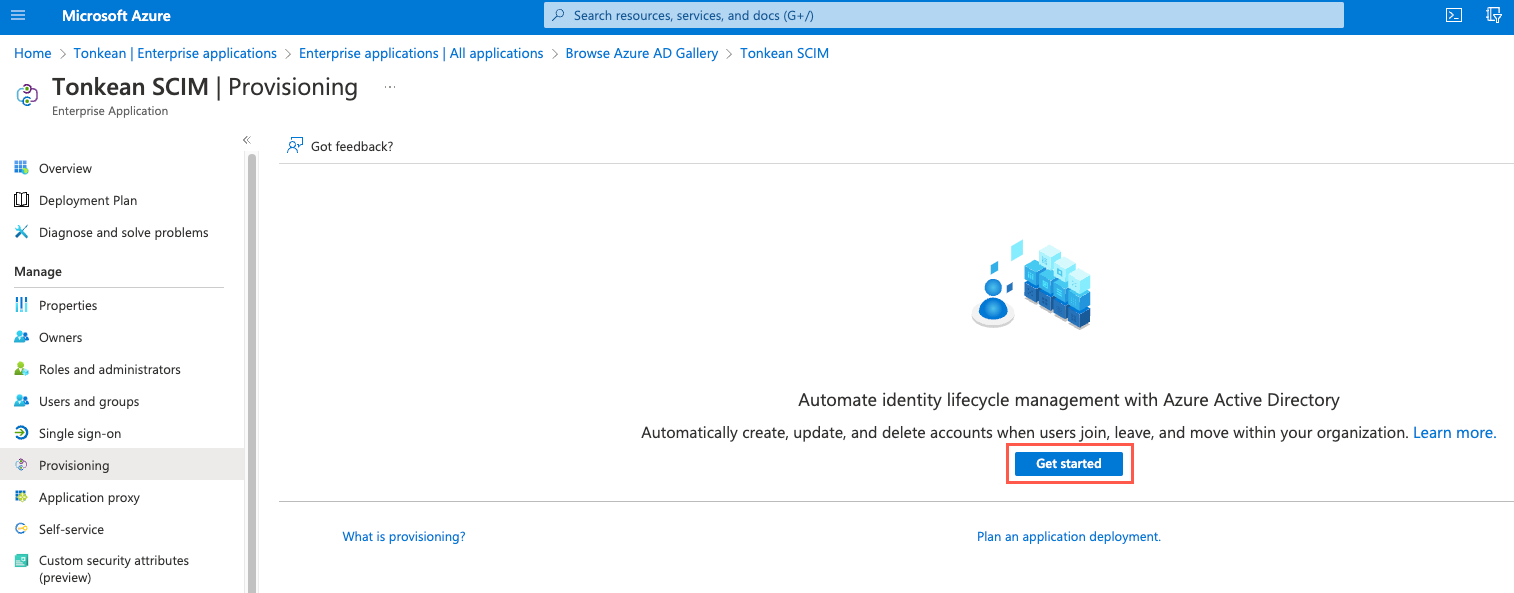
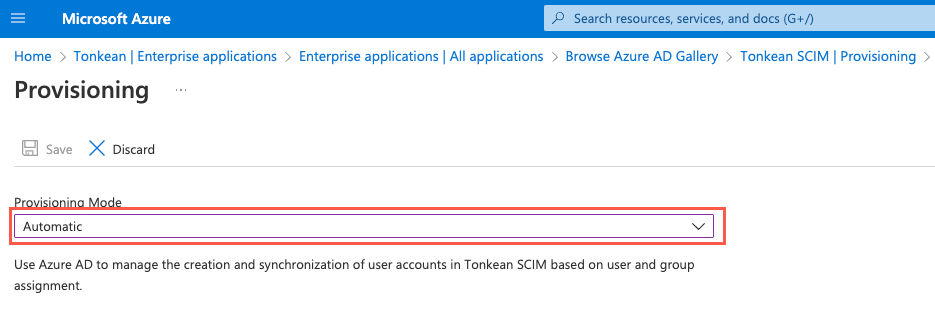
Select Get started. The Provisioning screen displays.
Select the Provisioning Mode dropdown and select Automatic. The Admin Credentials fields display.
Enter the SCIM API URL into the Tenant URL field:
https://api.tonkean.com/scim/v2This value may differ for some users depending on your deployment type (for example, private cloud users have an org-specific URL. You can retrieve the API endpoint by returning to the Identity Provider screen in Tonkean.
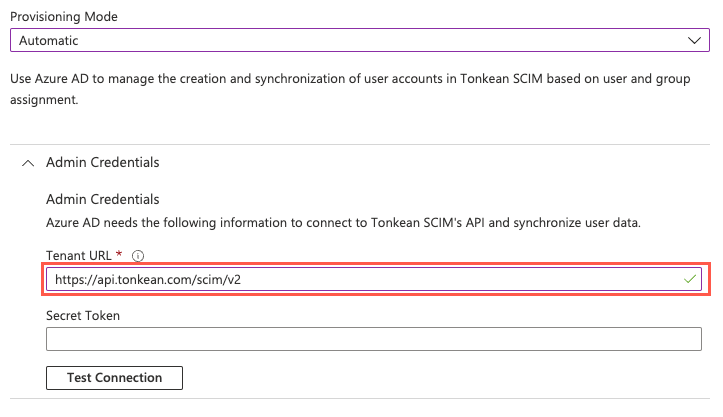
Retrieve the access token you generated in Tonkean and paste it into the Secret Token field.

With both fields populated, select Test Connection.
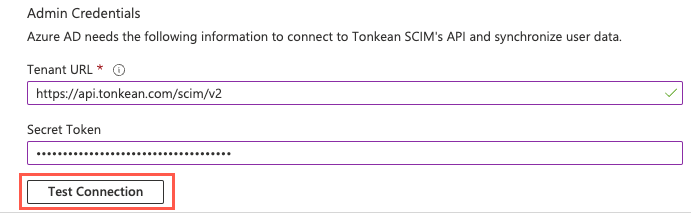
Azure tests the credentials and, if successful, a success message displays in the upper right. If the test is unsuccessful, confirm that both the Tenant URL and Secret Token are entered correctly, with no additional spaces.
After a successful test, select Save to save the admin credentials.
You have established the connection between your enterprise application and Tonkean and can now provision users in Tonkean from Entra ID.
Add and Map Extension Attributes in the Enterprise Application
With your enterprise application created and set up to allow provisioning, you can add custom attributes, referred to as extension properties in Entra ID, to your application. These extension properties define the user roles in Tonkean.
Add the Extension Property
There are two options for adding custom attributes. You can use the newly created user interface, following the documentation for defining custom attributes, or you can use Microsoft Graph, following the steps provided below.
In a new browser tab, open Microsoft Graph Explorer.
Select the profile icon in the upper right and sign in to Graph Explorer.
Retrieve the
idfor your app to use in adding extension properties:Select GET in the method dropdown.
Enter the following endpoint URL:
https://graph.microsoft.com/v1.0/applications
You can leave the Request body empty.
Select Run query. The list of all enterprise applications you have permissions for in your Azure tenant is returned.
If you don't have permission to use Graph Explorer, you may need to add the relevant permissions to your app. See the Microsoft Graph documentation for configuring Azure AD Graph permissions.
In the response, use your browser Find tool ("Ctrl + f" on Windows or "cmd + f" on Mac) and search for your application by name.
Locate the application object in the response and copy the value of
id. Paste this value in a separate location. You can always query all applications to retrieve the value, if needed.This process requires the
idvalue, not theappIdvalue.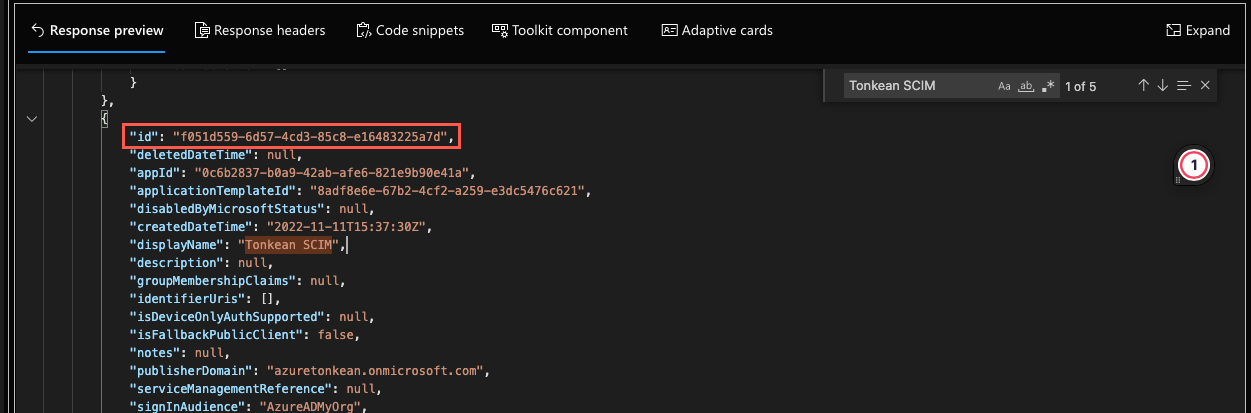
Add a new extension property, "User":
Select POST in the method dropdown.
Enter the following endpoint URL:
https://graph.microsoft.com/v1.0/applications/{id}/extensionPropertiesIn the Request body, enter the following body:
{
    "name": "tonkeanRoles",
    "dataType": "String",
    "targetObjects": [
        "User"
    ]
}
The query should display as follows:
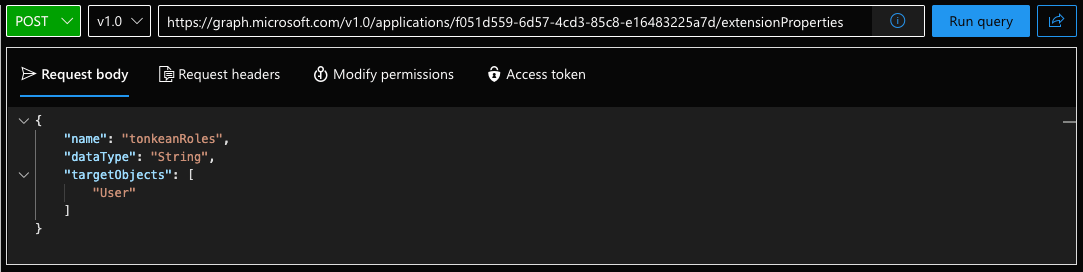
Select Run query.
The new property object, "User", is added to the application. View the object details in the response:
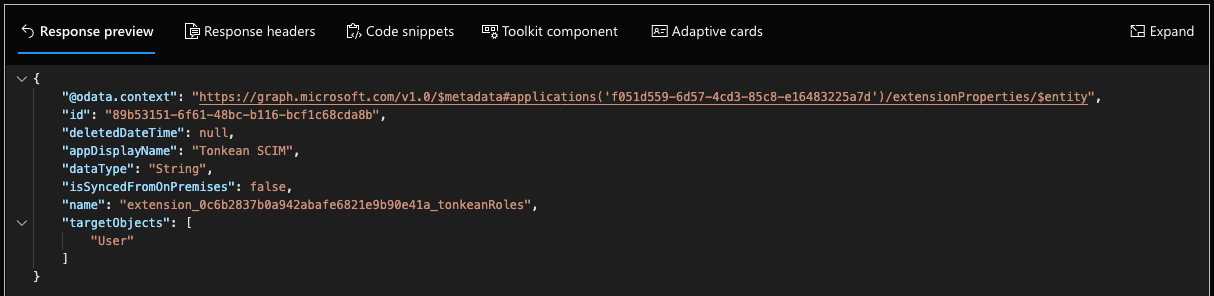
Locate the
namevalue for the new extension property object. Copy thisnamevalue and save it in a separate location. You'll need this value to update the extension property with the specific role attribute.The
namevalue for our extension property isextension_ed99f46c624143628d6641621fa593c2_tonkeanRoles.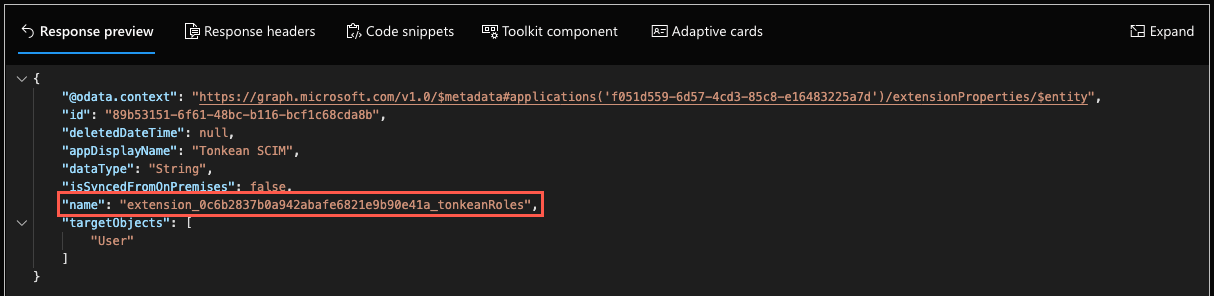
Leave Graph Explorer open in your browser tab—you'll return to it later in the process.
Add New Mapping for the Extension Property
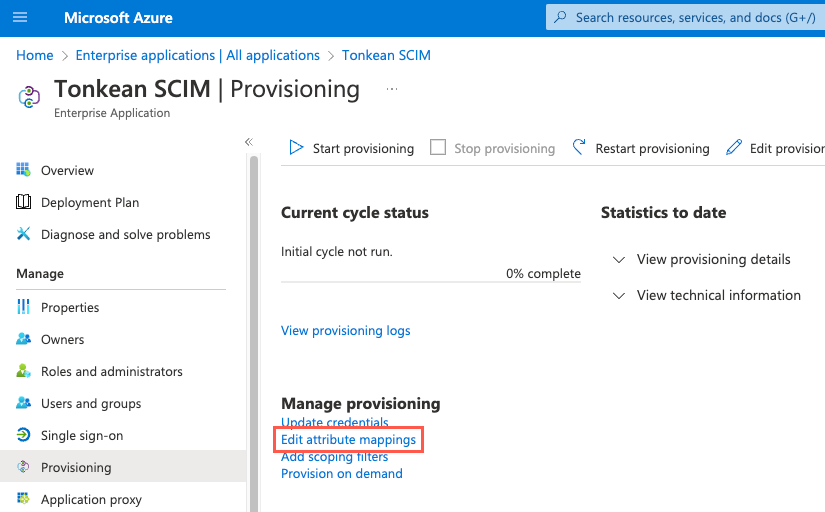
Navigate back to the {Enterprise app} | Overview screen.
In the sidenav, select Provisioning. The {Enterprise app} | Provisioning screen displays.
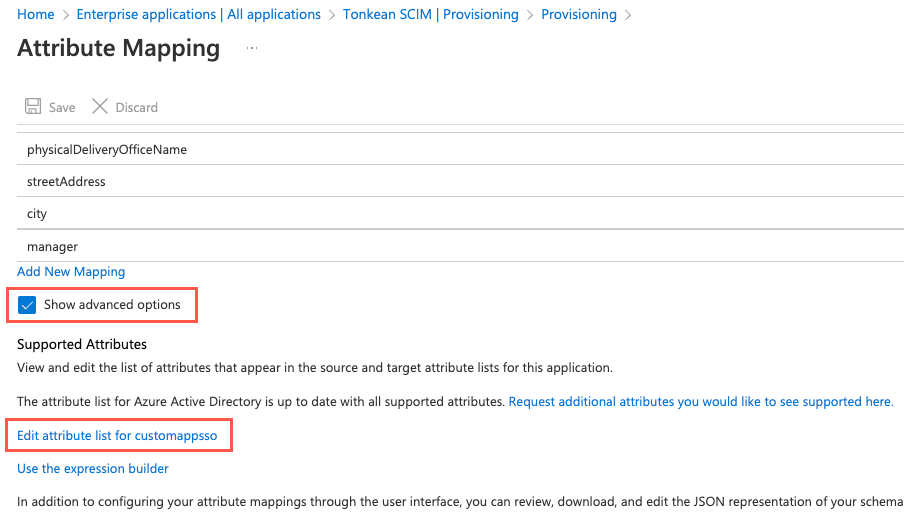
Select Edit attribute mappings. The Provisioning screen displays.
Edit attribute mappings may be located in the sidenav by navigating to Provision on demand > Manage > Attribute mapping.
Select the Mappings dropdown, then select Provision Azure Active Directory Users. The Attribute Mapping screen displays.

Scroll to the bottom of the screen and select the Show advanced options checkbox, then select Edit attribute list for customappsso. The Edit Attribute List screen displays.
Scroll to the bottom of the screen and add a new attribute,
urn:ietf:params:scim:schemas:extension:enterprise:Tonkean, to the list with Type set to String.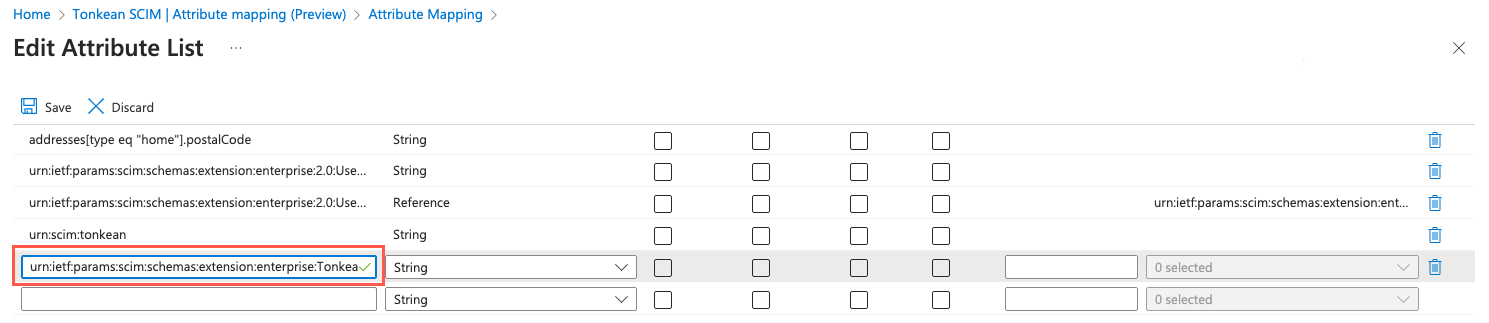
When finished, select Save and confirm the changes.
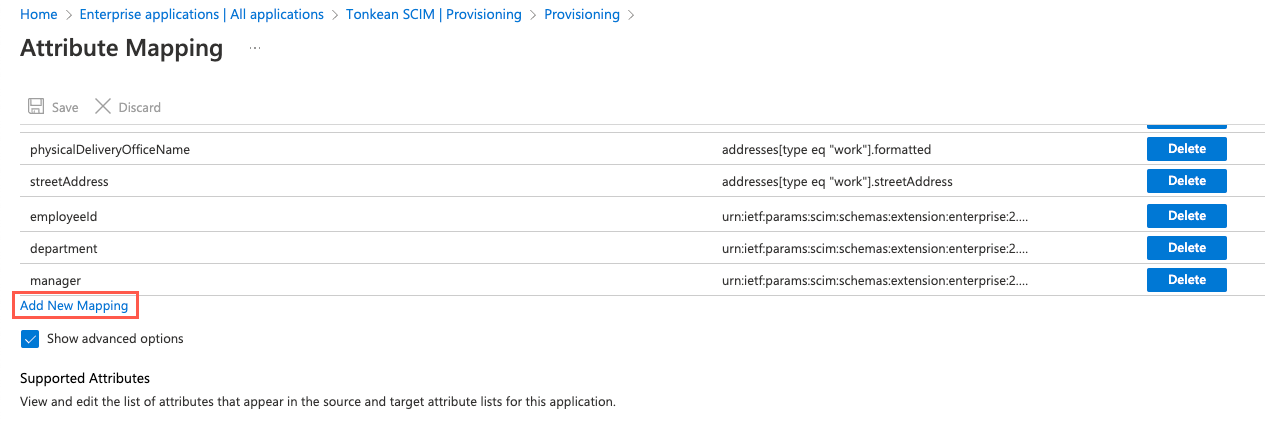
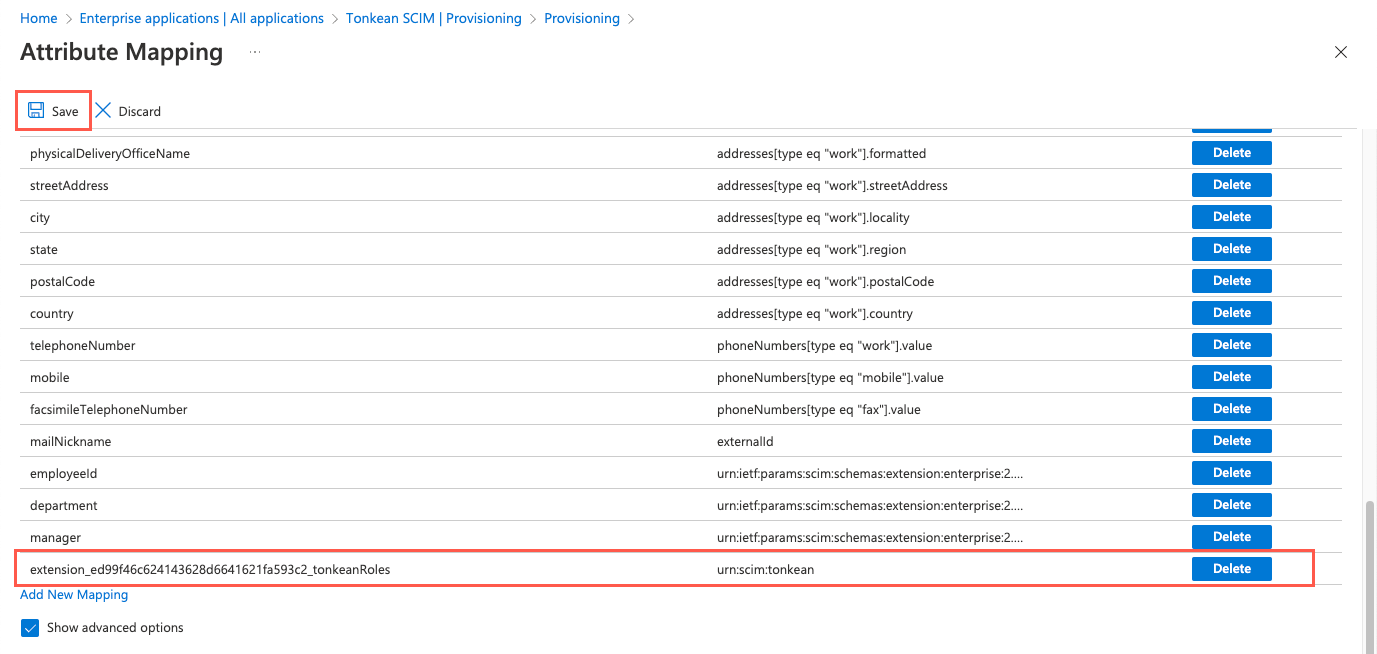
Select Add New Mapping. The Edit Attribute screen displays.
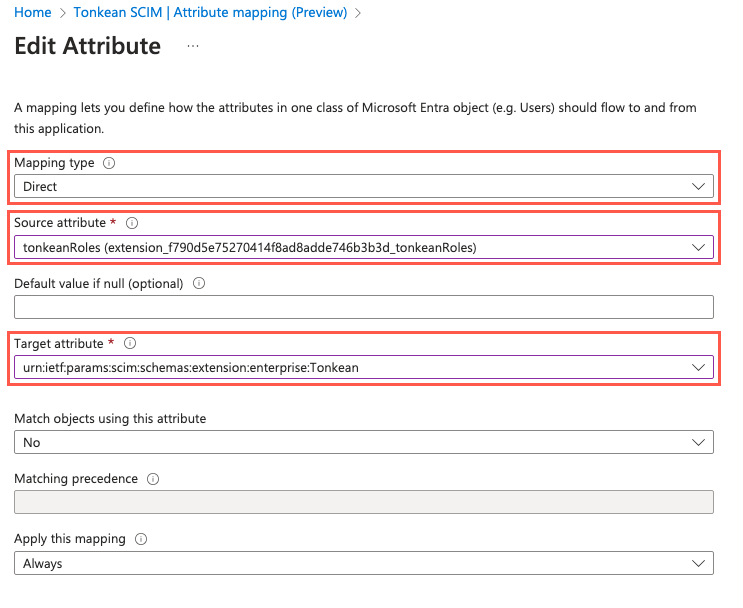
Configure the attribute:
Leave the Mapping type set to Direct.
Select the Source attribute dropdown and select the object name of the extension property,
tonkeanRoles, you created earlier. For example, our source attribute istonkeanRoles (extension_ed99f46c624143628d6641621fa593c2_tonkeanRoles).In the Target attribute field, enter
urn:ietf:params:scim:schemas:extension:enterprise:Tonkean.When finished, select Ok. The Edit Attribute window closes.
On the Attribute Mapping screen, confirm the addition of the new mapping and select Save and confirm the changes.
Provision Users in your Enterprise Application
Now that you have your enterprise application created and configured, you can provision users in your enterprise application.
Ensure that you've already added users to your directory before continuing this process—a user's object ID is required to provision them with the appropriate role.
Locate User Object ID
To assign the process contributor to each user, you must retrieve their Object ID.
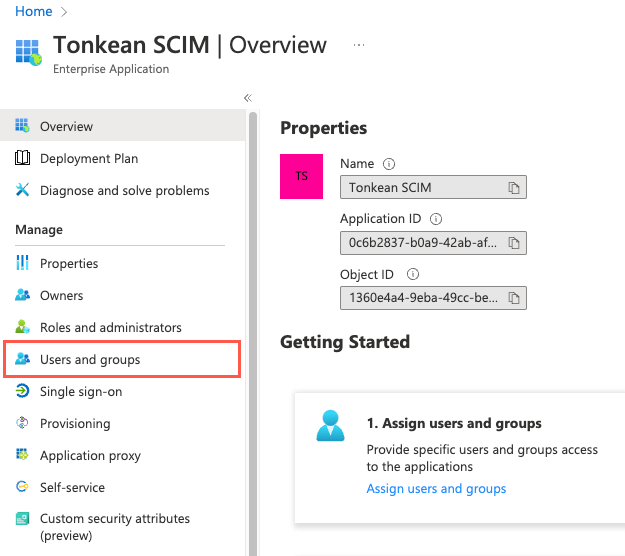
Navigate to the {Enterprise app} | Overview screen.
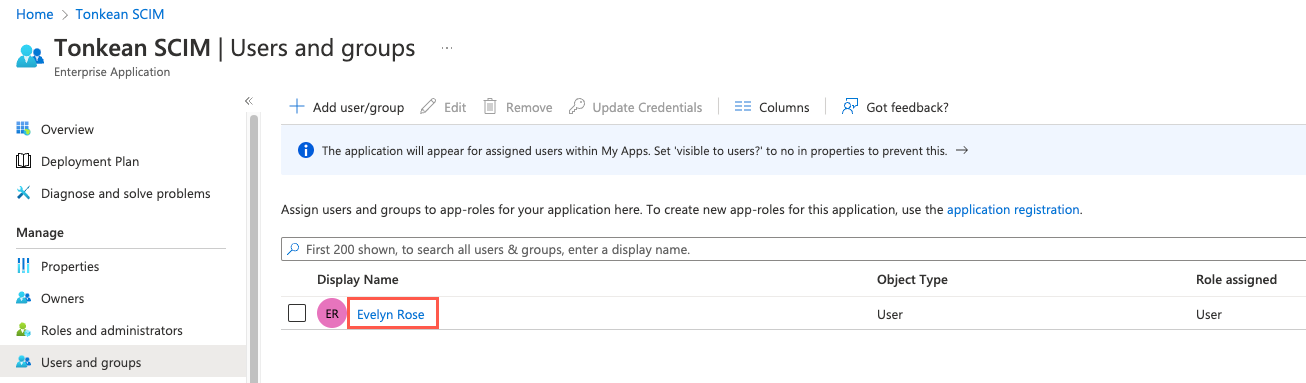
In the sidenav, select Users and groups. The {Enterprise application} | Users and groups screen displays.
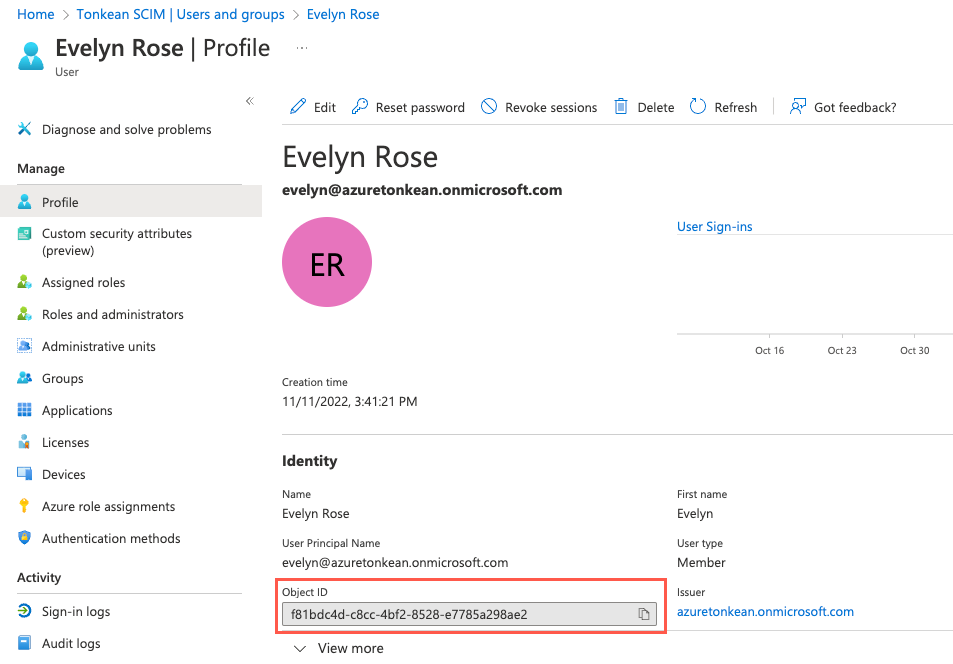
Select the user you want to assign the process contributor role. The {User} | Profile screen displays.
Locate and copy the Object ID for the user. You'll use this ID to assign the process contributor role using Graph Explorer.
Update the Extension Property to Assign the Process Contributor Role
For each user, you must update the tonkeanRoles extension property with a new role attribute of process contributor.
To simplify this process and allow users not already provisioned to access Tonkean, you can Automatically Assign the Process Contributor Role.
Navigate back to Graph Explorer.
Select PATCH in the method dropdown.
Enter the following endpoint URL, replacing {user_object_id} with the Object ID value you copied for the specific user:
https://graph.microsoft.com/v1.0/users/{user_object_id}In the Request body, enter the following body:
{
    "{application_name_value}": "PROCESS_CONTRIBUTOR"
}
Replace {application_name_value} with the specific value for your application, saved in the Add the Extension Property section above. The
namevalue for our extension property isextension_ed99f46c624143628d6641621fa593c2_tonkeanRoles.The query should display as follows:

You can assign more than role at a time using a comma-separated list. For example,
"{application_name_value}": "PROCESS_CONTRIBUTOR, SYSTEM_USER".Select Run query. If the query is successful, a No Content - 204 message displays above the Response preview.
You have successfully assigned the process contributor role to the user. You can now provision the user in the enterprise application.
Provision the User in Azure
Navigate back to the {Enterprise application} | Overview screen.
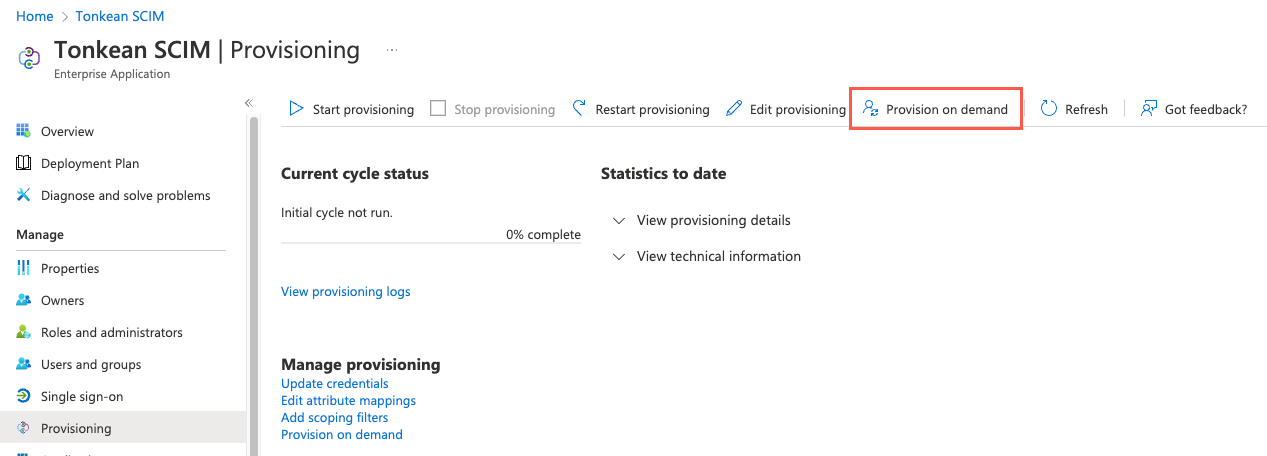
In the sidenav, select Provisioning. The {Enterprise app} | Provisioning screen displays.
Select Provision on demand. The Provision on demand screen displays.
Provision on demand may be located elsewhere on the screen, such as in the Quick actions section.
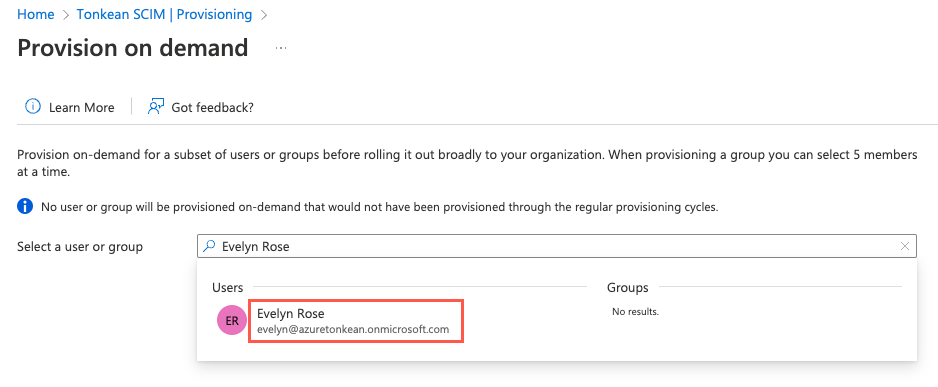
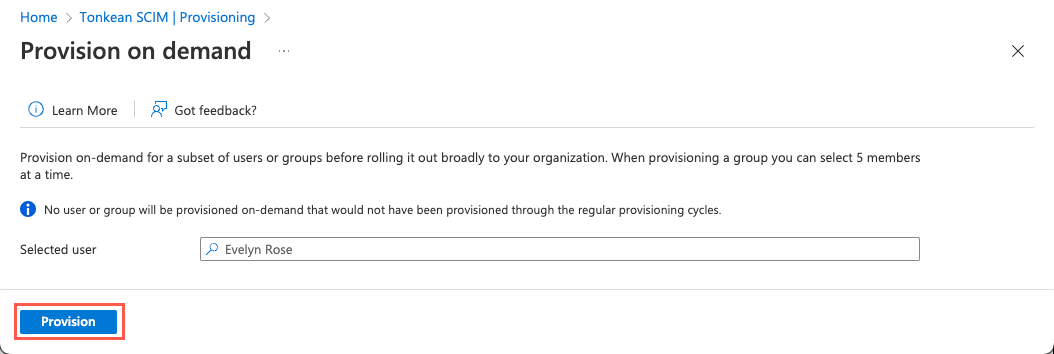
Use the search bar to search for and select the user you want to provision. The user name displays in the Selected user field.
Select Provision.
After processing, the user is provisioned:
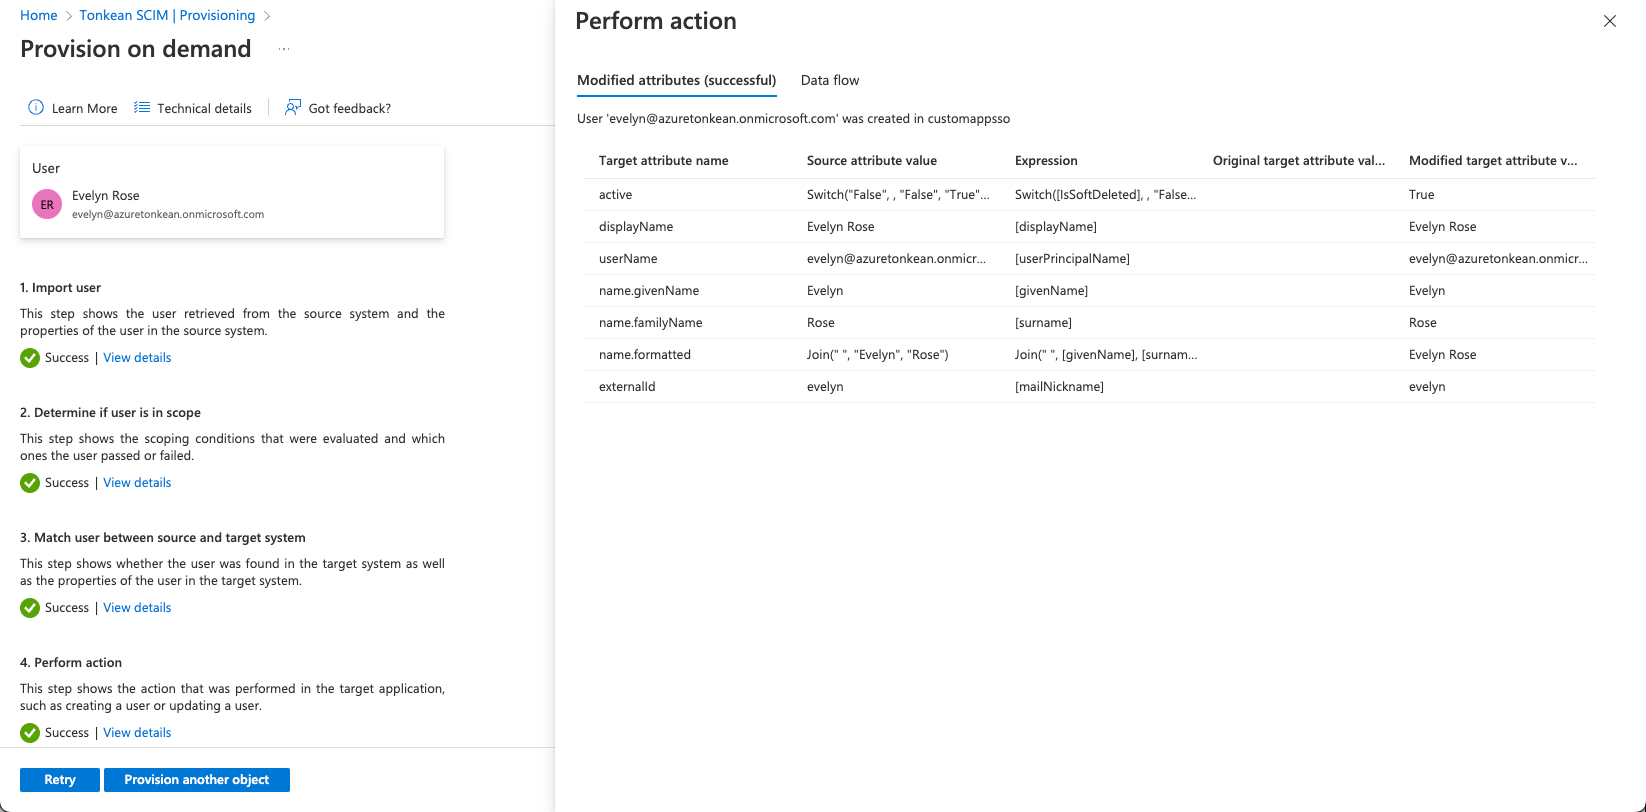
If, as in the image above, you do not see the value of attribute
urn:ietf:params:scim:schemas:extension:enterprise:Tonkeanupdated to[PROCESS_CONTRIBUTOR], select Retry in the lower left. The attribute should then be updated: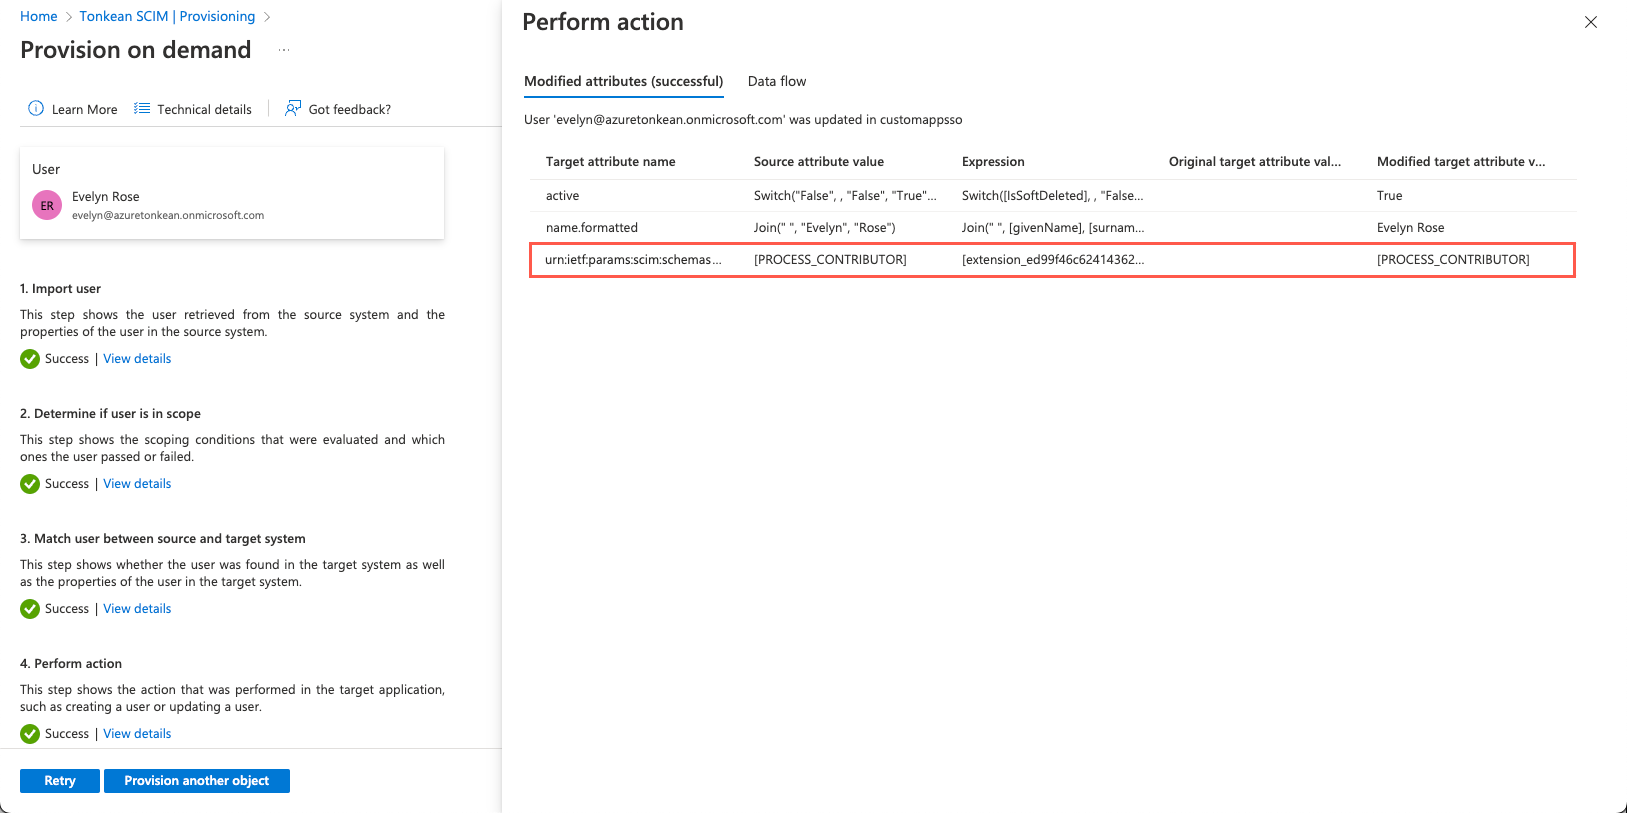
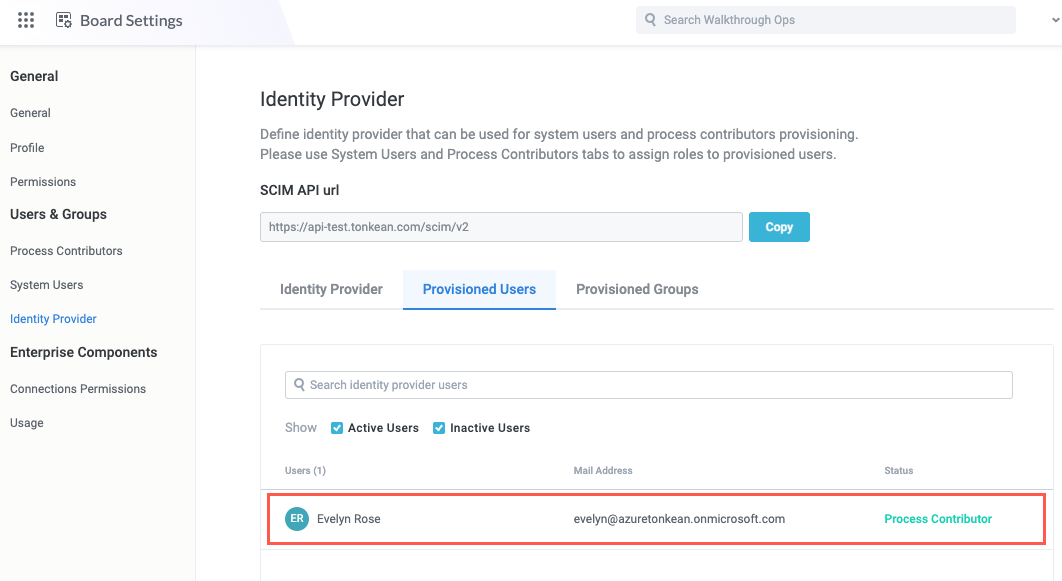
To confirm the user is successfully provisioned and granted the appropriate role, navigate to the Identity Provider screen in Tonkean and select the Provisioned Users tab. The tab should display the user and a Status of Process Contributor:
Repeat each step in Provision Users in your Enterprise Application for each user you want to provision and assign the process contributor role.
You have successfully provisioned the user and assigned to them the process contributor role.