NetSuite
NetSuite is a popular cloud ERP solution, providing a suite of applications, from accounting and financial planning to warehouse management, ecommerce, inventory management, and more. NetSuite is often connected to Tonkean to leverage its procurement and purchasing management features, such as managing purchase orders.
Authenticate with NetSuite
To leverage the NetSuite data source actions in your solution, you must connect NetSuite as a data source:
Select the main nav icon,
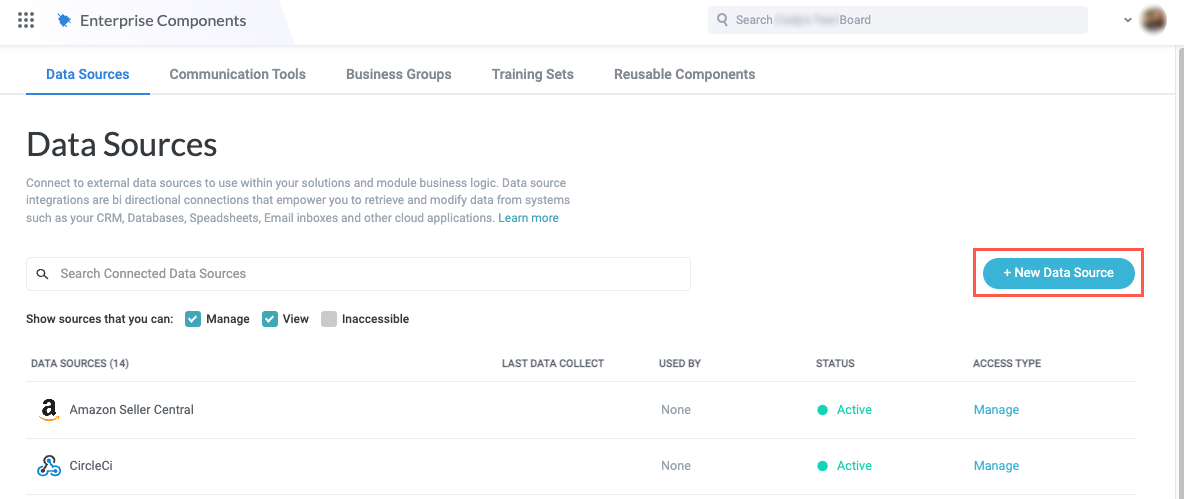
 , in the upper left and select Enterprise Components. The Enterprise Components screen displays.
Select + New Data Source in the upper right.
Select Cloud Application. The Add New Data Source window displays.

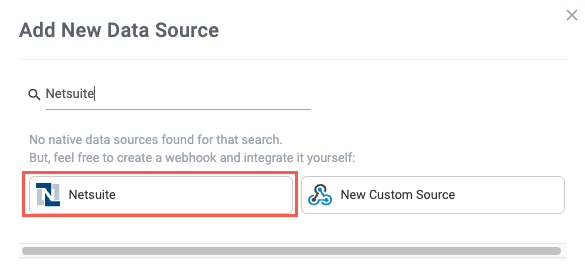
Enter "Netsuite" in the search field, then select Netsuite. The New Netsuite Connection window displays.
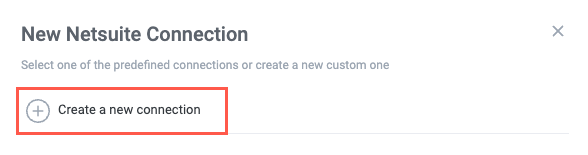
Select Create a new connection. The Set Up Data Source window displays.
Enter the required information:
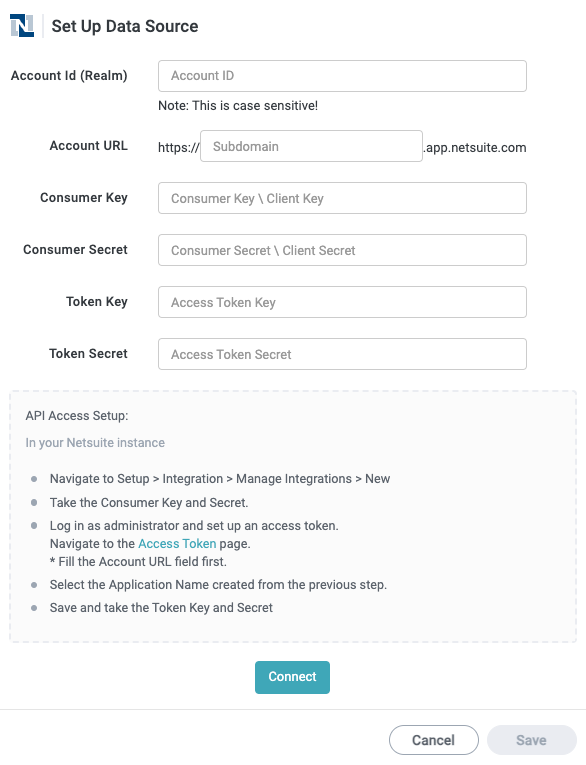
Account Id (Realm) - Your account ID/realm parameter. Be sure to replace hyphens (-) with underscores (_), and capitalize all letters.
Account URL - Your account subdomain.
Consumer Key - The consumer key. Find this value in NetSuite by navigating to Setup > Manage Integrations > New and creating a new integration.
Consumer Secret - The consumer secret. Find this value in NetSuite by navigating to Setup > Manage Integrations > New and creating a new integration.
Token Key - The token key. To locate this value, navigate to the Access Token page.
Token Secret - The token secret. To locate this value, navigate to the Access Token page.
When finished, select Connect.
Your NetSuite instance is connected to Tonkean.
While most NetSuite data source actions work out of the box, some actions require additional configuration. See the sections below for information on setting up the Upload File to File Cabinet and Attach File actions.
Configure Upload File to File Cabinet Action
To enable the Upload File to File Cabinet action in Tonkean, you must enable the SuiteScript feature and add a script in your NetSuite instance:
Enable the SuiteScript Feature in NetSuite
Before adding the required SuiteScript, ensure the SuiteScript feature is enabled in your NetSuite instance.
In NetSuite, navigate to Setup > Company > Enable Features. The Enable Features screen displays.
Select the SuiteCloud tab. The SuiteCloud tab displays.
In the SuiteScript section, check the CLIENT SUITESCRIPT checkbox. The SuiteScript feature is enabled.
Upload and Deploy the Upload File SuiteScript
With the SuiteScript feature enabled, you can upload the required SuiteScript and deploy it in your environment.
Upload the SuiteScript
Save the SuiteScript and upload it to your NetSuite instance.
Copy the script below and save it as a JavaScript file (.js):
/**
* @NApiVersion 2.x
* @NScriptType Restlet
* @NModuleScope Public
*/

var file,
	log,
	query,
	record;

define( [ 'N/file', 'N/log', 'N/query', 'N/record' ], main );

function main( fileModule, logModule, queryModule, recordModule ) {
	file = fileModule;
	log = logModule;
	query = queryModule;
	record = recordModule;
    return {
        post: postProcess
    }
}

function postProcess( request ) {
	if ( ( typeof request.function == 'undefined' ) || ( request.function == '' ) ) {
		return { 'error': 'No function was specified.' }
	}
	switch ( request.function ) {
		case 'fileCreate':
			return fileCreate( request )
			break;
		case 'folderCreate':
			return folderCreate( request )
			break;
		default:
			var response = { 'error': 'Unsupported Function' }
			return response;
	}
}

function fileCreate( request ) {
	// Validate the request...
	if ( typeof request.name == 'undefined' ) {
		return { 'error': 'No name was specified.' }
	}
	if ( typeof request.fileType == 'undefined' ) {
		return { 'error': 'No fileType was specified.' }
	}
	if ( typeof request.contents == 'undefined' ) {
		return { 'error': 'No content was specified.' }
	}
	if ( typeof request.description == 'undefined' ) {
		return { 'error': 'No description was specified.' }
	}
	if ( typeof request.encoding == 'undefined' ) {
		return { 'error': 'No encoding was specified.' }
	}
	if ( typeof request.folderID == 'undefined' ) {
		return { 'error': 'No folderID was specified.' }
	}
	if ( typeof request.isOnline == 'undefined' ) {
		return { 'error': 'No isOnline was specified.' }
	}

	// Load the file.
	try {
		var fileObj = file.create(
			{
				name: request.name,
				fileType: request.fileType,
				contents: request.contents,
				description: request.description,
				encoding: request.encoding,
				folder: request.folderID,
				isOnline: request.isOnline
    		}
		);

		// Save the file and get its ID.
		var fileID = fileObj.save();

		// Load the file.
		fileObj = file.load( { id: fileID } );

		// Create the response.
		var response = {};
		response['info'] = fileObj;
		response['content'] = fileObj.getContents();
		return response;
	} catch (e) {
		return { 'error': e }
	}
}

function folderCreate( request ) {
	// If no folder name was specified...
	if ( typeof request.name == 'undefined' ) {
		return { 'error': 'No name was specified.' }
	}

	// Create the folder record.
	var objRecord = record.create(
		{
			type: record.Type.FOLDER,
			isDynamic: true
		}
	);

	// Set the folder name.
	objRecord.setValue( { fieldId: 'name', value: request.name } );

	// If this is a subfolder...
	if ( typeof request.parent !== 'undefined' ) {
		objRecord.setValue( { fieldId: 'parent', value: request.parent } );
	}

	// Save the record.
	var folderId = objRecord.save();

	// Get the record.
	result = record.load( { type: record.Type.FOLDER, id: folderId, isDynamic: false } );
	return result;
}
In NetSuite, navigate to Documents > File > SuiteScripts. The Folder Contents screen displays.
In the sidenav, select SuiteScripts. The Folder Contents | SuiteScripts screen displays.
Select the Add File button and select the script JavaScript file you saved in step #1. The JavaScript file is added to your SuiteScripts folder.
Deploy the SuiteScript
With the SuiteScript successfully uploaded, you can deploy it to your environment.
In NetSuite, navigate to Customization > Scripting > Scripts > New. The Upload Script File screen displays.
In the SCRIPT FILE dropdown, locate and select the SuiteScript file, then select Create Script Record. The Script screen displays.
Enter a descriptive Name for the script, then select Save.
Select Deploy Script. The Script Deployment screen displays.
In the STATUS dropdown, select Released.
On the Audience tab, include the appropriate Roles and Employees.
When finished, select Save. The script is successfully deployed.
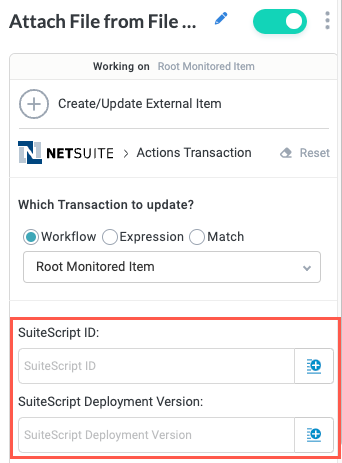
Copy the script ID and deployment version from the URL value. The deployment version is preceded by
deploy=in the URL. Save these values in a separate file to use in the Upload File to File Cabinet action in Tonkean: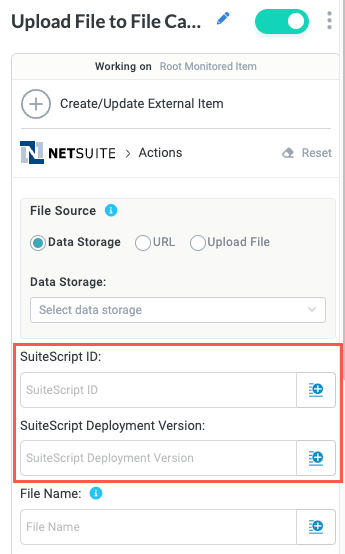
Configure the Attach File from File Cabinet Action
To enable the Attach File from File Cabinet action in Tonkean, you must enable the SuiteScript feature and add a script in your NetSuite instance
Enable the SuiteScript Feature in NetSuite
Before adding the required SuiteScript, ensure the SuiteScript feature is enabled in your NetSuite instance.
In NetSuite, navigate to Setup > Company > Enable Features. The Enable Features screen displays.
Select the SuiteCloud tab. The SuiteCloud tab displays.
In the SuiteScript section, check the CLIENT SUITESCRIPT checkbox. The SuiteScript feature is enabled.
Upload and Deploy the Attach File SuiteScript
With the SuiteScript feature enabled, you can upload the required SuiteScript and deploy it in your environment.
Upload the SuiteScript
Save the SuiteScript and upload it to your NetSuite instance.
Copy the script below and save it as a JavaScript file (.js):
/**
* @NApiVersion 2.x
* @NScriptType Restlet
* @NModuleScope Public
*/

var file,
	log,
	query,
	record;

define( [ 'N/file', 'N/log', 'N/query', 'N/record'], main );

function main( fileModule, logModule, queryModule, recordModule ) {
	file = fileModule;
	log = logModule;
	query = queryModule;
	record = recordModule;
    return {
        post: attachRecord
    }
}

function attachRecord(request)
{

	var response = record.attach({
	    record: {
	        type: 'file',
	        id: request.fileID
	    },
	    to: {
	        type: request.recordType,
	        id: request.recordID
	    }
	});

	return response;
}
In NetSuite, navigate to Documents > File > SuiteScripts. The Folder Contents screen displays.
In the sidenav, select SuiteScripts. The Folder Contents | SuiteScripts screen displays.
Select the Add File button and select the script JavaScript file you saved in step #1. The JavaScript file is added to your SuiteScripts folder.
Deploy the SuiteScript
With the SuiteScript successfully uploaded, you can deploy it to your environment.
In NetSuite, navigate to Customization > Scripting > Scripts > New. The Upload Script File screen displays.
In the SCRIPT FILE dropdown, locate and select the SuiteScript file, then select Create Script Record. The Script screen displays.
Enter a descriptive Name for the script, then select Save.
Select Deploy Script. The Script Deployment screen displays.
In the STATUS dropdown, select Released.
On the Audience tab, include the appropriate Roles and Employees.
When finished, select Save. The script is successfully deployed.
Copy the script ID and deployment version from the URL value. The deployment version is preceded by
deploy=in the URL. Save these values in a separate file to use in the Attach File from File Cabinet action in Tonkean: