Okta
Okta is an identity and access management service for cloud-based SaaS applications. Many IT teams rely on Okta to help manage permissions, onboarding and offboarding of employees, and other important security practices.
Authenticate with Okta
To use Okta in Tonkean, you must first connect it as a data source:
Select the main nav icon,
 , in the upper left and select Enterprise Components. The Enterprise Components screen displays.
Select + New Data Source in the upper right.
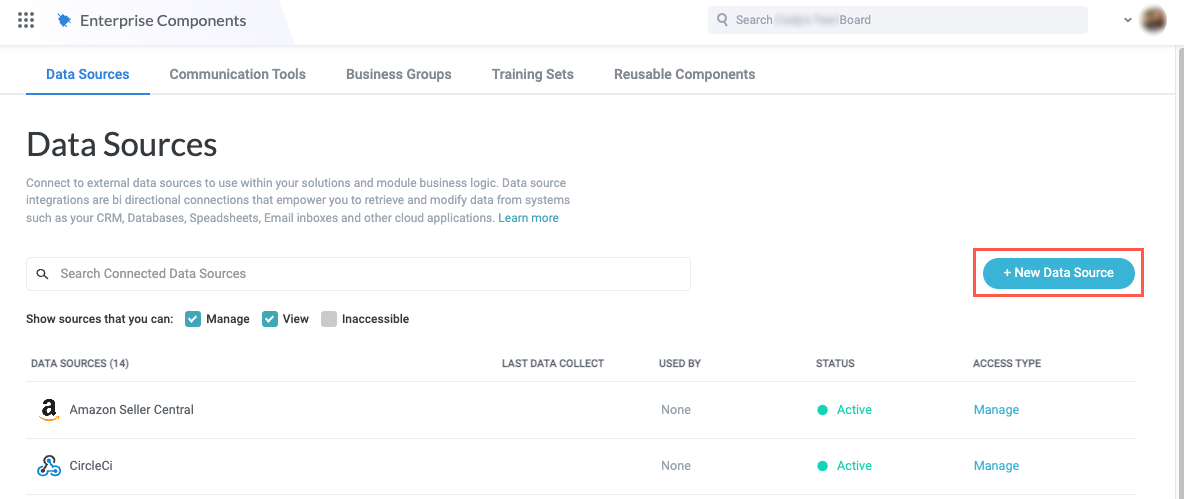
Select Cloud Application. The Add New Data Source window displays.

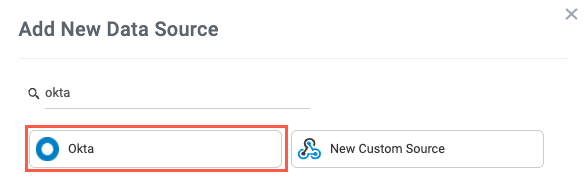
Enter "Okta" in the search field, then select Okta. The New Okta Connection window displays.
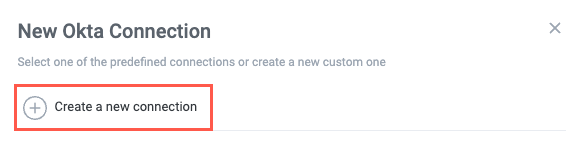
Select Create a new connection. The Set Up Data Source window displays.
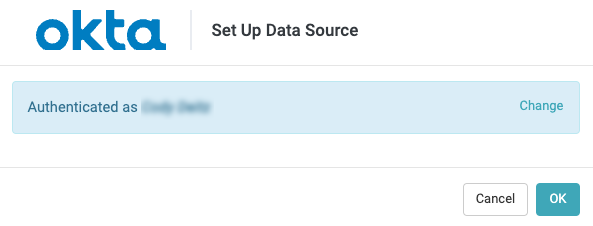
In the URL field, enter the subdomain of your Okta environment (for example, https://dev-071389.okta.com/).

Generate an API token in Okta:
Navigate and log in to your Okta account.
In the sidenav, navigate to Security > API. The API screen displays.
Select the Tokens tab.
Select Create Token. The Create Token window displays.
Enter a unique name for the token (for example "tonkean-okta"), then select Create Token. The newly-created token displays. Select the copy-to-clipboard button to copy the token. Then, save it for later use in a separate document.
This is the last time you'll be able to view the decrypted token, so make sure you save it somewhere safe in case you need to reference it later.
Return to Tonkean. In the API Key field, paste in the API token. When finished, select OK.
If authentication is successful, a success message displays. Select OK to close the window.
Okta Permissions
When you connect an Okta account to Tonkean, it's important to note that all of the permissions in Okta (that is, create, edit, read-only) are mirrored in Tonkean. A user is able to create or update in Tonkean anything they are able to create or update in Okta.
Considering these equivalent permissions, make sure that the account you connect has the authority to perform all the actions your process requires in Tonkean while also being careful not to give Tonkean more access to Okta than is necessary.
Monitor Okta as an Intake Source
Like most data sources, you can use Okta as the module intake source:
After creating a new module, select the item tile. The Item Details panel displays.
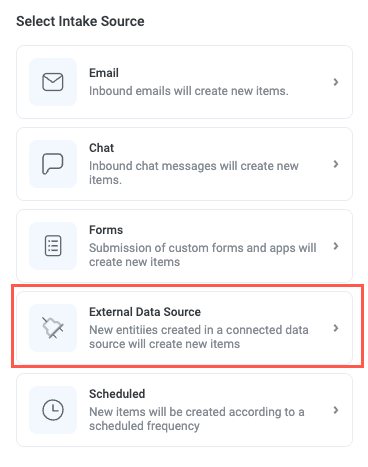
In the Select Intake Source section, select External Data Source. The Select Data Source section displays.
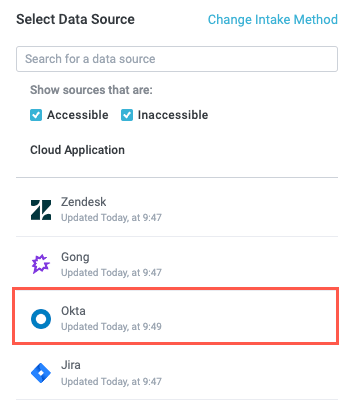
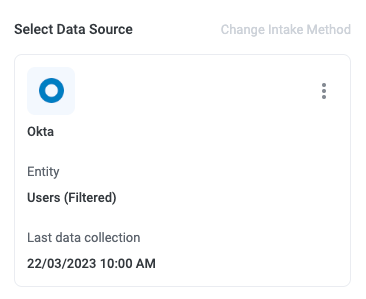
Select the Okta data source you want to connect as the intake source. The connection configuration screen displays.
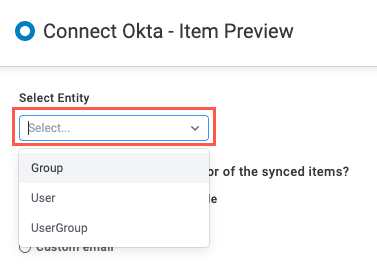
Select the entity you want to collect, where relevant.
Okta entities include all available objects in Okta (that is, Group, User, and UserGroup).
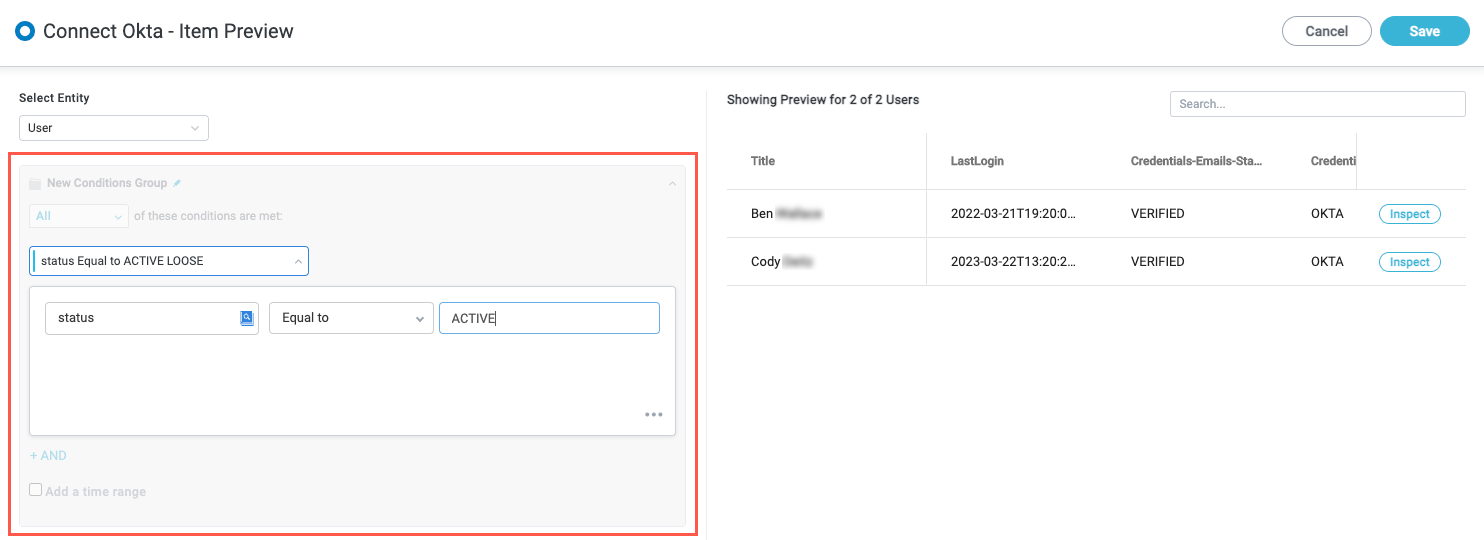
By default, Tonkean collects all entities of the selected type. If you want to filter the entities the module monitors, configure the conditions for the conditions group.
When setting up a new intake source, we recommend always adding a custom filter instead of monitoring all entities of the selected type. This ensures there's a smaller amount of data to monitor and respond to. For example, you might configure the module to monitor only Users whose status is ACTIVE in Okta.
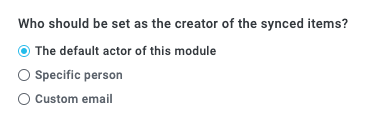
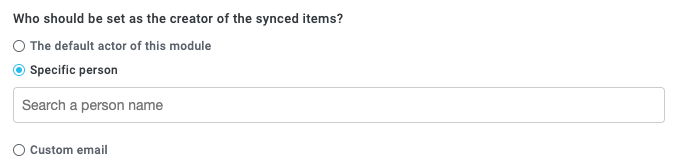
Select who to set as the creator of the items synced from the data source:
The default actor of this module - The module actor, configured in the module settings. For more information about configuring the module actor, see Configure Module Settings.
Specific person - Select a specific user from your board.
Custom email - Enter a custom email. Enter the email address manually or dynamically create the address by selecting the insert field button,
 , and using existing fields from your module.
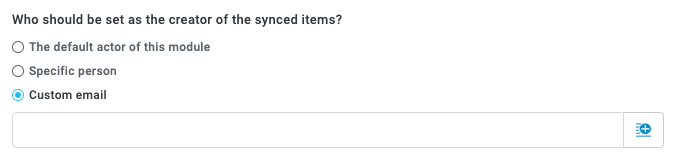
When finished, select Save in the upper right.
Your module is monitoring Okta as an intake source and displays in the Item Details panel.
Use Okta as an Action
In addition to monitoring an Okta instance, you can use actions to update and create new records in Okta based on triggers you create. To add an Okta action block, perform the following steps:
On the module builder screen, add an action by selecting the plus icon,
 , to the right of the Do arrow in your work flow. A new action block is created and the Action Block panel displays.
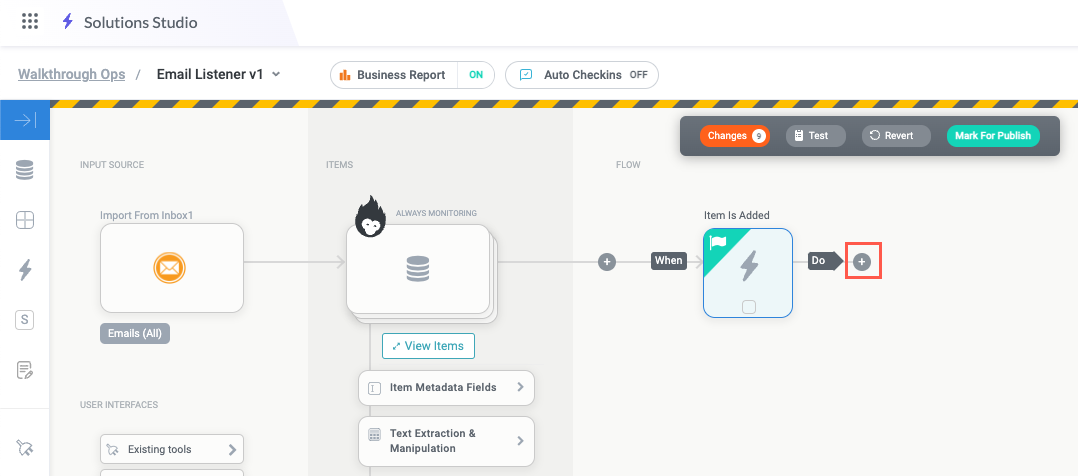
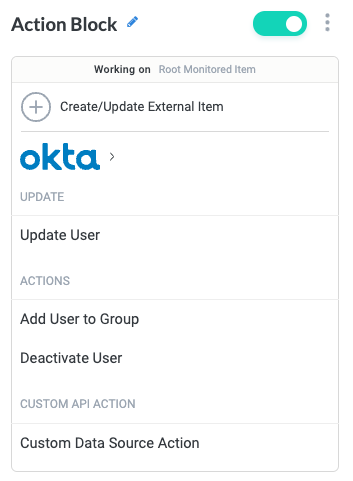
Scroll down to the Data Actions section and select the Okta action. The Okta action panel displays.
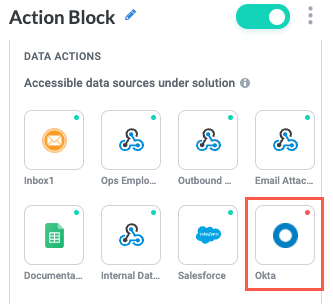
Configure the fields to perform any action relevant to your workflow.
You're leveraging Okta as an integrated part of your module workflow.