MySQL
MySQL is an open-source database management system popular with many enterprises. It is especially helpful to organizations whose databases scale up to large data volumes but that still value cost-effectiveness and speed.
You can connect a MySQL database to your Tonkean instance as a data source and create custom actions to interact with that database in your solutions.
To successfully connect your SQL database, Tonkean must be able to access your database server. There are several options to ensure access: (1) Your database server is publicly available, (2) Your network administrator provides access to the database server by whitelisting Tonkean servers, or (3) Your network administrator provides access to the database server using a reverse IP proxy installed on your network—see this guide for running a reverse proxy.
Authenticate with MySQL
To use MySQL in Tonkean, you must first connect it as a data source:
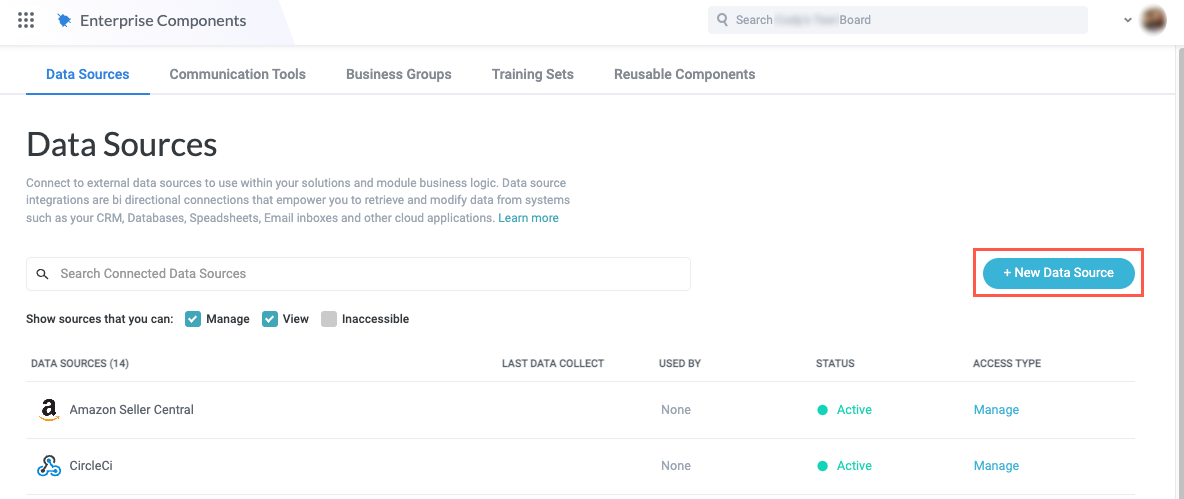
Select the main nav icon,
 , in the upper left and select Enterprise Components. The Enterprise Components screen displays.
Select + New Data Source in the upper right.
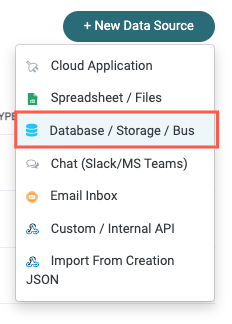
Select Database / Storage / Bus. The Add New Data Source window displays.
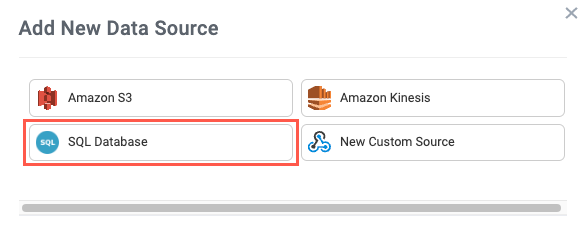
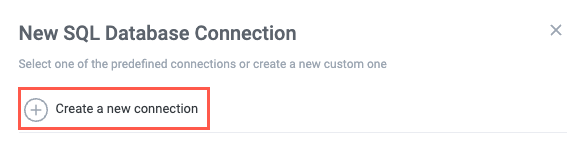
Select SQL Database. The New SQL Database Connection window displays.
Select Create a new connection. The Set Up Data Source window displays.
Select the Database Type dropdown and confirm MySQL is selected.
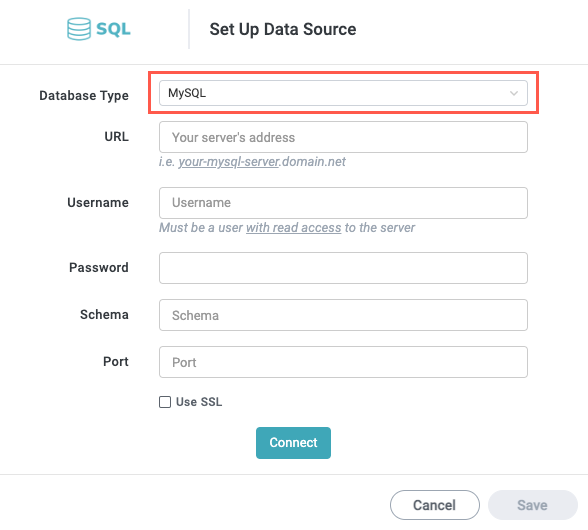
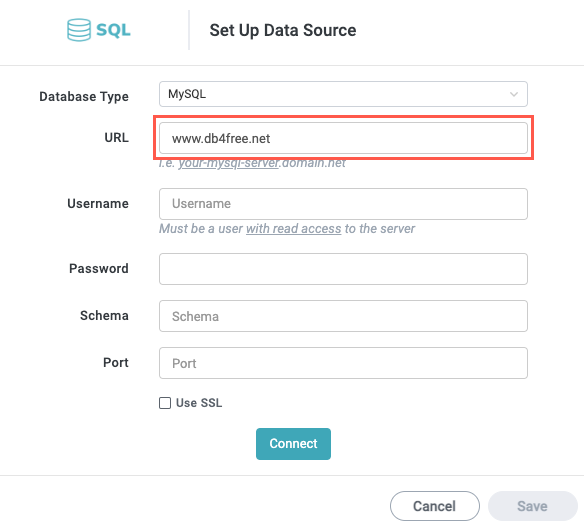
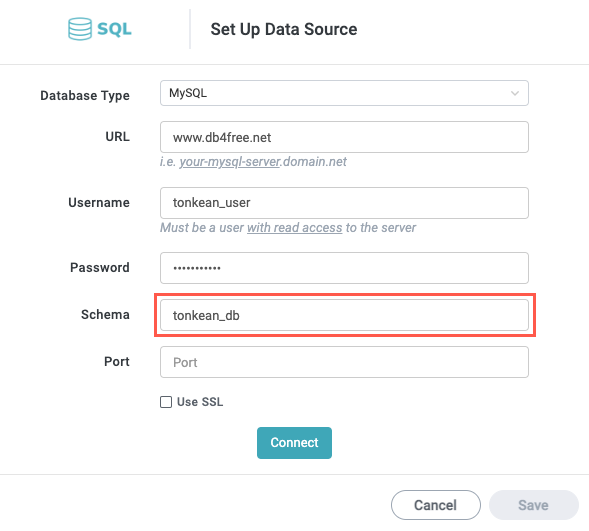
Enter the URL for your database server. In the example below, we're using an open-source database provider.
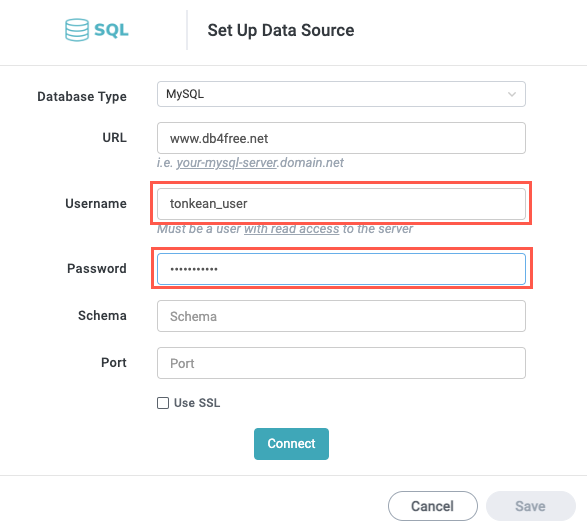
Enter your Username and Password for the server.
The user must have read access to the server.
Enter the Schema for your database.
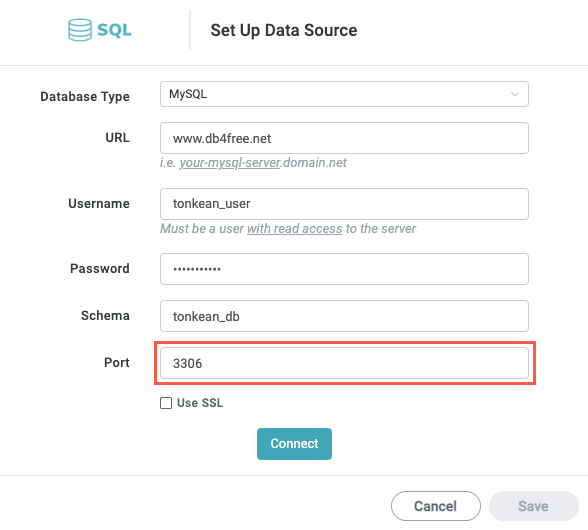
Enter the Port number for your database.
MySQL uses port number 3306 by default.
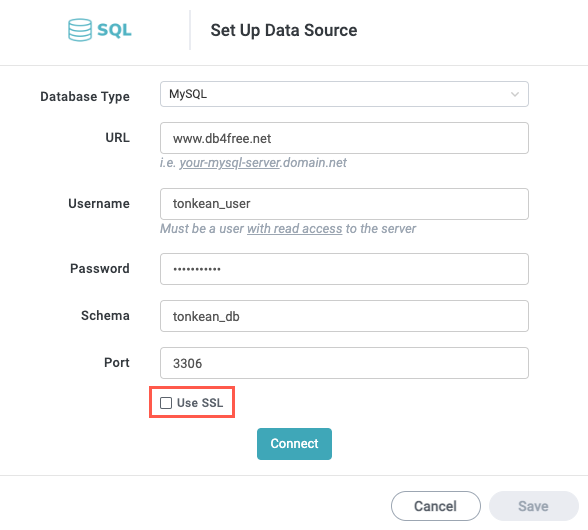
If you want to use SSL, select the Use SSL checkbox.
When finished, select Connect. After processing, a success message displays at the top of the window, Authenticated as {server name}, and the Query Entity section displays.
Configure Query Entities
Tonkean creates entities from the SQL queries you define. These queries can return an entire database, a table, or even a set of related tables. As you add query entities, consider the actions you want to perform with these entities. In some cases, there may be value to creating separate entities, where relevant.
To add a query entity, follow the steps below:
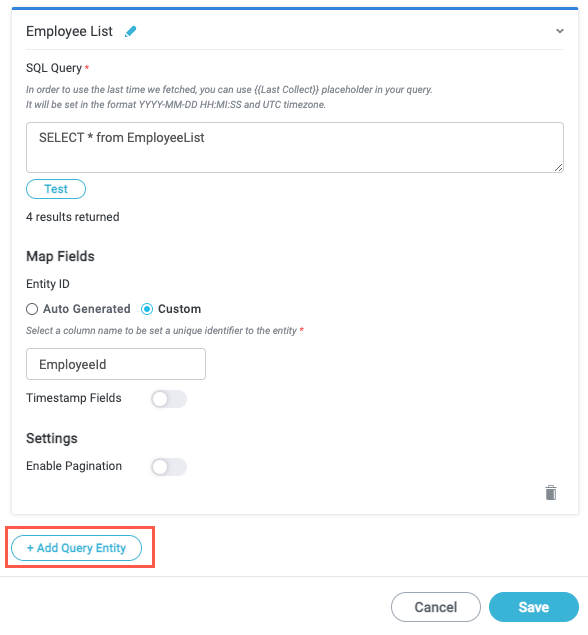
Select the edit icon,
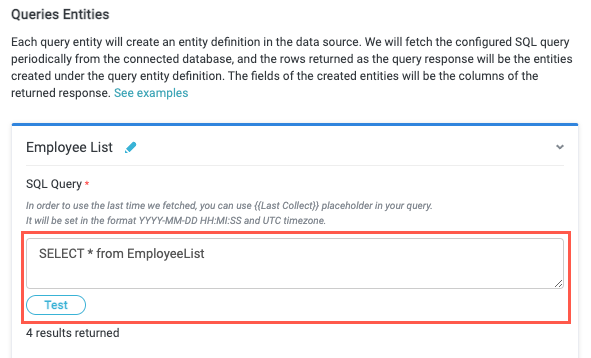
 , to replace the default query entity name, creating a unique name that's clear to your process contributors. For example, you might name the query entity "Employee List Table" for a table of employee data in your database.
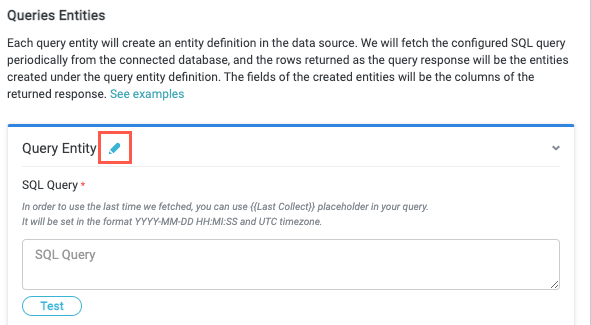
In the SQL Query field, enter the query that returns the database object you want Tonkean to collect and monitor, then select Test. The number of returns results displays beneath the Test button.
You can also use the SQL Query field as a prompt to run commands. Enter a command and select Test to run the command.
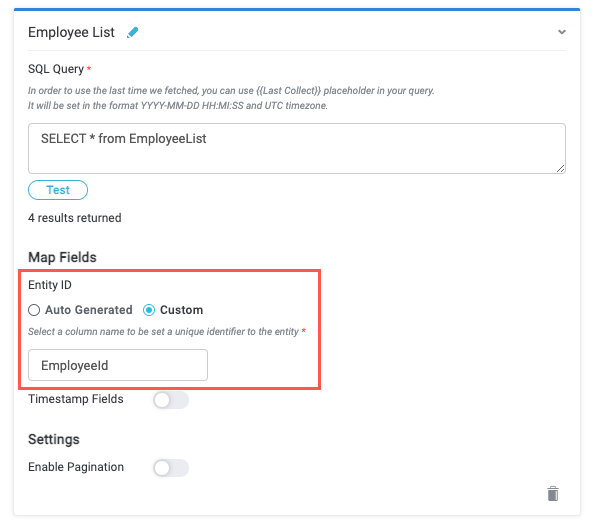
In the Entity ID field, choose which value Tonkean uses as the unique identifier for data source record:
Auto Generated - Tonkean generates a value for each data source record (for example, each row in a table).
Custom - Select a value to act as the unique identifer. IDs and email addresses are common choices, where relevant.
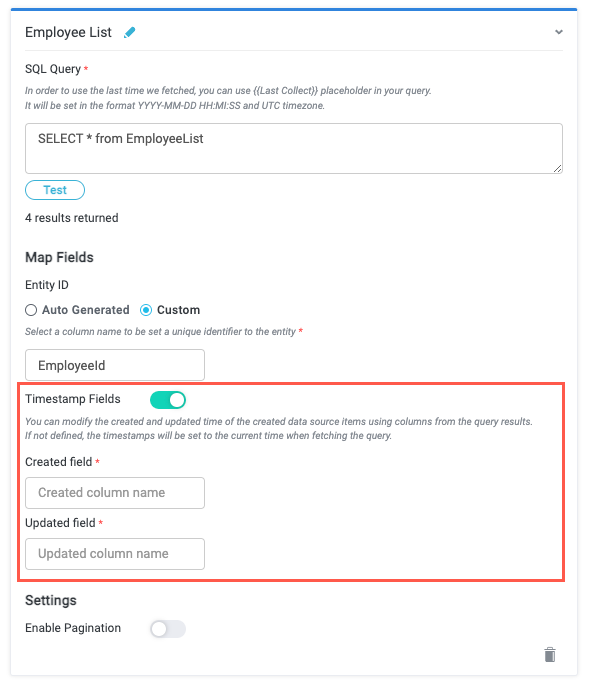
If your database object contains fields that capture when the record is created and updated, you can map those fields. Turn on the Timestamp Fields toggle and enter the relevant field label in Created field and Updated field. By default, this toggle is off and Tonkean adds timestamps of the current time when fetching the query results.
Turn on the Enable Pagination toggle to incorporate pagination in the query results, then enter the Amount of pages and Page size.
You must include
{{Offset}}and{{Limit}}placeholder values in your query to leverage pagination.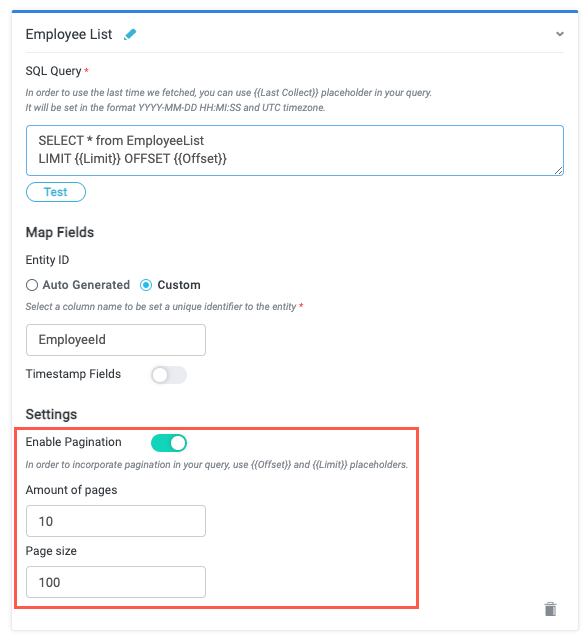
To add another query entity, select + Add Query Entity. A new Query Entity section displays.
Repeat steps #1-5 for each query entity you want to add to your MySQL data source.
When finished adding query entities, select Save. The Set Up Data Source window closes and the data source configuration panel displays.
Create a SQL Custom Action
Like most native data sources, you can create custom actions for MySQL data sources. However, unlike creating custom actions for native cloud applications, custom actions for SQL databases don't use a REST API and therefore follow a simpler process.
Custom actions that call SQL databases are simply SQL commands you can create and then leverage in your module workflow, enabling you to create, update, or delete records in your connected database entity.
To create a SQL custom action, follow the steps below:
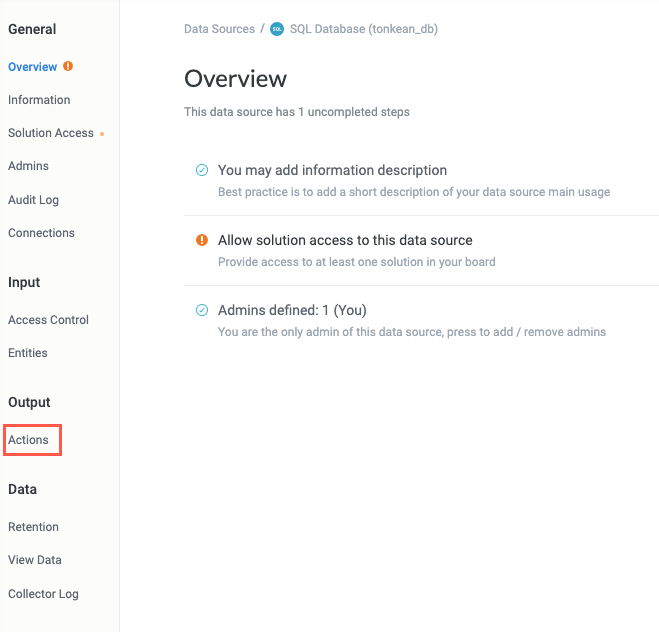
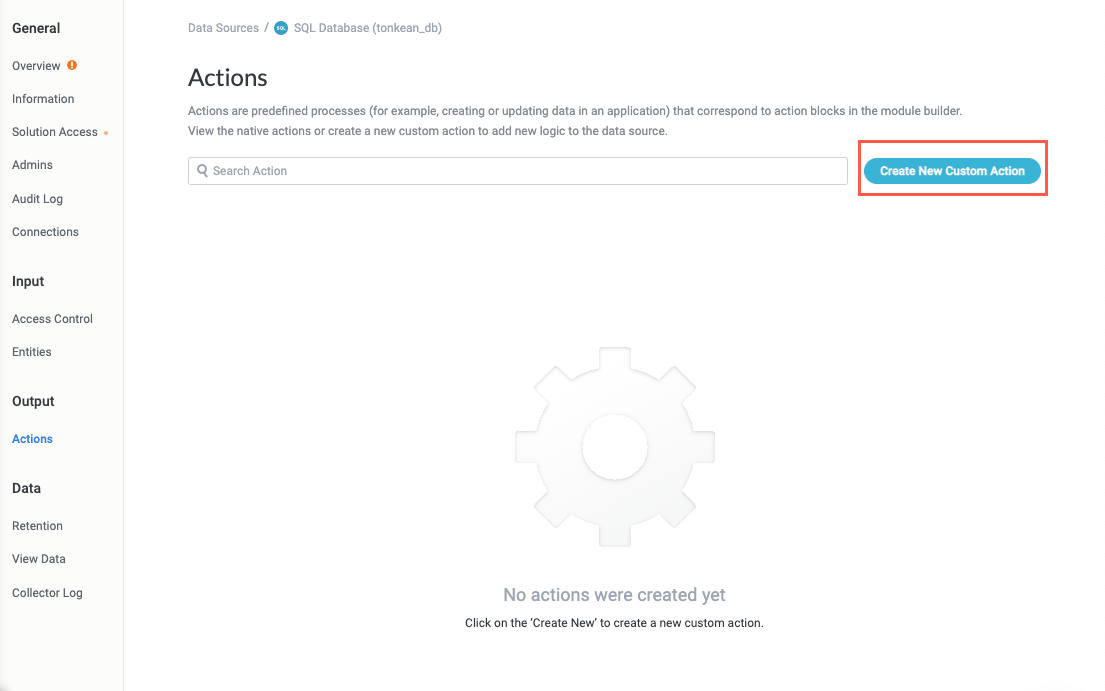
On the SQL Database Overview screen, select Actions in the data source configuration panel. The Actions screen displays.
Select Create New Custom Action in the upper right. The New SQL Custom Action window displays.
Select the edit icon,
, and replace the default custom action name, creating a unique name for your custom action.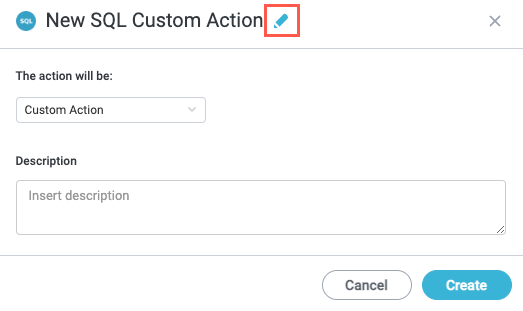
If desired, enter a Description for your custom action. Descriptions provide helpful context to process contributors.

When finished, select Create. The window closes and the Custom Action | General screen displays.
Configure the SQL Request
You must configure the SQL query that forms the request Tonkean sends to the database server.
In the Settings panel, select Request. The Request screen displays.

Add a param for each variable you need to populate in the request. To add a param, locate the Action Params section and enter a param name in the provided field.
When fished, select + Add Param. The param is added to the list above the field.
Alternatively, you can include a param field in your query wrapped in double curly braces to create a param for it. For example,
{{City}}.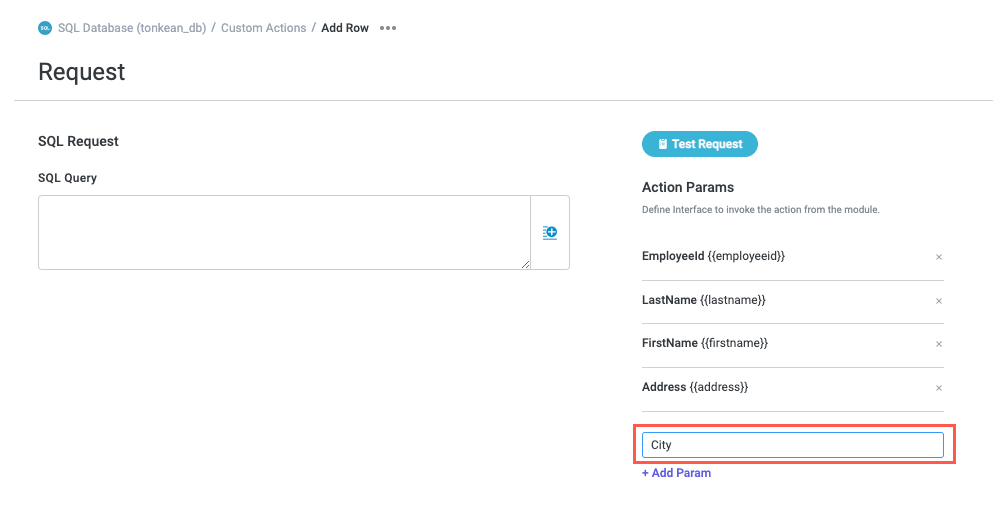
Enter the SQL Query.
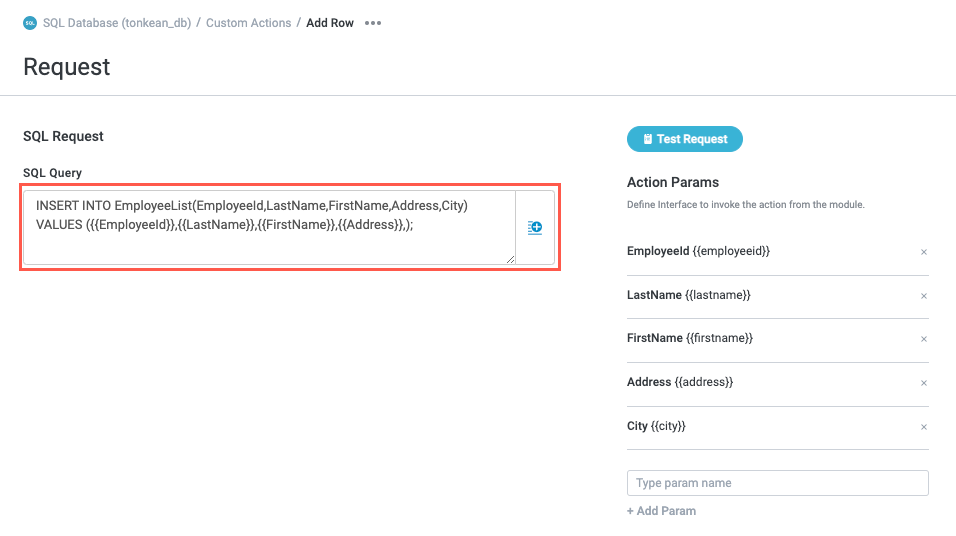
Select the insert field button,
 , to insert your params in the appropriate places.
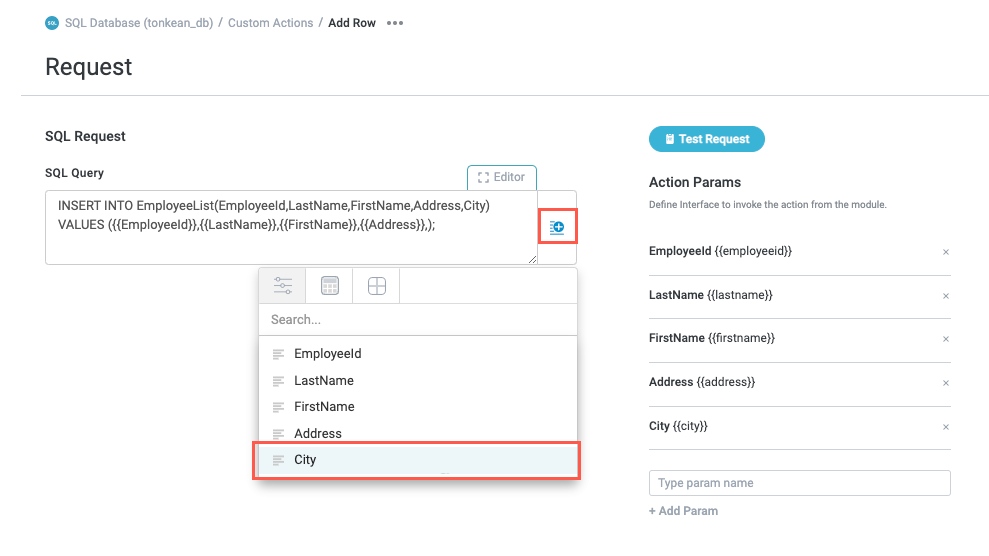
When finished, select Save Action Changes in the upper right.
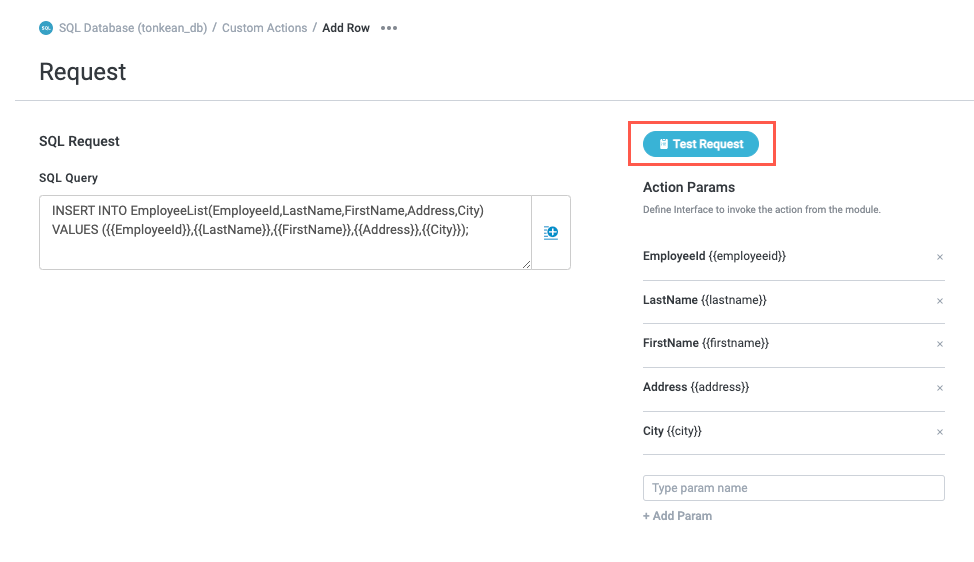
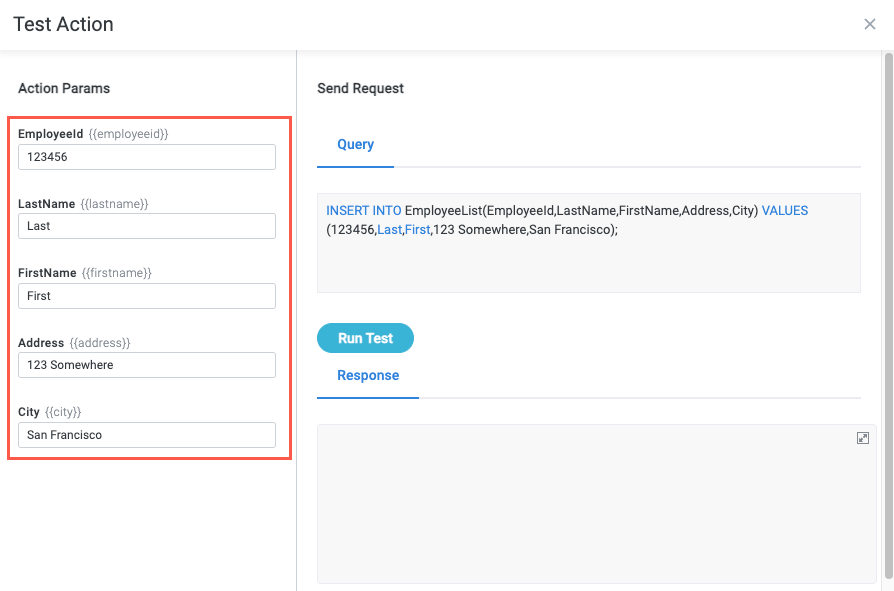
Test the Request
After you have configured the request, you can test it to make sure it's working as expected.
Select Test Request. The Test Action window displays.
In the Action Params section, enter valid values for each of the params you included in the request.
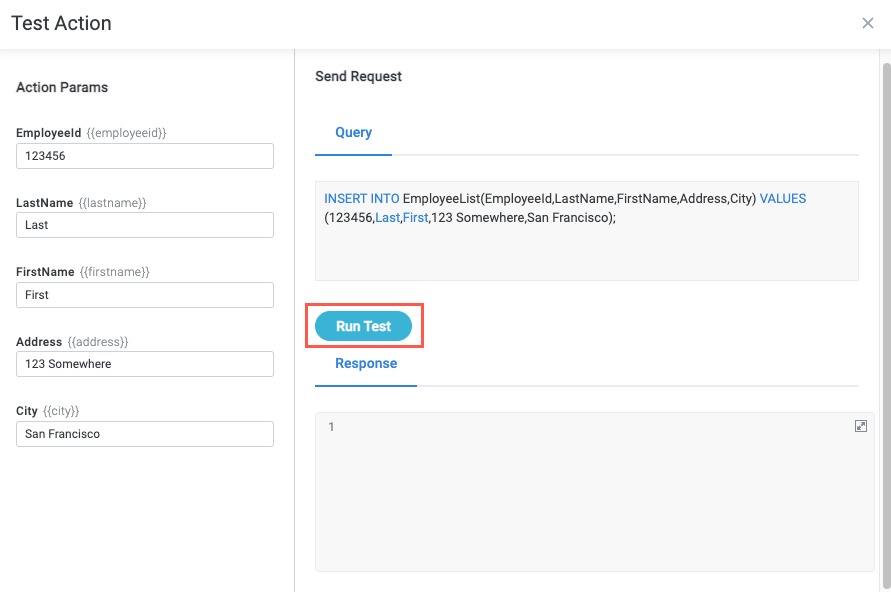
Select Run Test. The request runs with the param values you provided and the Response tab displays a count of the records added or updated.
If you don't receive the expected response, or your test request fails, close the Test Action window and return to the Request screen to troubleshoot the problem.
When finished, close the Test Action window.
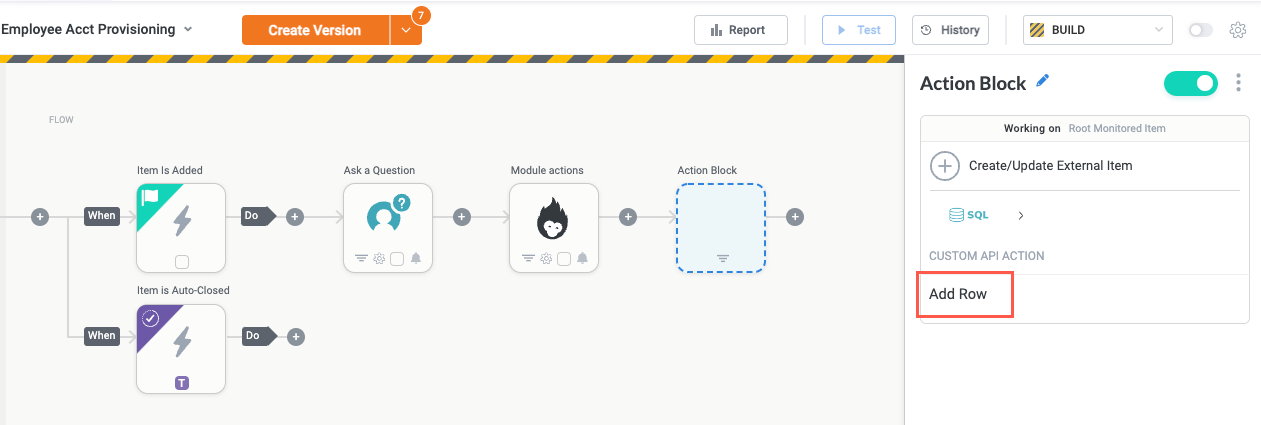
Your custom action is now ready for use in your module workflow. To leverage your custom action and the fields it extracts, add the relevant data source action block in your module and select the custom action from the Custom API Action section.